How is the test done and how to read the charts
Instead of adding a lot of explanation to each battery test/review I have made this explanation of how the test is done and how to read the charts.
Equipment
I have done two battery tests before, for these I was using the CBA to measure capacity and for the first a WF139 charger and the second a hobby charger (iCharger 208B). This time I wanted to improve the precision and reduce the workload when doing the test, i.e. I wanted something that could do everything automatic. For this it is possible to buy specialized battery testers, but I did not want that kind of expensive and specialized equipment.
For charging I decided to use a ordinary bench power supply that can be computer controlled. With computer control I can adjust both voltage and current. To turn of charging at a specific current, the computer monitors the charge current and turns the power supply off when the current drops below the threshold.
Doing some test with this method I get very good repeatability, the final charged battery voltage does not vary with more than 1 to 2 mV between discharge/charge cycles.
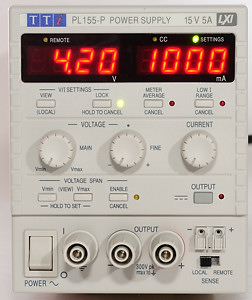
When turned off the power supply has a small leak current (5mA), to avoid this I added a relay box between the power supply and the battery. This is based on a Velleman K8090 that has some very solid relays and is easy to control from my own software.
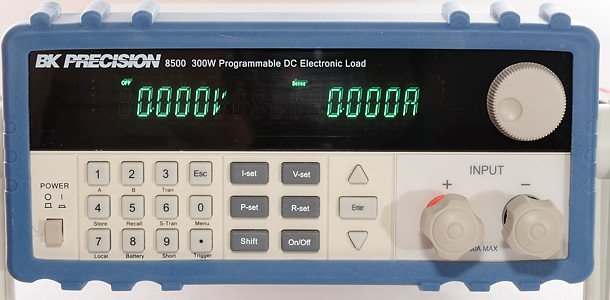
To discharge the batteries I decided to use a electronic load, again with computer control. This can be programmed to draw any current from mA up to 30A, it can also do power, resistance and voltage. To get the capacity I need to sum current over time, with a computer connected this is easily done.
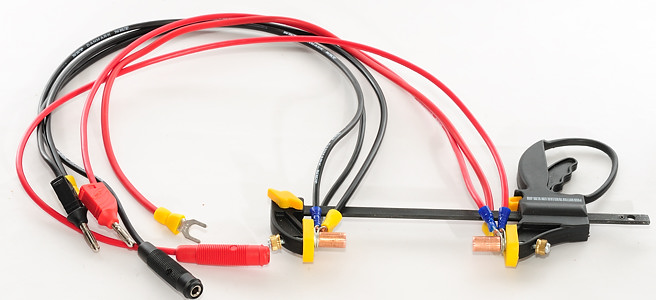
To get best possible precision I want a very good connection to the battery and also separate wires for measuring voltage, i.e. the voltage is measured at the battery, not at the load or the power supply. This way I can get rid of any voltage drop in wires and connections. Before I have used a clamp for battery connection and this has worked well. I have connected 3 set of wires to the clamp: Load, power supply and measurement wires. The connection to the battery is a piece of copper.
The actual voltage drop from the battery to the measurement points is below 0.01 volt, even at 5 ampere load.
In addition to this equipment I am using a computer for control and recording. On this computer is running a program (I have written) to control both power supply and load. This program will automatic do all the tests and save logfiles of everything. I.e. I just put in a battery and pushes start, 3 days later the test is finished and I can make the charts.
With this equipment I can easily adjust it to different battery sizes and types, this is just a question about changing some parameters in a script. I will do individual reviews of the batteries, this also makes it possible to test any battery and publish a review of it.

When doing low current tests (Below 0.1A) the precision of the electronic load is not that good and I switch to a SMU that can handle current down to uA with very high precision. This device can both charge and discharge batteries, but is limited to a maximum current of 1A.
2016 Upgrade
See here for improvements made to the test stations
Charging LiIon
For charging I decided to use a typical hobby charger setting, I am charging with 1 ampere, until 4.2 volt, then I keep the voltage constant and stops charging when the current has fallen to 1/10, i.e. 0.1 ampere. This will not get the most energy from a specific cell (but will be close), typically I need a lower termination current for that and it will vary between different batteries.
-Charge.png)
Here is the charge curve for battery, show in the same style as in my charger reviews. This battery could be charged in 210 minutes with a 1A CC/CV charger.
The charge curve I show is after the 1A discharge when testing batteries around 18650 size.
-Charge-zoom-a.png)
In this chart I have expanded the voltage scale and marked the different sections of the charge. First is the constant current charge (CC) and when 4.2 volt is reached the curve goes into the constant voltage (CV) portion of the charge.
When the charge current is turned off, there is a voltage drop, this is the reason that a CC/CV charger cannot charge a battery to 4.2 volt, but always will be a little bit below.
After the charge I let the battery rest for 1 hour, where the voltage again will drop a bit, before I start a discharge test.
It can also be seen on the graph that my power supply is slightly below 4.2 volt, it is 4.196 volt.
I have done some testing of capacity with different charge voltage and terminations currents.
Charging NiMH
I uses a fast charging algorithm when charging NiMH batteries, this means that I charge with a high current (in my case 1A) and stops when the voltage starts to drop, this is called -dv (I could also have stopped when the temperature raises).
-Charge.png)
Above is a typical charge curve. Because I am starting to charge immediately after the discharge, the battery will be warm from that, as can be seen at the start of the charge curve.
A smart charger might have more than one termination method, i.e. it can check for both -dv, temperature raise and maximum voltage.
The voltage and temperature peak will depend on a lot of factors, like battery age, battery brand, charge current and ambient temperature.
An alternate way to charge NiMH is with a slow charger, it will charge with 0.1C (i.e. 200mA for a 2000mAh battery) for 12 to 14 hours and then stop without checking anything.
Some chargers does a combination, where they do a fast charge followed by one or two hours of slow charge.
Pictures
A review requires some pictures to show what it is about.
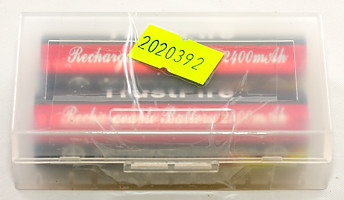

I include pictures that shows how the battery was wrapped during shipping. Some uses a small box for the cell, other does just wrap a piece of paper around it. The best packing protects the battery against shorts and against bumps. Shrink wrap or a plastic box sealed with sticky tape gives a good protection against shorts.
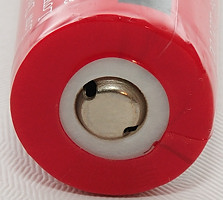

The cells top and bottom. On the top photo it can be seen if uses a small or large button top.

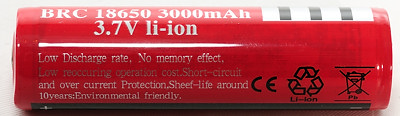
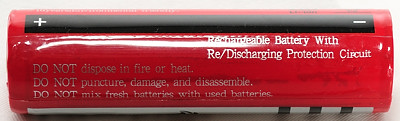
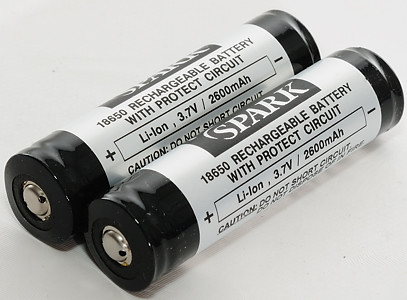
Two or tree photos showing all the text on the battery.
Official specifications
This list of specifications are from the manufacturer of the battery, often taken from the website that is selling the battery.
If there is any mistake in the specifications I copy from I will usual include these mistakes in my list.
Information box
-info.png)
Each test starts with the information box. It contains the battery name. If I can find any information about what cell is used in the battery I will also include that. Some battery names are used by more than one manufacturer (one example is UltraFire), with these it can be very important where I got the battery from.
The weight of the battery is supposed to be the same for all cells, if there are large variations in the weight I will include both weights, this is usual a very bad sign, because that means that the two batteries does not contain the same type of cell.
Because these cell has a added circuit at the bottom and sometimes an extra button top, the length will vary and not all cells will fit in all equipment (In my reviews I usual check this). The diameter does also vary slightly, this can be due to the original cell, but also because the cell has an extra wrapper around it and a wire from the top to the circuit at the bottom. I measures both values with a digital caliper and uses the largest measurement in the box.
The plus pole on the battery exist in different styles, I uses SB for small diameter button, LB for large diameter button and flat when the plus pole is flush with the isolation.
At the bottom of a protection cells is a small circuit PCB, on most batteries one side of this PCB is used at the bottom, but on a few batteries a metal plate is added to improve the strength of the battery bottom.
If the battery has a rated maximum current I will include it. This is the highest current the manufacturer guaranties that the battery can handle.
The test condition will list the charger settings, this will nearly always be 4.2 volt with 0.1 ampere termination current, but some special cells are designed for slightly higher voltage and I might do a extra test at that charge voltage.
The lower part of the information box summaries all the results, for capacity and energy it will be the average from the two tested cells. The trip current will be the minimum current where I tripped the protection. During this test I also calculates the internal resistance in the battery.
Capacity measurement
-CapacityTimeHours.png)
When testing the battery I do discharges at different rates, from 0.2 ampere and up to 5 ampere for most 18650 batteries. In this chart it can be seen how long time a battery wil last at the different rates. The voltage scale can be used with my flashlight reviews where there is a voltage sweep that shows how much current the light uses at different voltages.
For quality batteries the curves for the two tested batteries will be close together or even on top of each other as they are here.
-CapacityTime.png)
For the high currents I have also included the time chart with a more expanded time scale.
None of the above curves are good to compare how the battery voltage changes with changing load, for this it is better to use a mAh or Ah scale.
-Capacity.png)
With this scale it is also possible to see the actual capacity of the cell at different load.
I uses Ah scale to get mAh move the comma 3 digits to the right, i.e. 3,00 Ah is 3000 mAh.
-PowerLoadTime.png)
I also do a capacity measurement with a constant power load, this is the same type of load as many flashlight uses. With a high voltage the current draw is low, but it will increase as the voltage drops.
Temperature for NiMH
With NiMH I have added a temperature sensor to the battery, i.e. I do also record temperature.
-Discharge-3.0.png)
-Discharge-5.0.png)
-Discharge-7.0.png)
-Discharge-10.0.png)
Looking at these curve, I do not believe that they add much information and in the review I only include the maximum temperature measured at each discharge current.
Maximum temperature raise at different discharge currents: 1A:+1,2°C, 2A:+3,3°C, 3A:+5,8°C, 5A:+11,3°C, 7A:+16,6°C, 10A:+22,1°C,
Due to the delay in the temperature measurement, they battery might raise a slightly higher temperature a few minutes after I stops the discharge, this is not included in the above value.
Energy measurement
-Energy.png)
Multiplying volt and ampere gives power, summing this up over time gives energy and this is often more useful than capacity measurements. Stabilized lights with buck or boost converters will often draw a fixed amount of power, making it possible to get a good estimate of runtime from the energy contents of the battery. When comparing batteries with different chemistries, energy is also the only way.
A light drawing 3 watt will use slightly below 1A, i.e. using the 1A curve says that the battery has 10.2 Wh down to 2.8 volt, this will give a runtime of 10.2/3 -> 3.4 hours.
If the light can only maintain full brightness down to 3.6 volt, the battery can deliver 5 Wh, this would give 5/3 -> 1.7 hours runtime, before the brightness starts to fade. When the brightness goes down, the power consumption will also go down and it is difficult to estimate how long the light will burn at reduced brightness.
PCB trip current
-TripCurrent.png)
In this test I increased the current, until the PCB protection trips. I do this test 5 times. The test takes less than a minute for a typical battery and there is 5 minutes rest between the 5 tries, this prevents that the cell gets hot. The curve shows the voltage to the last measurement before the protection tripped.
This overload protection will usual change with temperature, i.e. a battery that can deliver 5A in my test, might only do 4A continuous.
From this curve I can also calculate the internal resistance in the battery, that is the slope of the curve. I uses the last two ampere for this calculation, i.e. with the above curve it would be from 6.2 to 8.2 ampere. The voltages are 3.484 and 3.275 volt. The internal resistance is (3.484-3.275)/(8.2-6.2) -> 0.1045 ohm.
Most cells does also have a PTC protection, this protection is based on heat and will disable the battery if it gets to hot (due to high current), it will automatic reset again when the temperature drops. This protection is not supposed to be tested here and might activate at a lower current than I measure.
-TripCurrent.png)
In this curve I have overloaded the battery into the unsafe region. To make this safe the protection must trip at 3A or preferable even lower. Because the above cell is a unprotected cell, it is my responsibility to stay below this current!
Rating
I try to rate the tested batteries, this rating is not designed to reflect the specifications of a battery, i.e. a 3100 or 2200 mAh battery can both get a very good rating. The rating has more to do with the safety and manufacturing of the battery.
LiIon cells can explode under certain conditions, especially if the production quality is low (Remember all the laptop battery pack recalls a few years ago). I cannot check the production quality, but must trust the manufactures, the rating is based on this with minus points for problems I have found during the test.
Very good
The cell used in the battery is from one of the big high quality LiIon battery manufactures: Panasonic, Sanyo, LG, Samsung, Sony and I did not find any real problem with it.
Good
The battery (Note: Battery not cell) is from a well-known manufacturer or it can be a one from above, that had some small problems.
Acceptable
Neither the battery or the cell is from a well-known manufacturer or it can be a one from above, that had some problems, but not anything serious.
Good for a cheap battery
The battery is a typical Chinese brand, usual with overstated capacity. It does show good result in the entire test.
Remember that there are increased safety risks with these batteries.
Acceptable for a cheap battery
The battery is a typical Chinese brand, usual with overstated capacity. The test result shows a useable battery.
Remember that there are increased safety risks with these batteries.
Bad
Something is serious wrong with this battery.
Notes
More about NiMH charging