Charger Opus BT-C3100 software V2
The charger is now delivered with version 2.1 software and I have made a new review
After my first review of this charger the software in this charger has been updated. This is a partial review of the updated charger, please read the original review first.
In this review I will focus on the problems I found in the first review and just do a fast general test.
This software will show "2.0" on the display for about 1 second when power is connected.
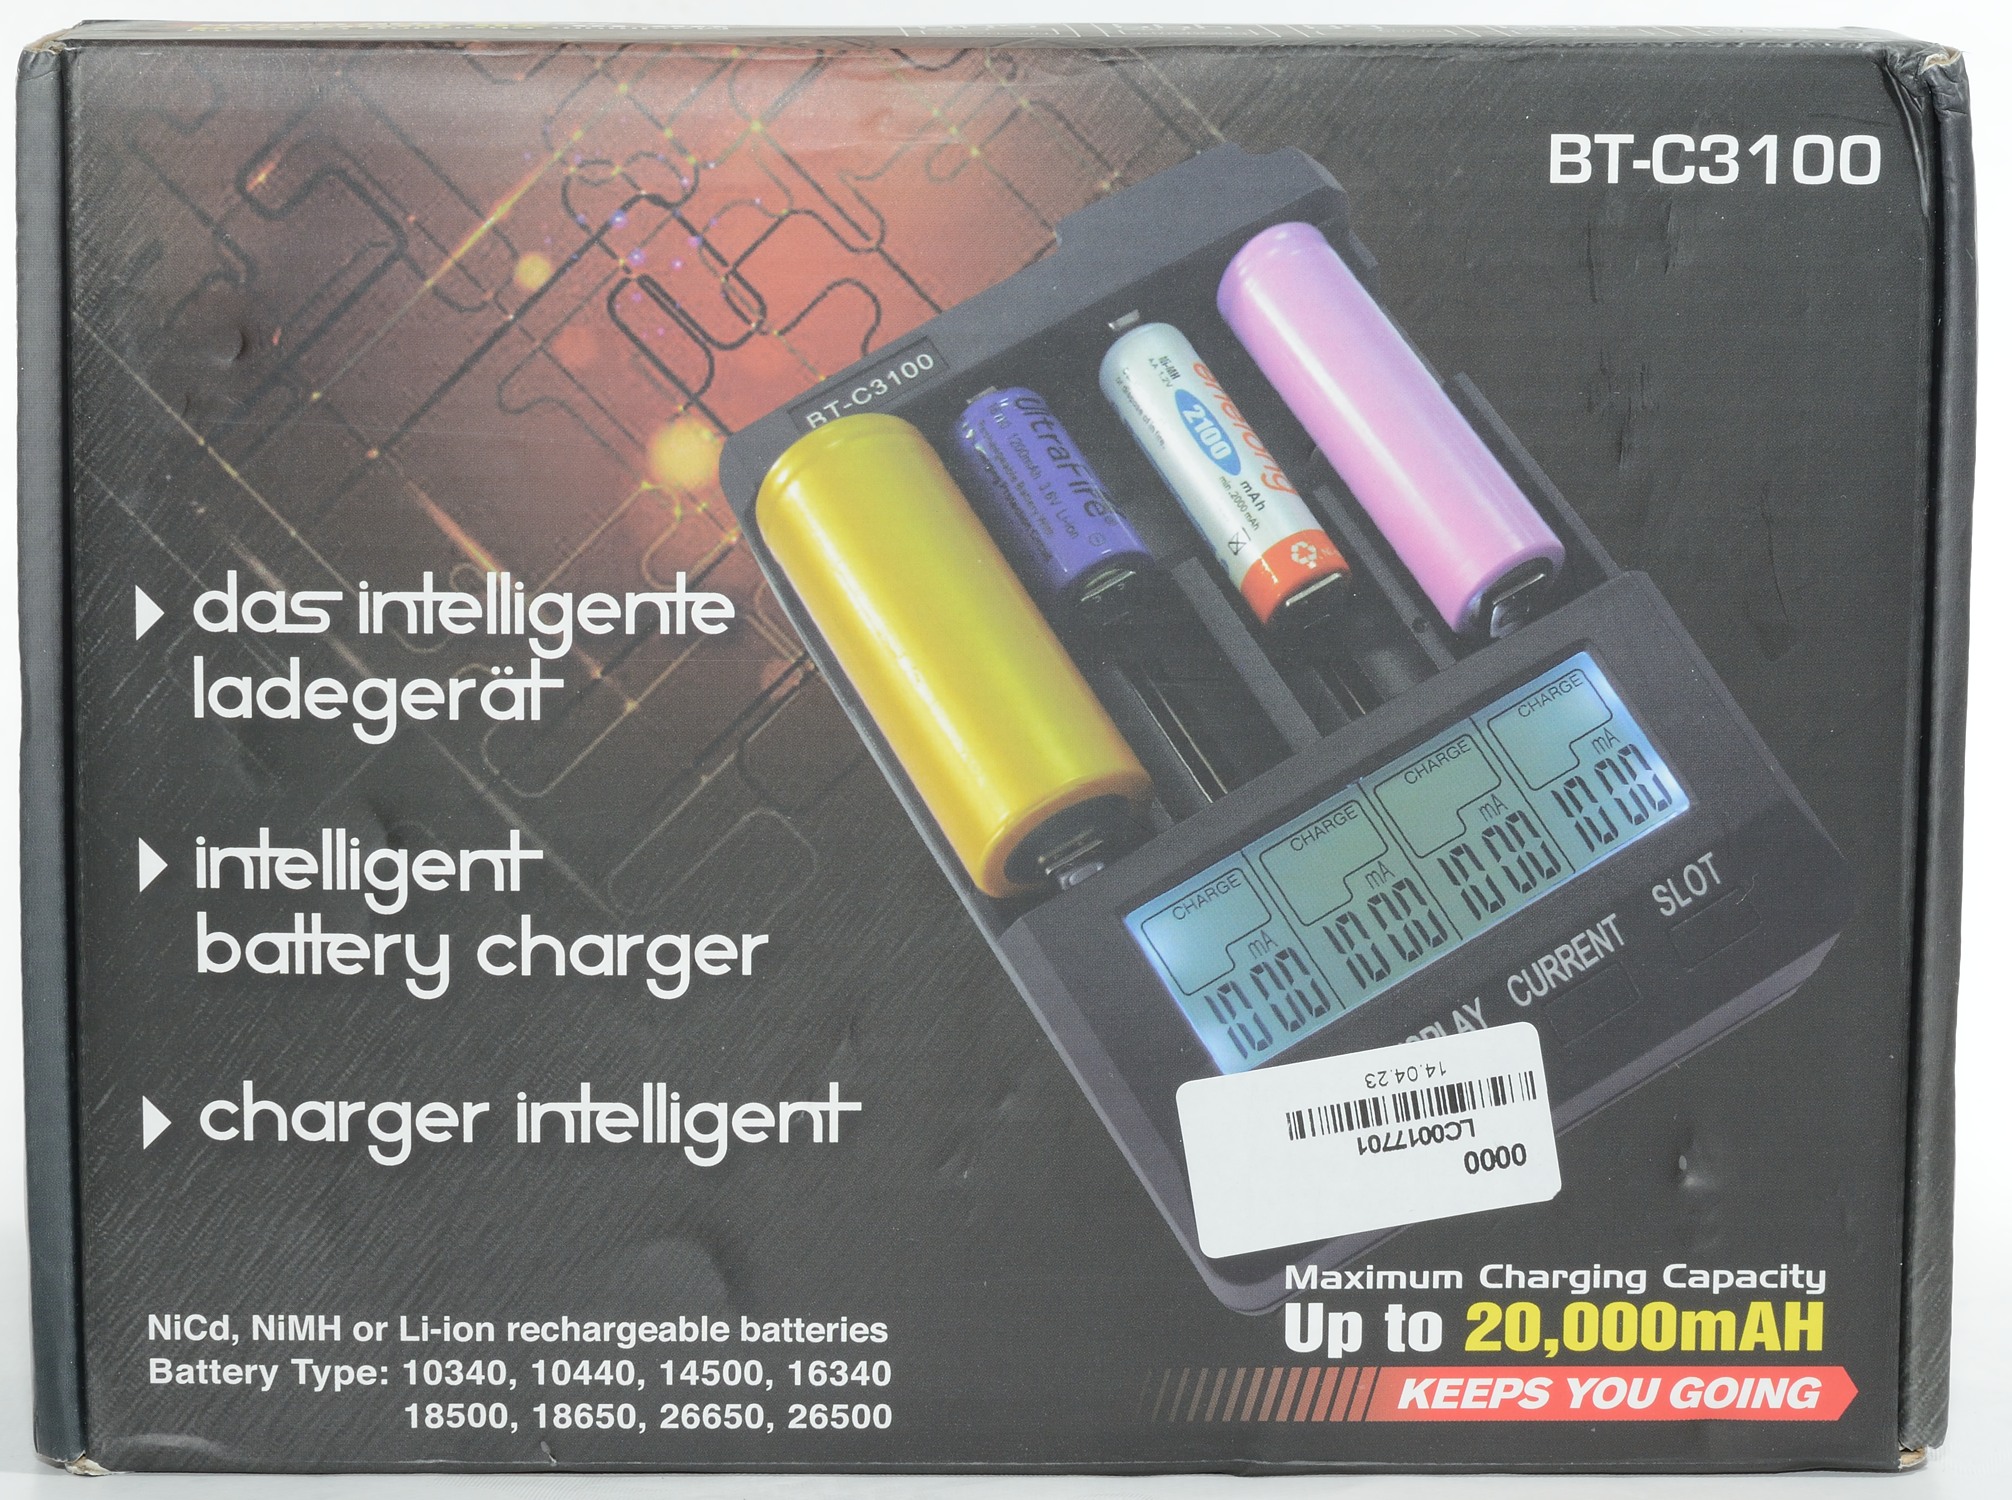
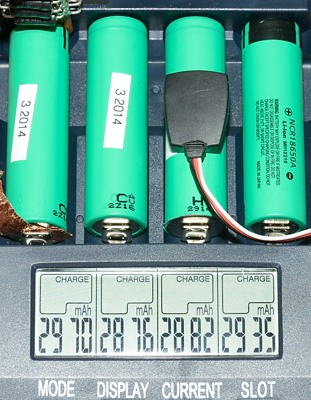
This time I got the charger in a retail box, but the box is without any brand name.
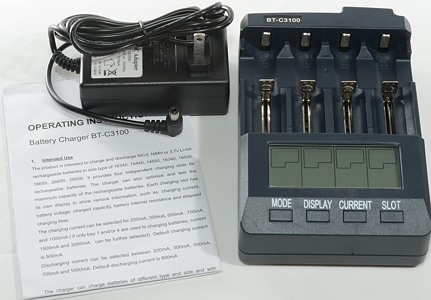
The box contained the charger, a manual and a US power supply.
The charger looks exactly the same, and works the same, with one exception. The maximum NiMH discharge current is reduced to 700mA, instead of 1000mA. Probably because it can not discharge NiMH with 1000mA anyway.
Measurements
In these test I have only checked charge/discharge looking for differences compared to the frist version, not for a total test of the charger.
LiIon batteries
%20%231.png)
%20%232.png)
First an ordinary charge on channel #1 and #2, they look fine.
%20%231.png)
Provoking the charger with a older cell (i.e. higher Ri) and maximum charger current, does still look acceptable.
%20%231.png)
My old IMR cell is more of a problem, the charger voltage is temporary way to high, but get adjusted down again and there is no oscillations any more. This is a significant improvement compare to the first version.
.png)
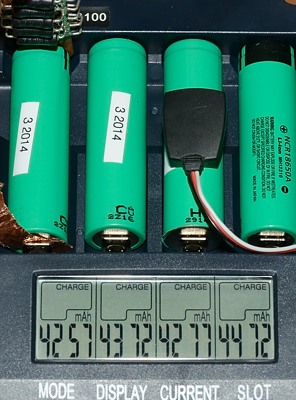
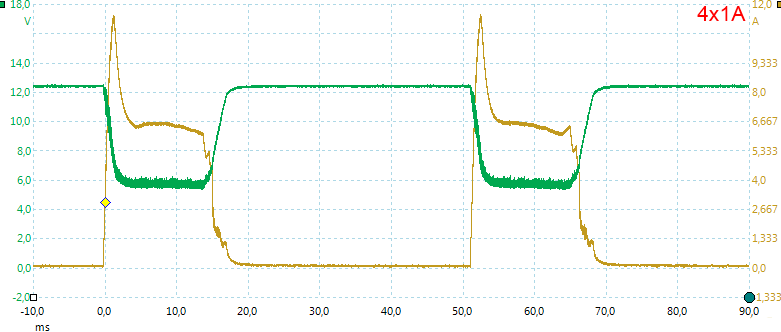
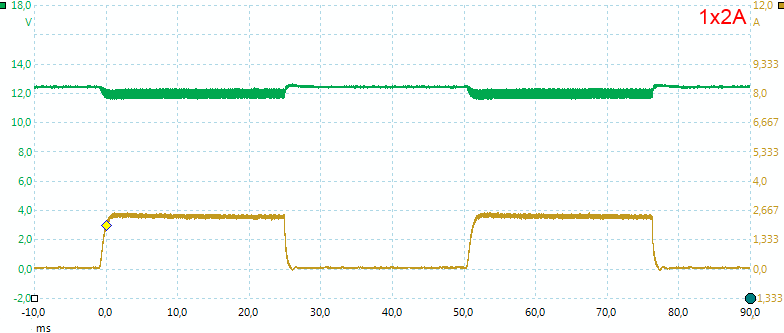
With four batteries and 1A charge current, the charger has a problem. The display shows 1000mA charge current, but the actual currect is considerable lower.
The charging takes longer, but the batteries are charged fine.
The reason for the wrong capacity reading on the charger is because it does not detect the reduced charge current, but assumes 1000mA charge current.

The most significant problem is the charge capacity display, it shows to high mAh. Doing a discharge shows a much more correct value.
This did also happen on the first charger, but there it was only a little bit to high. I do not believe that the software update has anything to do with this increased error, it is more likely it is related to how the power supply behaves when overloaded.
For practical usage, this is not really a big deal. If you want to know how much capacity is left in / used from you batteries, either discharge them or charge one at a time (Both will give correct value).
Charging four batteries at a time will charge the batteries, but at a lower current and with the power supply running hotter than normal.
.png)
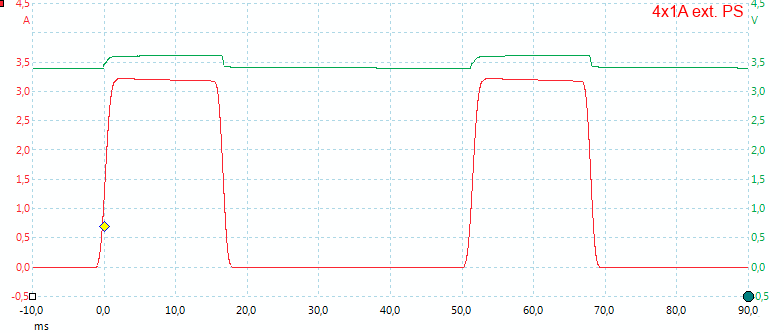
Using an external power supply with lots of amps, the charger does draw a significant current in the peaks, more about that below.
a.png)
With enough current aviable, the charge can maintain 1A charge current .
And the display shows a much more realistic charge capacity.
This time I connected the scope to the supplied power supply, to see what is going on. As can be seen the charger draws about 10A and the power supply voltage collapses to about 6 volt, reducing the current to about 6.5A (The power supply is rated for 3A).
This type of load will usual increase the power lost in the power supply, this means the power supply will run hotter and hotter means shorter lifetime for the power supply. This is not really a big problem, the power supply is a standard 12V supply and it is very easy to get a replacement if it wears out.
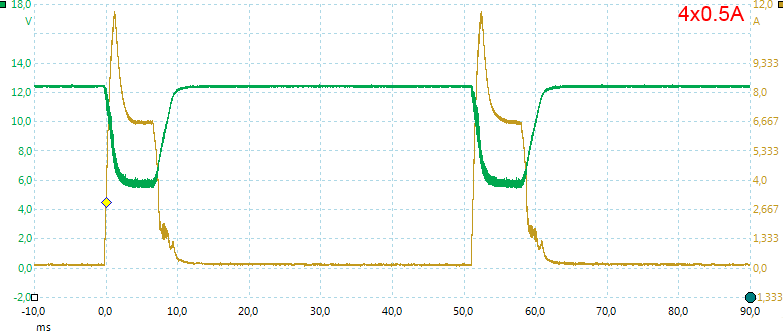
Reducing the charge current does not really help, the puls is shorter, but the same thing happens.
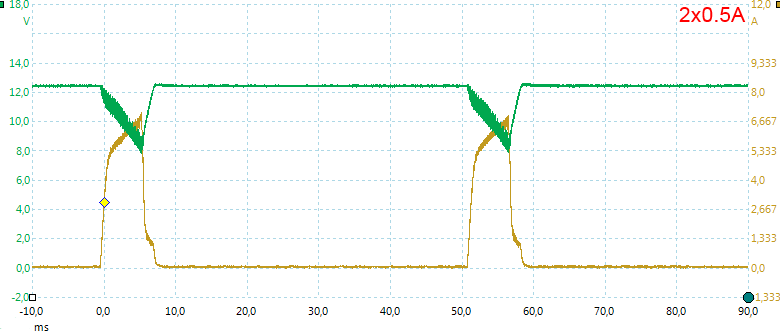
Less batteries does help.
Charging with 2A on a single channel gives no problems with the power.
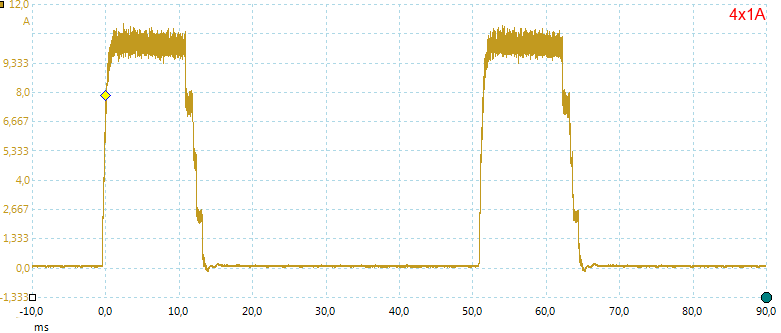
Here I am using my own power supply with enough current. The charger wants about 10A for 0.01 second 20 times each second. This is, of course, a bad design in the charger, a good design would have smoothed the current draw.
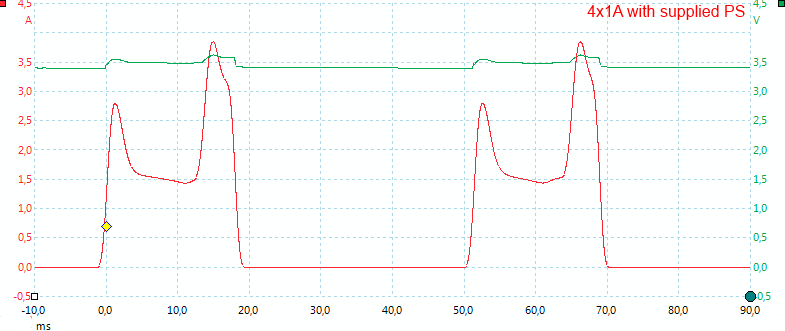
Looking directly at the charge current pulse with 4 batteries and supplied power supply, it is obvious that something is wrong. The pulse is supposed to be a square pulse, it is not supposed to sag in the middle.
Note: When doing these measurements I have a fairly large resistance (0.1ohm) in series with the battery, reducing the current somewhat.
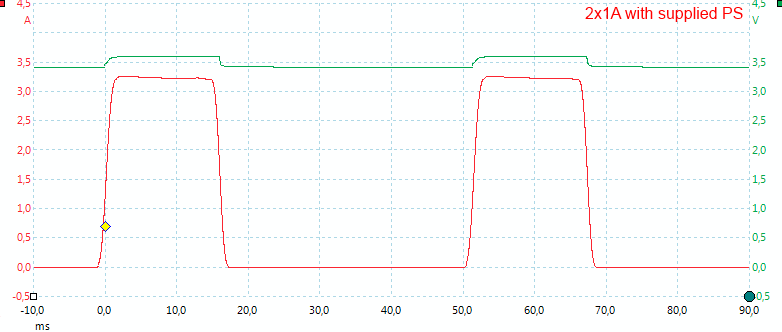
Reducing the number of batteries to 2, fixes the problem.
Or using my high current power supply.
NiMH batteries
.png)
Surprisingly the NiMH algorithm has also been changed, no more tapering of the current when the battery is nearly full, now it uses a very obvious -dv/dt algorithm (It was also supposed to do that before, but it was not as obvious). It does still use a trickle charger when finished with the regular charging.
%20%231.png)
No problem with the eneloop XX battery.
%20%231.png)
I wonder why the charger needs more than 30 minute to detect the -dv/dt signal. With the other batteries it is also a bit slow at detecting a full battery.
%20%231.png)
It does also take significant time to detect a full battery.
.png)
Discharge works fine.
Notice: I started this just after a charge, before the batteries had cooled completely.
QUICK TEST, i.e. measuring internal resistance
Since I last tested the charger I have made a test box with a 10mOhm resistance taps. This makes it possible to do multiple ohm measurements without removing the battery and with only a small variation in contact resistance.
The first "Extra R" column is the resistance added from my box, the second "Extra R" is the average extra value measured by the charger.
The "Avg" column is the average of the 5 ohm measurement and the "Diff" is the difference between highest and lowest value".
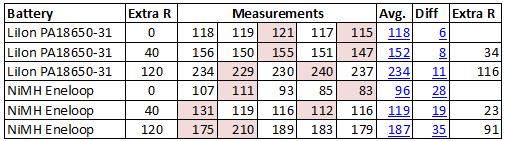
LiIon gives a fairly constant value and the two "ExtraR" columns are fairly close in values.
With NiMH it does not look nearly as good.
Testing with 2500 volt succeeded, but 5000 volt between mains and low volt side on the power supply failed. This means this power supply is only safe for 110VAC, not for 230VAC (This is the US supply, the EU supply passed the 5000V test in the first review).
Conclusion
The charger has been improved with the updated software, but many of the problematic areas are stil present:
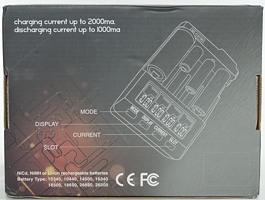
The user interface is fairly easy to use, but it may take a some time to learn what the different modes does.
The high current peak from the power supply is not good for the power supply and makes the charger show wrong readings.
Generally the peak charge and discharge current for LiIon are a bit high, especially on the outer slots.
The resistance measurement has limited use, not only due to contact resistance, with NiMH the precision is generally low.
I would have preferred constant current, instead of the pulsing.
The NiMH termination has changed, but it is a bit slow to terminate now (It does definitely fill the cells).
LiIon charging now works on all slots. The NiMH charging is probably not as good as in the first version, because the -dv/dt is rather slow to terminate
The analyzing function makes the charger very useful for anybody that wants to know something about the state of their LiIon cell.
The charger is not perfect, far from it, but as long as the problematic areas are know, the charger is a very useful tool.
Notes
The charger was supplied by GearBest for review.
Here is an explanation on how I did the above charge curves: How do I test a charger