Arduino fix of boot loaded

I like the Arduino Pro Micro, but it is not a official Arduino product, this means it can be a bit random what boot loader you get. This will affect what type Arduino the development environment believe it is. I like the Leonardo version, but it only works for 16MHz Pro micros! I have also crashed a the boot loader on a few Pro Micros. With the Arduino Nano I have a lot with a old boot loader version.
The solution is to program a new boot loader into the Pro Micro, I uses a USBtinyISP, they are cheap on Ebay and works fine. In addition the do not show up as a serial port, this is no problem for the Arduino development environment, it can easy find it.
Contents
The programmer
Pro Micro
Nano
Conclusion
Notes
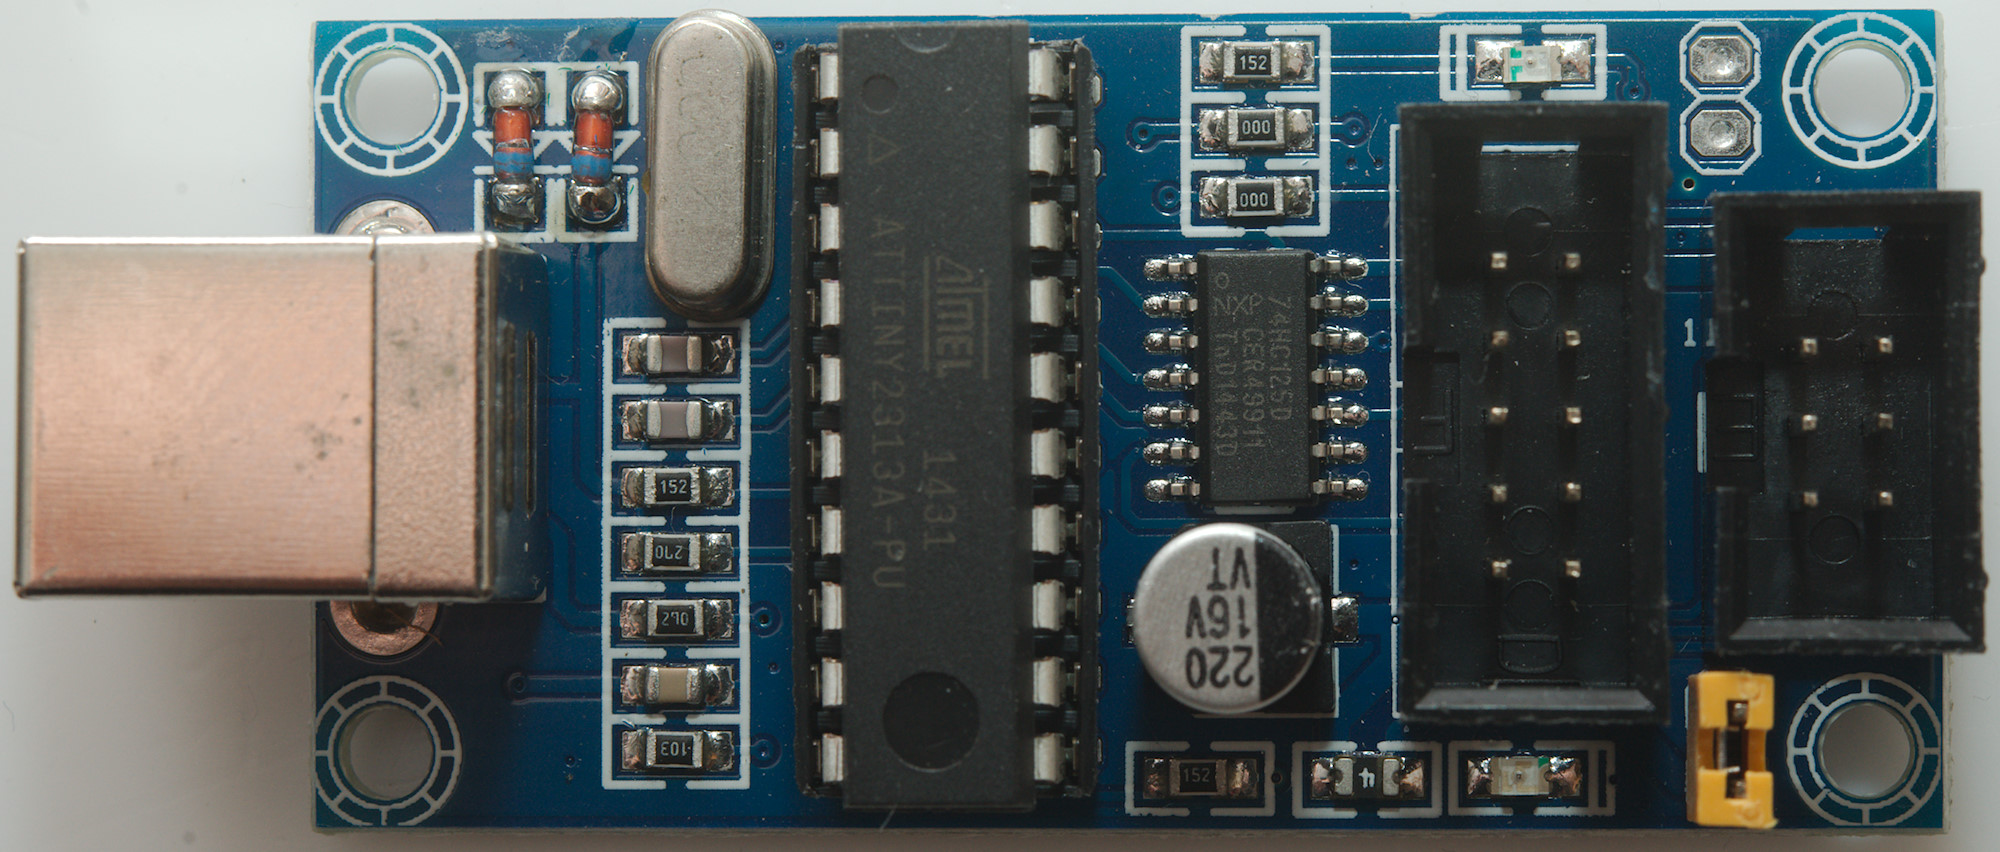
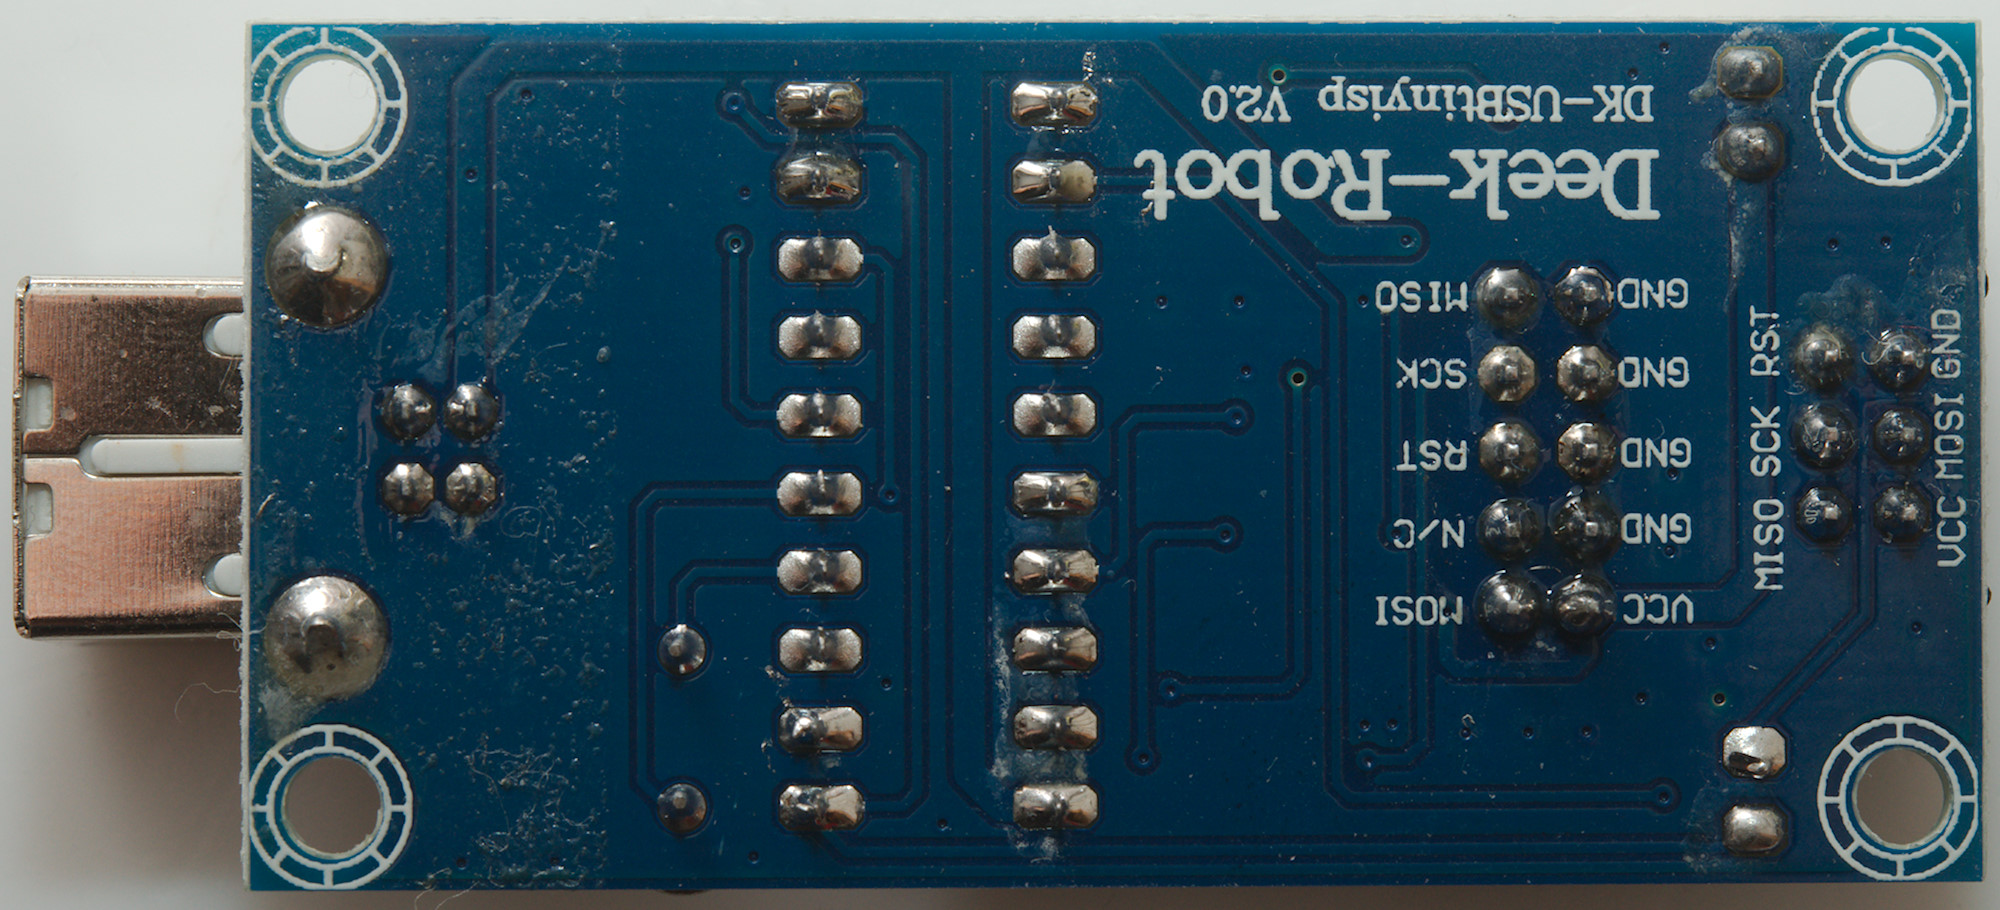
The programmer
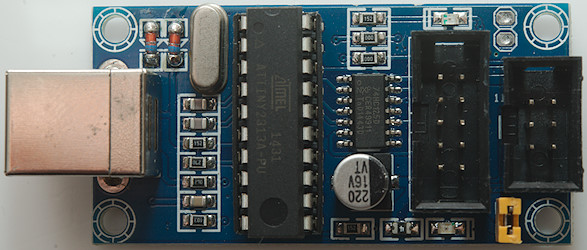
The USBtinyISP. The yellow jumper on the board supplies USB power to the internal driver and the Arduino/processor connected to the programmer.
If the jumper is removed the Arduino must be powered and will supply the driver on this board with power, this allows for true 3.3 volt operation.
This programmer is originally from adafruit.com and they have documentation and drivers on their website.
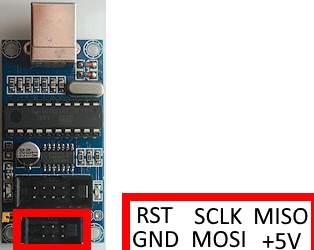
The 6 pin connector is the most used one.
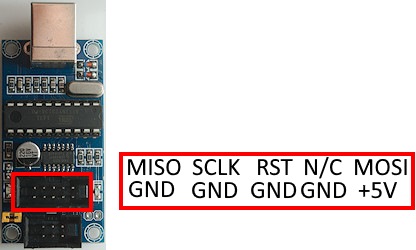
The 10 pin connector contains exactly the same signals.
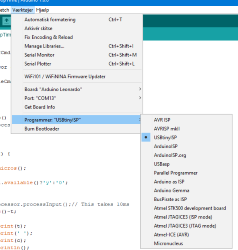
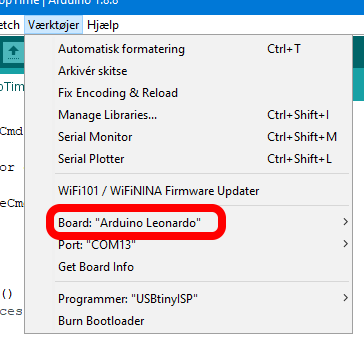
The boot loader tool must be selected in the development environment.
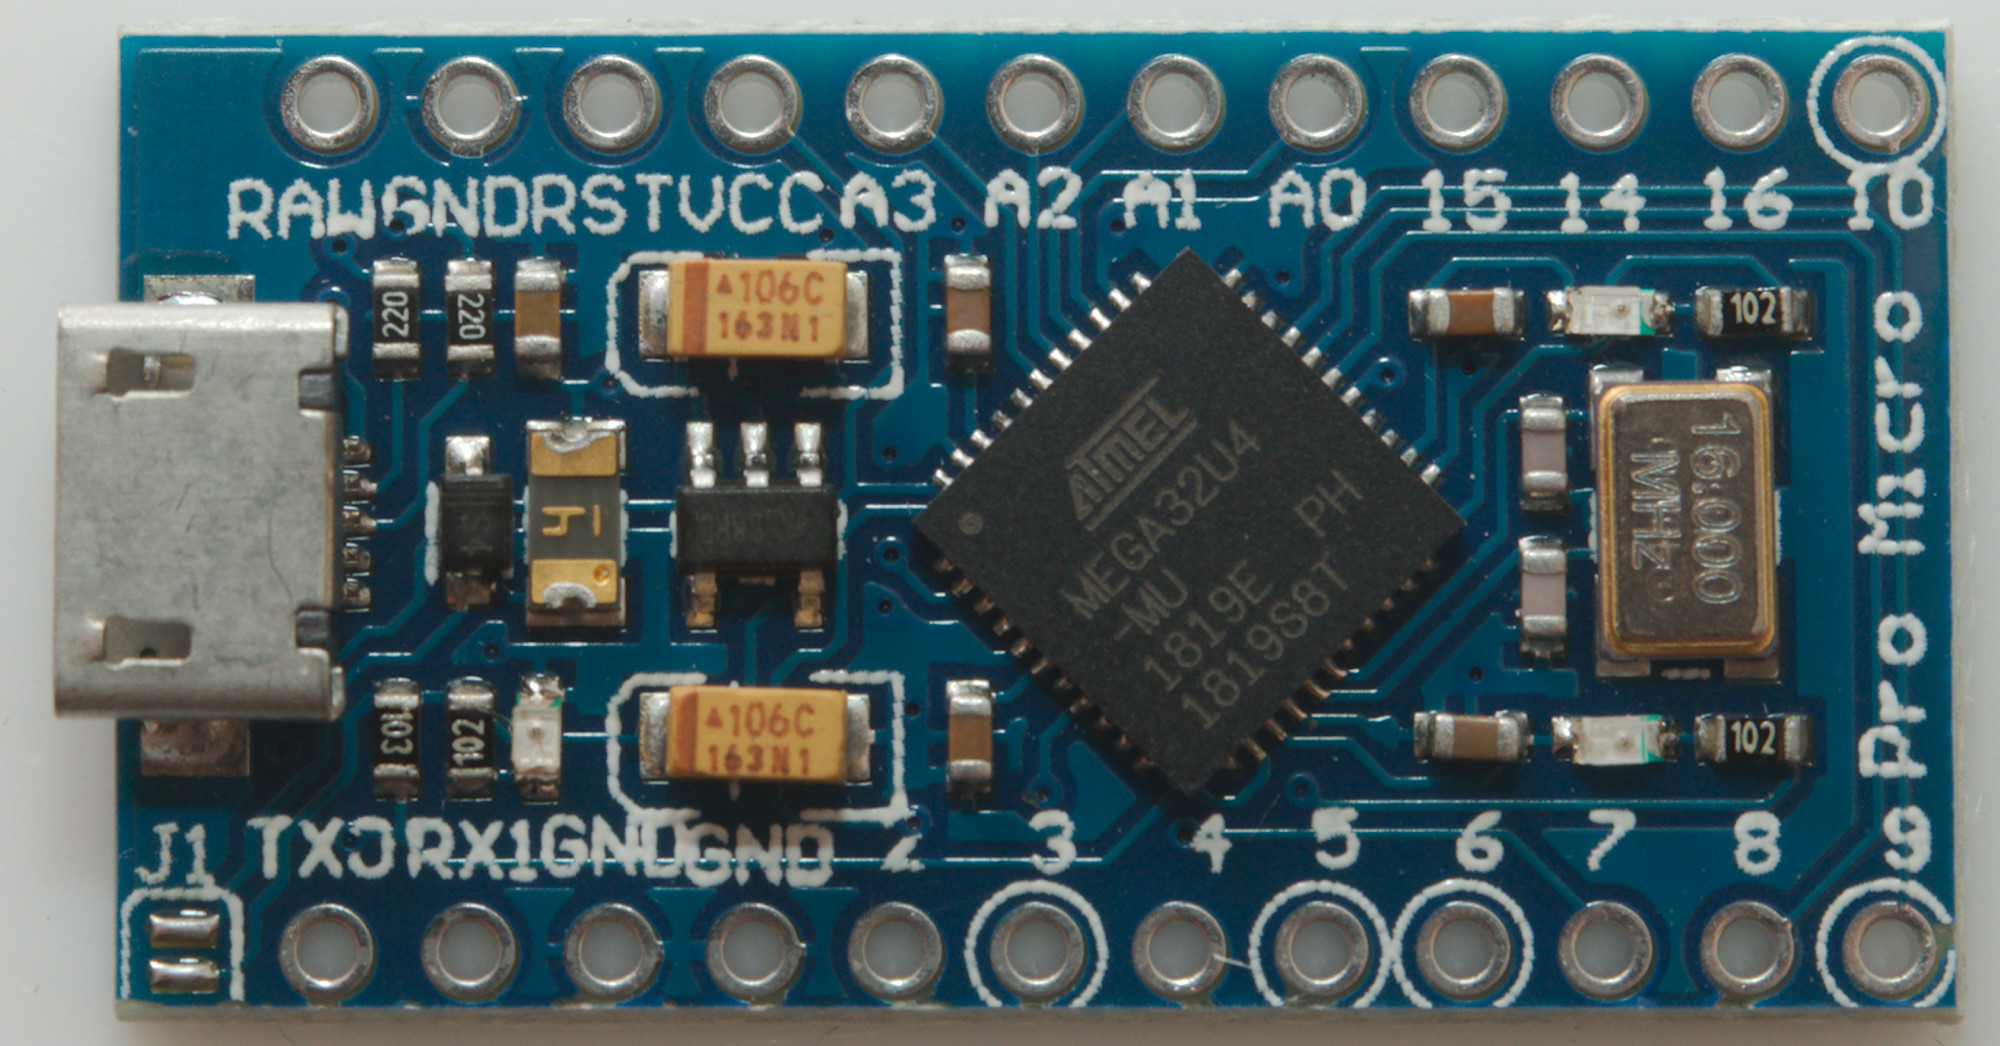
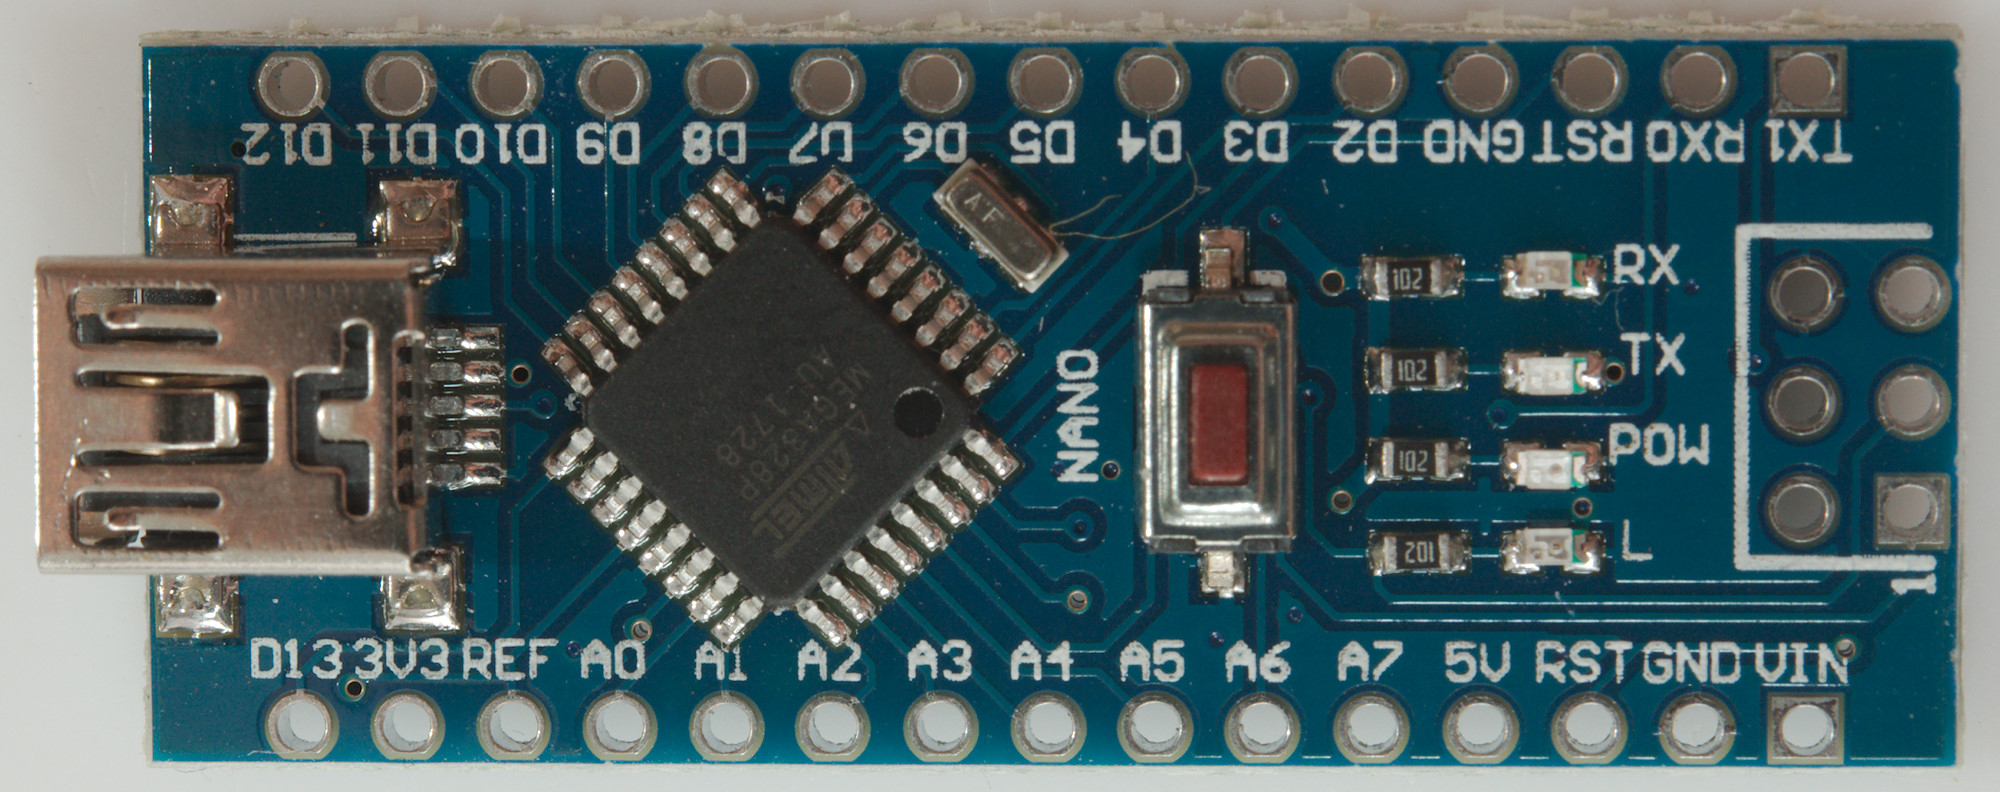
Pro Micro
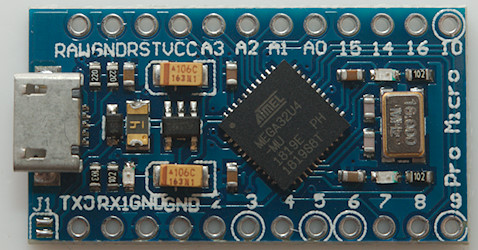
A 16MHz Pro Micro that can be programmed as a Arduino Leonardo.
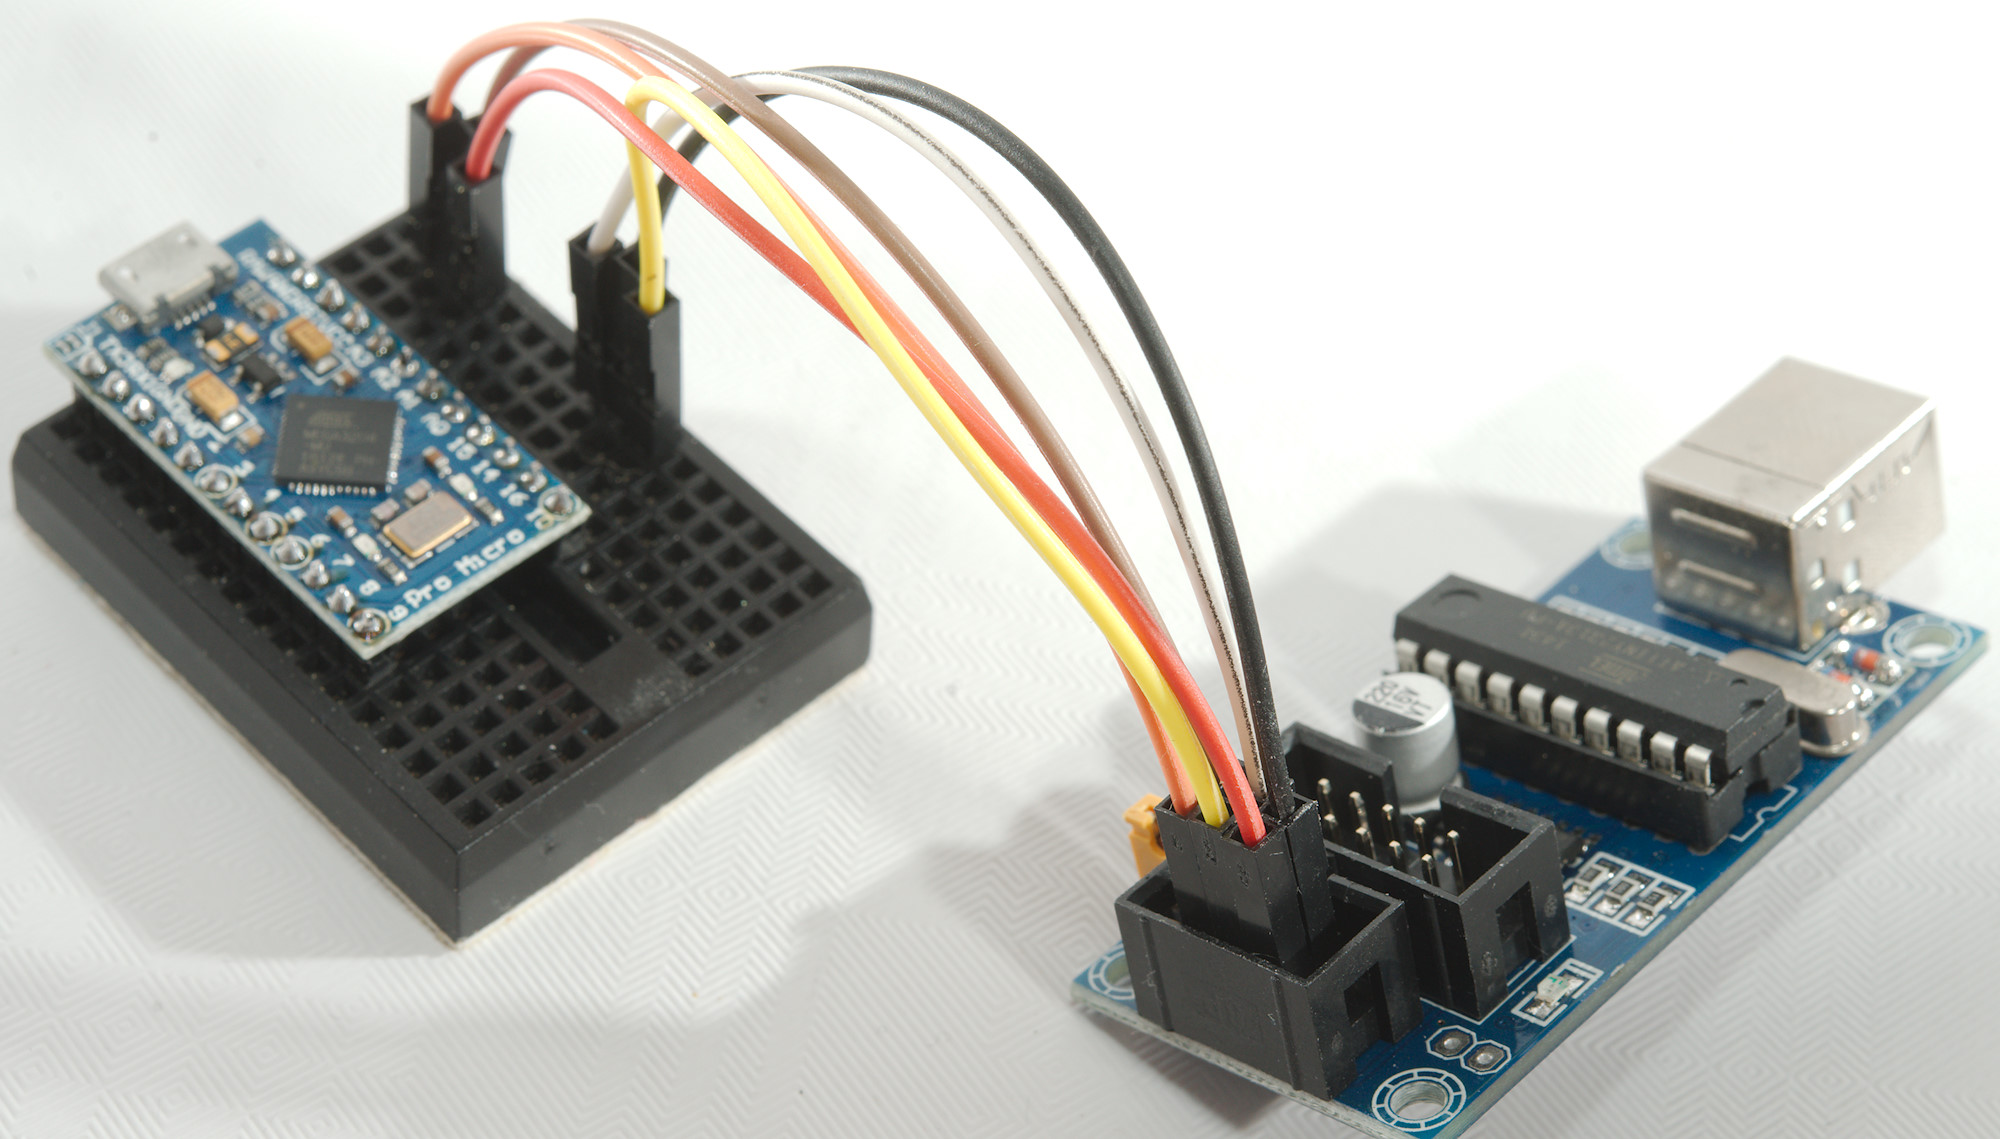
I already showed the hookup here (Click for larger version). Using a small breadboard makes it easier to make the hookup.
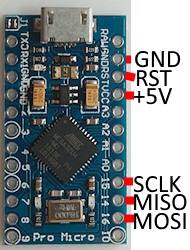
Here is the names, they must be connected. Do not cross MOSI/MISO in this case MOSI is connected to MOSI and MISO to MISO.
There is power wires included, it is not necessary to supply any other power to the Arduino.
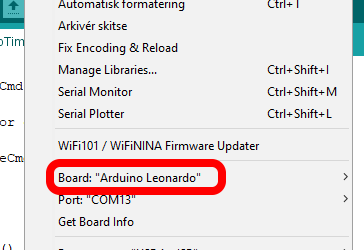
Verify you have selected a board type that is compatible with the Arduino. As I said above I like to use Leonardo for 16MHz Pro Micro.
The serial port is not used for burning a new boot loaded and can be ignored.
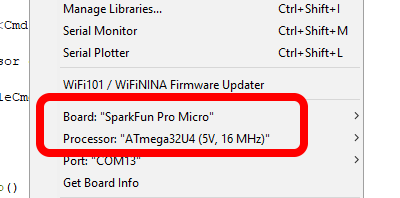
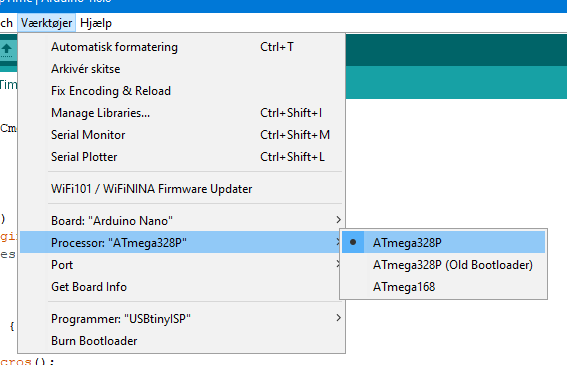
But there are other options, with SparkFun it is necessary to select the correct version of the Pro Micro, this makes it possible to select 8MHz version.
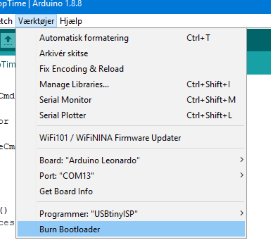
Secure all wires are connected, the Arduino will be powered by the boot loaded and then select burn.
It will take maybe a minute.
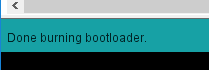
Look for this message then the programmer and Arduino can be disconnected from each other.
Nano
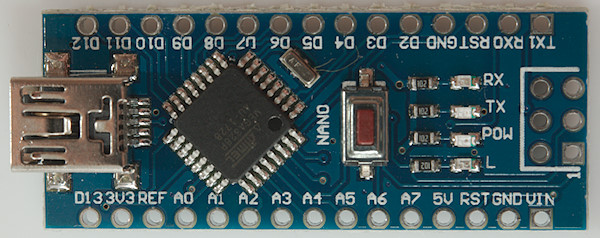
The Nano exist with new and old boot loaded. It is possible to use the same boot loader on all Nanos, i.e. either new or old.

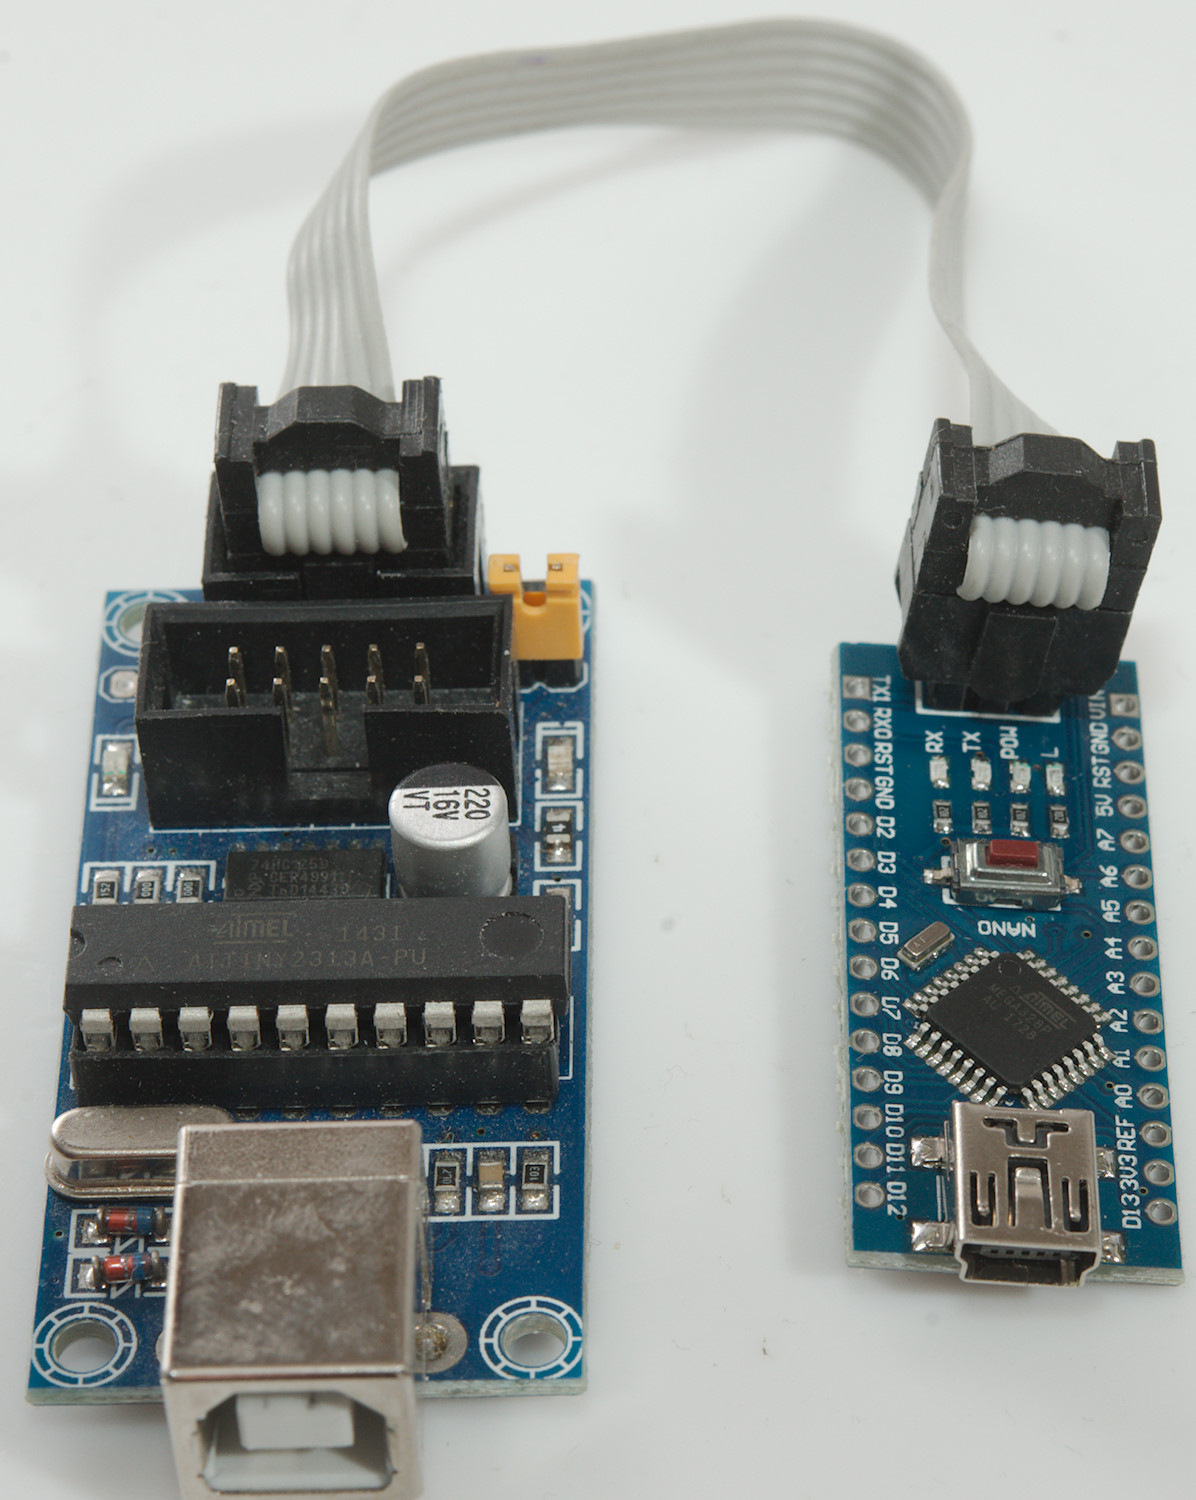
The Nano has a programming connector that can be directly connected with the ICP using a 6 wire flat cable
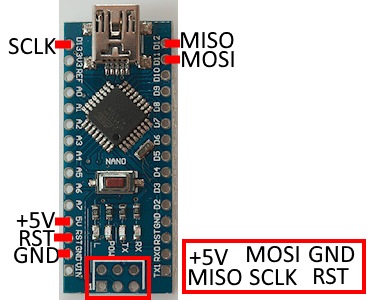
But I do seldom solder that connector on the board and it is not required because all connections are available as regular pins.

When connected select the desired boot loaded and burn it.
The Nano boot loader is very fast to update.
Conclusion
This is a fairly easy way to secure that all your Pro Micro are the same and that the Nano uses the newest boot loader.
The method can be used on many Arduino processors to reprogram the boot loaded or to put a boot loaded into a new chip.
It is possible to program a full program directly with this type of connection, this will remove the bootloader and make the startup faster.
Notes
It is nearly always possible to program a Arduino processor this way, but there are a few exceptions: The processor must have clock and a reset pin and programming must not be disabled. All is controlled by the fuses on the processor, the clock can only be disabled when no external crystal is present.
The reason for this article was mostly because I got tired of finding schematics each time I had to reprogram a boot loader in a Pro Micro. This would only require one drawing to help me, but why not do it in a way that may be useful to other people.