Computer controlled logic outputs

DSC_7523

After making the solid state relay and exaggerate a bit on the software, I could see that a box with logic outputs running the same software could be very useful. This required slightly different specifications:
Block%20diagram

The output design must be something like this, buttons and leds are not included.

Content
    Computer controlled logic outputs
        Selecting parts
        Drawing schematic and PCB
        Assembling the unit
        Part list
        Testing
    Manual for the final logic output box
        Transmitting serial data, standard serial
        Transmitting serial data, SPI
        Transmitting serial data for led pixels (WS2812 and other)
        TX command data format
    Control software
    Applications
        Testing a couple of led strips of the same type
    Low cost version
    Notes & download

Selecting parts

This will be similar to the SSRelay box, this means I use the same parts when possible, but some stuff had to be changed.

DSC_5793

In this case I need 5V, not 12-20V, for this I use a 9V DC-DC converter. That is because the input voltage will be lower than 5V due to the Arduino and USB. The converter is unregulated and will be below rated voltage, using a 9V converter gives my enough voltage.

DSC_5796 DSC_5795

And with enough voltage for a 5V regulator, this way I will have 5V in all cases. The 3.3V is done with a 3.3V regulator after the 5V one, here I use a very common SMD type.

DSC_5794

For isolating the signals I could not use the MOS drivers from before they worked at too high voltage, instead I found this chip. It has two channels and is fast. I am using the slowest (and cheapest) grade of them.
They are not opto-couplers, instead they use microscopic transformers and are rated for 2500Vrms, this is more than enough, I basically want to break ground loops, actual voltage differences will be well below 100V.
They work from 2.7V to 5.5V this nicely covers my requirement for 3.3V and 5V.

DSC_5797

I did not want my isolators to directly drive the output, I want something that is easy replaceable if I zap it. A good old 74HC244 in a socket looks like the right solution. They are rated to work from 2V to 6V. The outputs are not as high current as typically microprocessor outputs, but they can deliver a couple of mA. This is enough for logical signals and the pack has 8 drivers, meaning I can run two in parallel for double current output.


Drawing schematic and PCB

For the schematic I started with a copy of the SSRelay and replaced the output section.

Schematics

The output section is the isolators and the 74HC244, because the 74HC244 is 8 channels I parallel two outputs for each of my outputs. I placed a TVS diode (A sort of zener) across the supply, I hope this will help protection the voltage regulators and isolators if anything nasty comes back through the output pins.
With logic output signals I can also transmit serial data, for this I connected the TX and MOSI pins to the first output, with MOSI I also need SCK, it is connected to the third output. The software has the responsibility to only enable one pin at a time.
I wired a fourth output, this did not require any extra parts, especially because I did not add extra buttons or leds.


pcb

For the circuit board I started with the SSRelay version and replaced the output section.


Assembling the unit

DSC_5751 DSC_5752

This time it also took a few weeks to get the circuit board.

DSC_5753

I soldered all the part on the board before testing. It did not work, it pulled my power supply down.
Measuring and looking at the board I found the problem, the small chips where the wrong way round.

DSC_5759 DSC_5760

A bit more work and it was fixed and this time it worked.
Most of my SMD soldering still looks bad, but it works.

DSC_5761 DSC_5762

DSC_5763 DSC_5764

ConnectionsPCB

The connections to the circuit board.

DSC_6059

With the circuit board ready I needed a box with a lot of holes in it.

DSC_6060

Mostly in the front.

DSC_6064

In addition to the binding posts I also wanted a easy way to connect to breadboards and modules. This meant a pin row, or in this case a dual row of female pin headers. This may look like many connections for four outputs, but I wanted some space between the outputs and lot of gnd signals.

Connections

All the gray are ground, red is 1, green is 2, yellow is 3 and blue is 4

DSC_6066 DSC_6067

The front is mounted with all the hardware

DSC_6070

Only the PCB must be mounted on the bottom.

DSC_6072 DSC_6073

A lot of connections to do.

DSC_6174 DSC_6175

Some labeling and it is ready to use.

DSC_6176

All my "relay" boxes with Arduino. The top one is with real relays and uses a Nano and only support relay mode.


Part list

Partlist

For the electrolytic capacitor I used 220uF 16V I had laying around.
For the wires to the switch and led I used Arduino jumper cables where I cut one end open with side-cutters and stuffed the connector into a 5 pin header, this is much faster than crimping.


Testing

This testing is done before putting the circuit into the box.
The voltage on the output side is 3.3V -> 3.26V and 5V -> 5.04V, this is fine.
Power consumption from USB is about 64mA in both 3.3V and 5V mode.

PWM%20100kHz%201pct%205V

I wanted to see how fast the isolators are, the fastest signal I can generate is 100kHz PWM with 1% duty-cycle, this is a 100ns pulse. The red curve is output from the ProMicro, the blue is output from the 74HC244.
It is not exactly 100ns, but that is because the Arduino has to take 1% of 160 or said another way the resolution is 62.5ns. I measure the red curve to be 126ns wide, this matches fairly well with this and the isolator and 74HS244 gives a total delay of about 40ns.
The spikes and ringing is because I do not use proper measuring technic for these frequencies.

PWM%20100kHz%201pct%203.3V

The 3.3V setting looks similar, but the delay is slightly larger.

PWM%20100kHz%201pct%205V%20all

Measuring on all 3 PWM output, they all run 100kHz 1% duty cycle. The third channel is behind the other two, this is because it is running on another timer and the microprocessor do not start them at exactly the same time, as can be seen there is 250ns or 4 Arduino clock cycles between them.
I got more spikes and ringing here because I am using some 10cm breakout wires.

PWM%20100kHz%201pct%205V%20all%20comp

It is fairly easy to get rid of this offset, this is done by preloading timer 3 with a small offset instead of zero to compensate for how much it is behind. The problem is that must only be applied at fastest timer speed or it would add offset instead when using a lower timer speed. The 3 PWM outputs do not really need to be synchronized and I did not see a reason to include this offset.


Manual for the final logic output box

I will only include the functions special for this box, for the rest check the manual for Computer controlled solid state relay

There are a few modifications to that manual.
RELAYON/RELAYOFF/RELAY? can be used with 1 to 4 as parameter, not only 1 to 3.
PATTERN accept a sequence with "0123456789ABCDEF", not only "01234567".


Transmitting serial data, standard serial

The box can transmit in standard serial format, this can be used to test/debug receivers. The data is on output 1 and output 2 goes high while transmitting data.

baud is baud rate from 122 to 1000000, there are some limits. The regular baud rates only works up to 115200, above that the number must divide into 1000000 without any reminder.
data is the data to transmit, see below for format.

The format can use the following parity options:
SerialData

The above data was transmitted with:
SERIAL 9600N81          Select serial mode and Setup baud rate and format.
TX "Hello world"          Transmit the data as ascii characters.

SerialData1MB

SERIAL 1000000N81          Setup maximum possible baud rate
TX "Hello world"          Transmit the data as ascii characters.

SerialData1MB%20rep

SERIAL 1000000N81          Setup baud rate
REPTX "Hello world"          Repeatedly transmit the data as ascii characters.


Transmitting serial data, SPI

This is clocked serial data.  The data is on output 1 and output 2 goes high while transmitting data, the clock is on output 3.

rate is the transmission rate and can be from 125000/250000/500000/1000000/2000000/4000000/8000000
format defines the actual SPI format used.
data is the data to transmit, see below for format.

The SPI format is:
SPI%202M

SPI data at 2M.

SPI 2000000FE          Select SPI, setup data rate and format (Falling, enable low).
TX "Hello world"          Transmit the data.

SPI%202M%20zoom

A closer look at the curves, red is enable, blue is data and green is clock.


Transmitting serial data for led pixels (WS2812 and other)

This function is not hardware assisted, but only software, it uses output one and output 3 as clock for types marked with a # in the name.

pixels, number of pixels connected, when 0 is specified the data from TX is transmitted once (Number of bytes must match what the LED's require).
format, sequence for RGB or chip type, types with # in name uses SPI
data is the data to transmit, see below for format.

Formats:
Neopixel

PIXEL 144 WS2812B          Select pixel with a 144 led strip with WS2812B
TX R1G2B3          Turn all 144 leds on with low intensity red/green/blue sequence


When using SPI based leds a prefix and postfix will be automatic added outside the transmit buffer. When manually entering numeric values, remember the specially encoded intensity byte!


TX command data format

The TX command must be used with data first time, but on subsequent executions it will reuse data if no new data are specified.
A couple of formats are used, it is possible to mix format, i.e. use numbers between text.

Numbers

Any number from -128 to 255 can be used:

TX 45 46 47 13


Hex numbers

Hex is specified with a 0x prefix, only bytes can be specified:

TX 0x30 0x31 0x32 0x0d


Text

Text must be surrounded by quotes, it can either be single or double, it is possible to use the opposite quote inside the string:

TX "Hello world"
TX 'Hello world'

Inside a string some escapes can be used.

Colors

For an easy way to specify data for pixels there is also some color specifications, these change encoding depending on pixel format. Using a space or not between these letters are optional, but there must not be a space between the letter and the number.

The following letters are recognized:
The letter uses alone means full brightness, add a number from 0 to 9 after the letter to reduce brightness. I.e. R0 is lowest red brightness, the next steps are: R1, R2, R3, R4, R5, R6, R7, R8, R9 and R for full brightness. A logarithmic table is used for the brightness.

TX R1G1B1Y1M1C1W1O will show all colors at low intensity with every eight led off.


Control software

This is a addendum to the manual in the SSRelay article, explaining the extra page that is used for the serial modes.

pgmtx

There is configuration for the 3 serial modes supported. For serial the baudrates are limited to the common rates, the box will support some other rates.
Before the Tx button works one of the Serial/SPI/NeoPixel buttons must be used to select format. The repeat will only be available for Serial


Applications


Testing a couple of led strips of the same type

The programming function makes it possible to store small test scripts in the box, here is an example for testing a 144 led SK6812RGBW clone. The using of scripts is most interesting if many strips has to be tested.

The testing is done by first turning all led, but one on, this makes it easy to see if the number of leds are correct. Being a RGBW strip, the next tests is to turn all white, red, green and blue leds on, one color at a time.

First this program is loaded into the box:
Code:
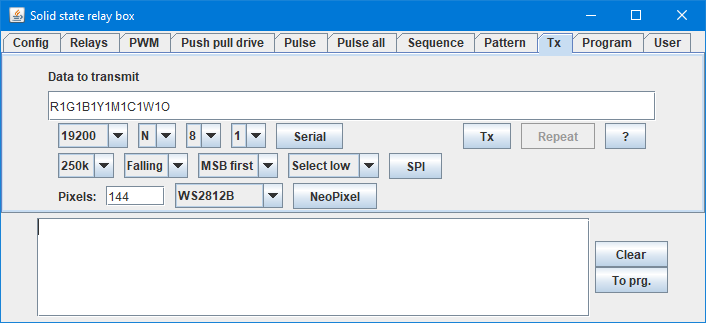
PIXEL 143 GRBW
TX w4
SELECTPGM
PIXEL 144 GRBW
TX w4
PGM1
PIXEL 144 GRBW
TX r4
PGM2
PIXEL 144 GRBW
TX g4
PGM3
PIXEL 144 GRBW
TX b4
Either with the software or directly from any serial terminal with these commands:
Code:
PROGRAM PIXEL 143 GRBW|TX w3|SELECTPGM|PIXEL 144 GRBW|TX w4|PGM1
PA PIXEL 144 GRBW|TX r4|PGM2|PIXEL 144 GRBW|TX g4|PGM3|PIXEL 144 GRBW
PA TX b4

The program starts by defining one less led that is present (PIXEL 143 GRBW) and then turn the leds on with white (TX w4). After that the user must press a button (SELECTPGM) and depending on the button pressed different sections are executed. They all change to the full number of leds (PIXEL 144 GRBW) and then turn on the leds in some color (TX r4)

Now the box can be run from any USB charger or power bank.

Connect the leds to a power supply and to channel 1 on the box. Then press RUN, all leds except the last in the strip must turn on.
Next press one of the buttons:
1: All leds change to red (including the last one)
2: All leds change to green (including the last one)
3: All leds change to blue (including the last one)
RUN: All leds change to white (including the last one)

This sequence can be repeated for all four colors, i.e. RUN-1, RUN-2, RUN-3, RUN-RUN and the test is done.


Low cost version

It is possible and cheap to test and use the software without making any hardware, it just requires a Arduino ProMicro mounted on a breadboard or a perfboard.
This will mean no isolation and only 5V (Slightly lower due to diode and regulator) outputs.

Output 1 is pin 1-12-14 (TX-D9-D16) connected together
Output 2 is pin 13 (D10)
Output 3 is pin 8-16 (D5-D15) connected together
Output 4 is pin 15 (D14)

CircuitBoards

The LED's and switches can also be connected (See schematic), but it is not necessary for the software or functions.

DSC_7522

The circuit on a breadboard. Connect it to a computer and program it from the Arduino environment, the commands can be sent from the serial monitor or close the serial monitor and use my software.


Notes & download

V1.1 Add WS2811 and fixed two warning in the code.


This was part two of the solid state relay project.
As I wrote in the first part I do not expect many software updates.

The design files and source code is included with this project, this means anybody is welcome to duplicate it or improve it.
Arduino program
Gerber files
Java program and source
KiCad files

Arduino program and Java program links to the SSRelay files, because they are the same.

TestController, can log data from this device