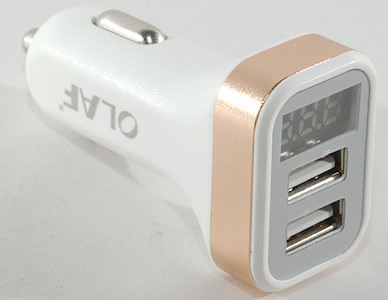
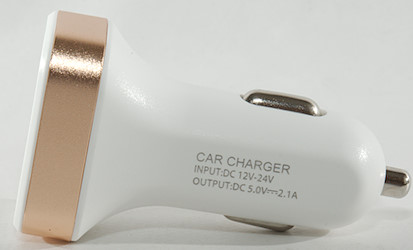
Olaf Dual Car charge with display 2.1A
Official specifications:
- Input: 5V/2A A car is 12V or 24V, not 5V. On of the slides correctly shows: DC 12-24V
- Quality Certification: CE,CCC
- Output Interface: USB
- Power Source: A.C. Source A car is DC, not AC
- Support Quick Charge Technology: No
- USB Ports: 2
- Model Number: USB Charger,USB Adapter,Phone Charger
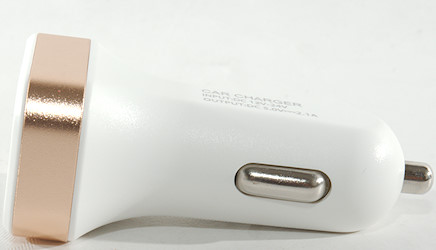
- Output: 5V/2.1A
I got it from Aliexpress dealer: TwitchDirect Store
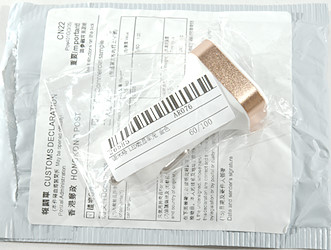
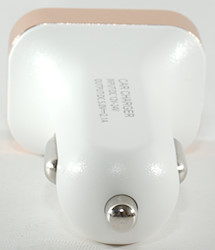
No fancy box for this charge, just an envelope and a plastic bag.
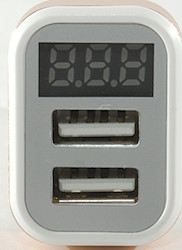
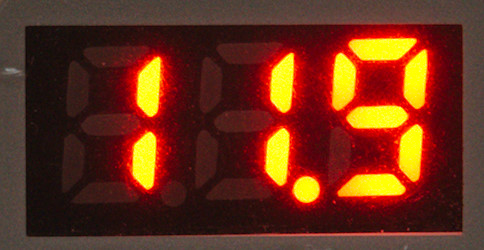
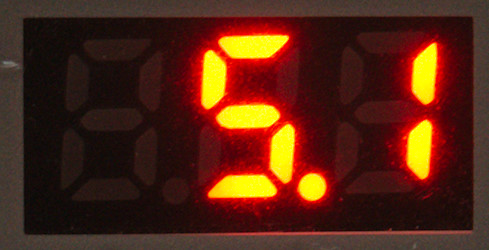
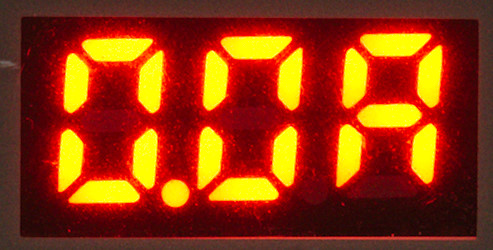
The display will change between 3 values: Input voltage, output voltage and output current.
Measurements
- Usb output is coded as usb charger (DCP).
- The two usb outputs are in parallel.
- Power consumption when idle is 18mA from 12V and 13mA from 24V
- Display will flash at 10.7 volt or lower input voltage.
- Display turns off at about 6.8 volt
- Weight: 20.7g
- Length: 64.5mm
- Front: 35.2 x 25.2mm
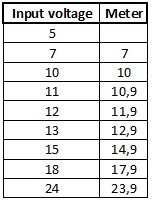
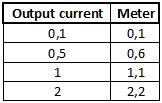
Both voltmeter and current meter have a good precision.
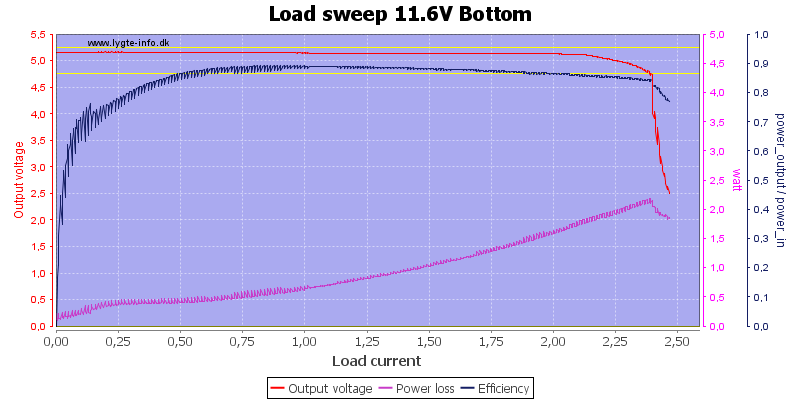
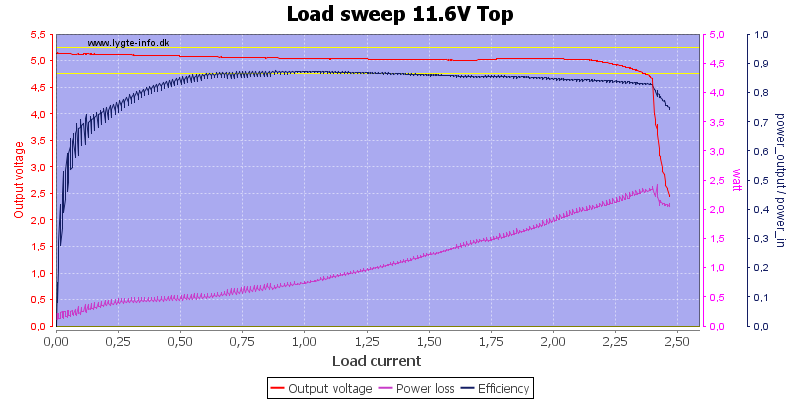
The charger has a over current protection a bit about 2.3A, this is fine for a 2.1A rated charger.
The over current limit is the same on both outputs

Because they are in parallel and the maximum output current is about 2.3A
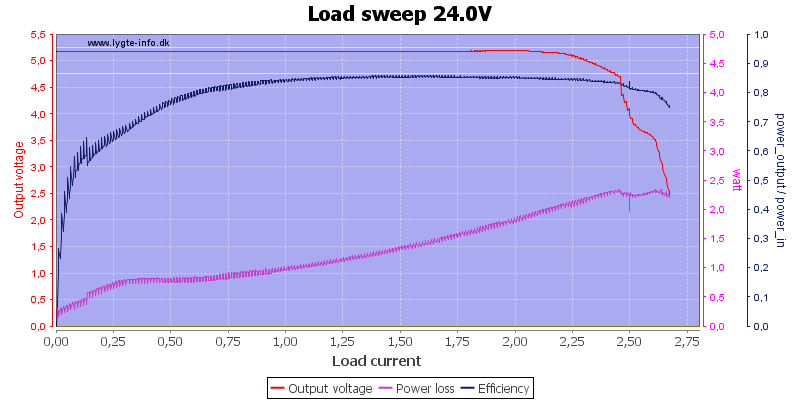
At 24V the over current protection do not looks as good, it trips at the same current but do not drop the voltage as fast.
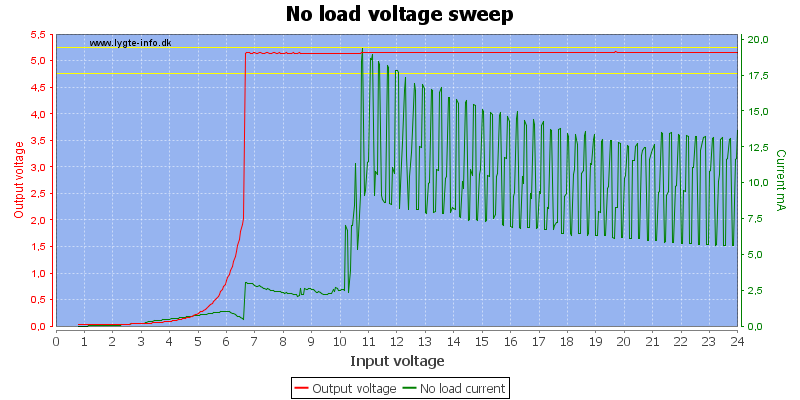
The unloaded current drops a bit up and down, due to the display changing between the different values.
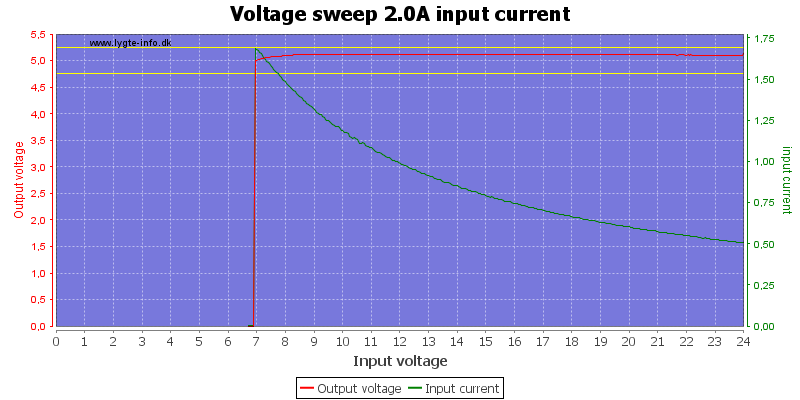

Even at 2A load the output can be maintained down to 7V
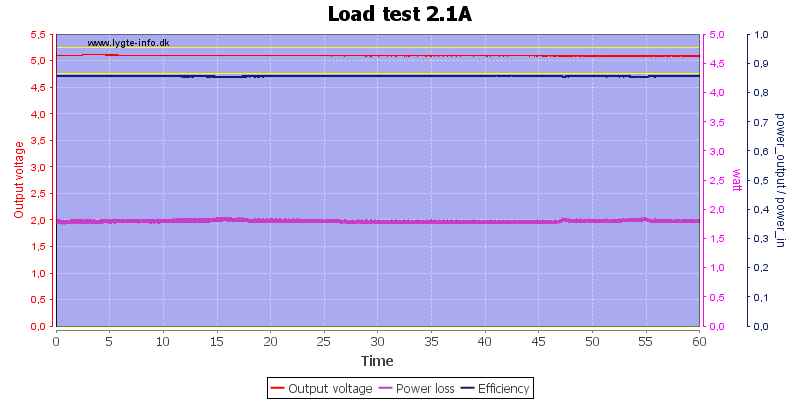
There was no problem running 1 hour with full load.
The temperature photos below are taken between 30 minutes and 60 minutes into the one hour test.
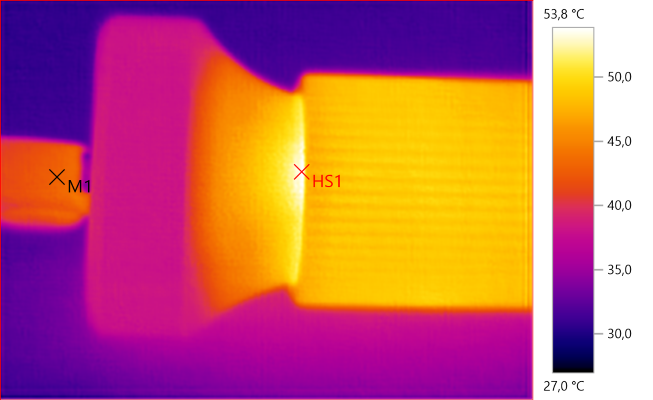
M1: 43.1°C, HS1: 53.8°C

M1: 55.3°C, HS1: 57.2°C
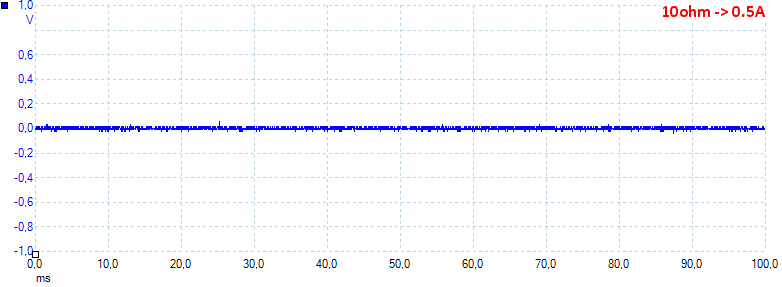
At 0.5A the noise is 11mV rms and 161mVpp
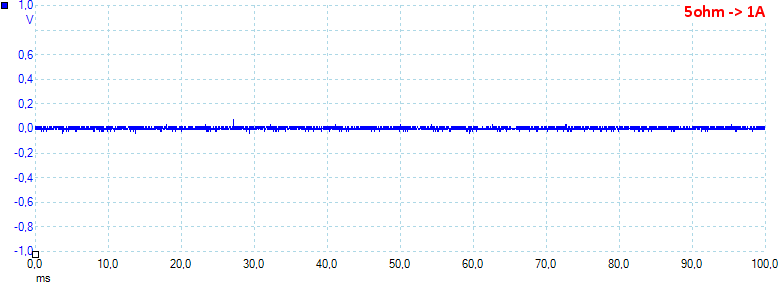
At 1A the noise is 11mV rms and 142mVpp
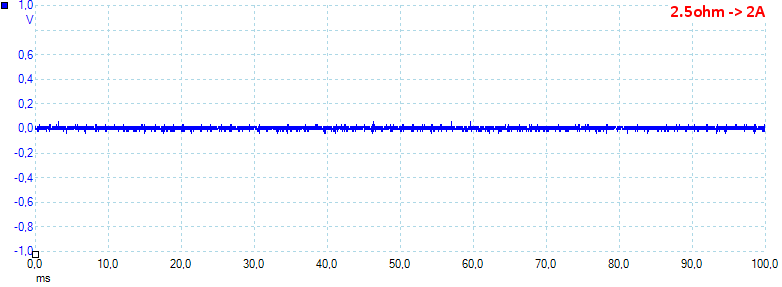
At 2A the noise is 25mV rms and 175mVpp
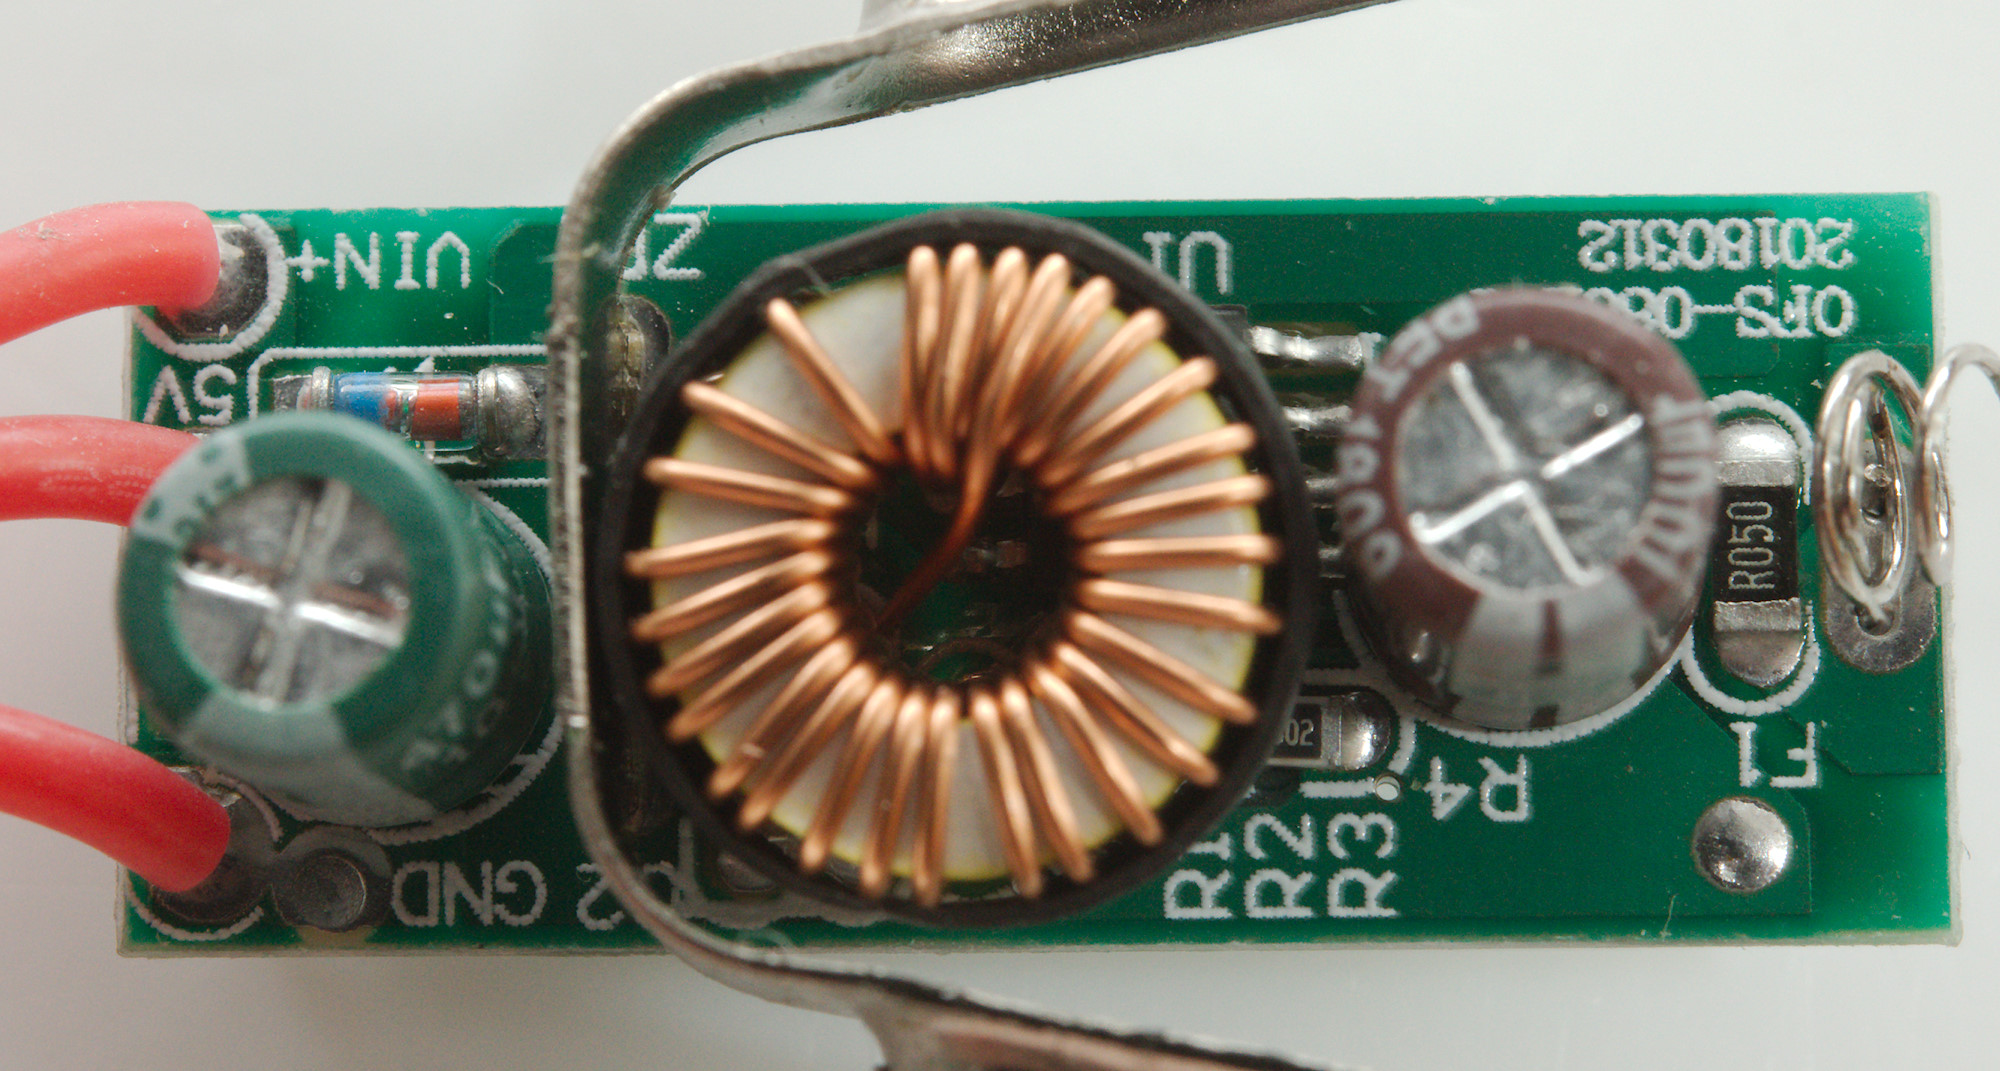
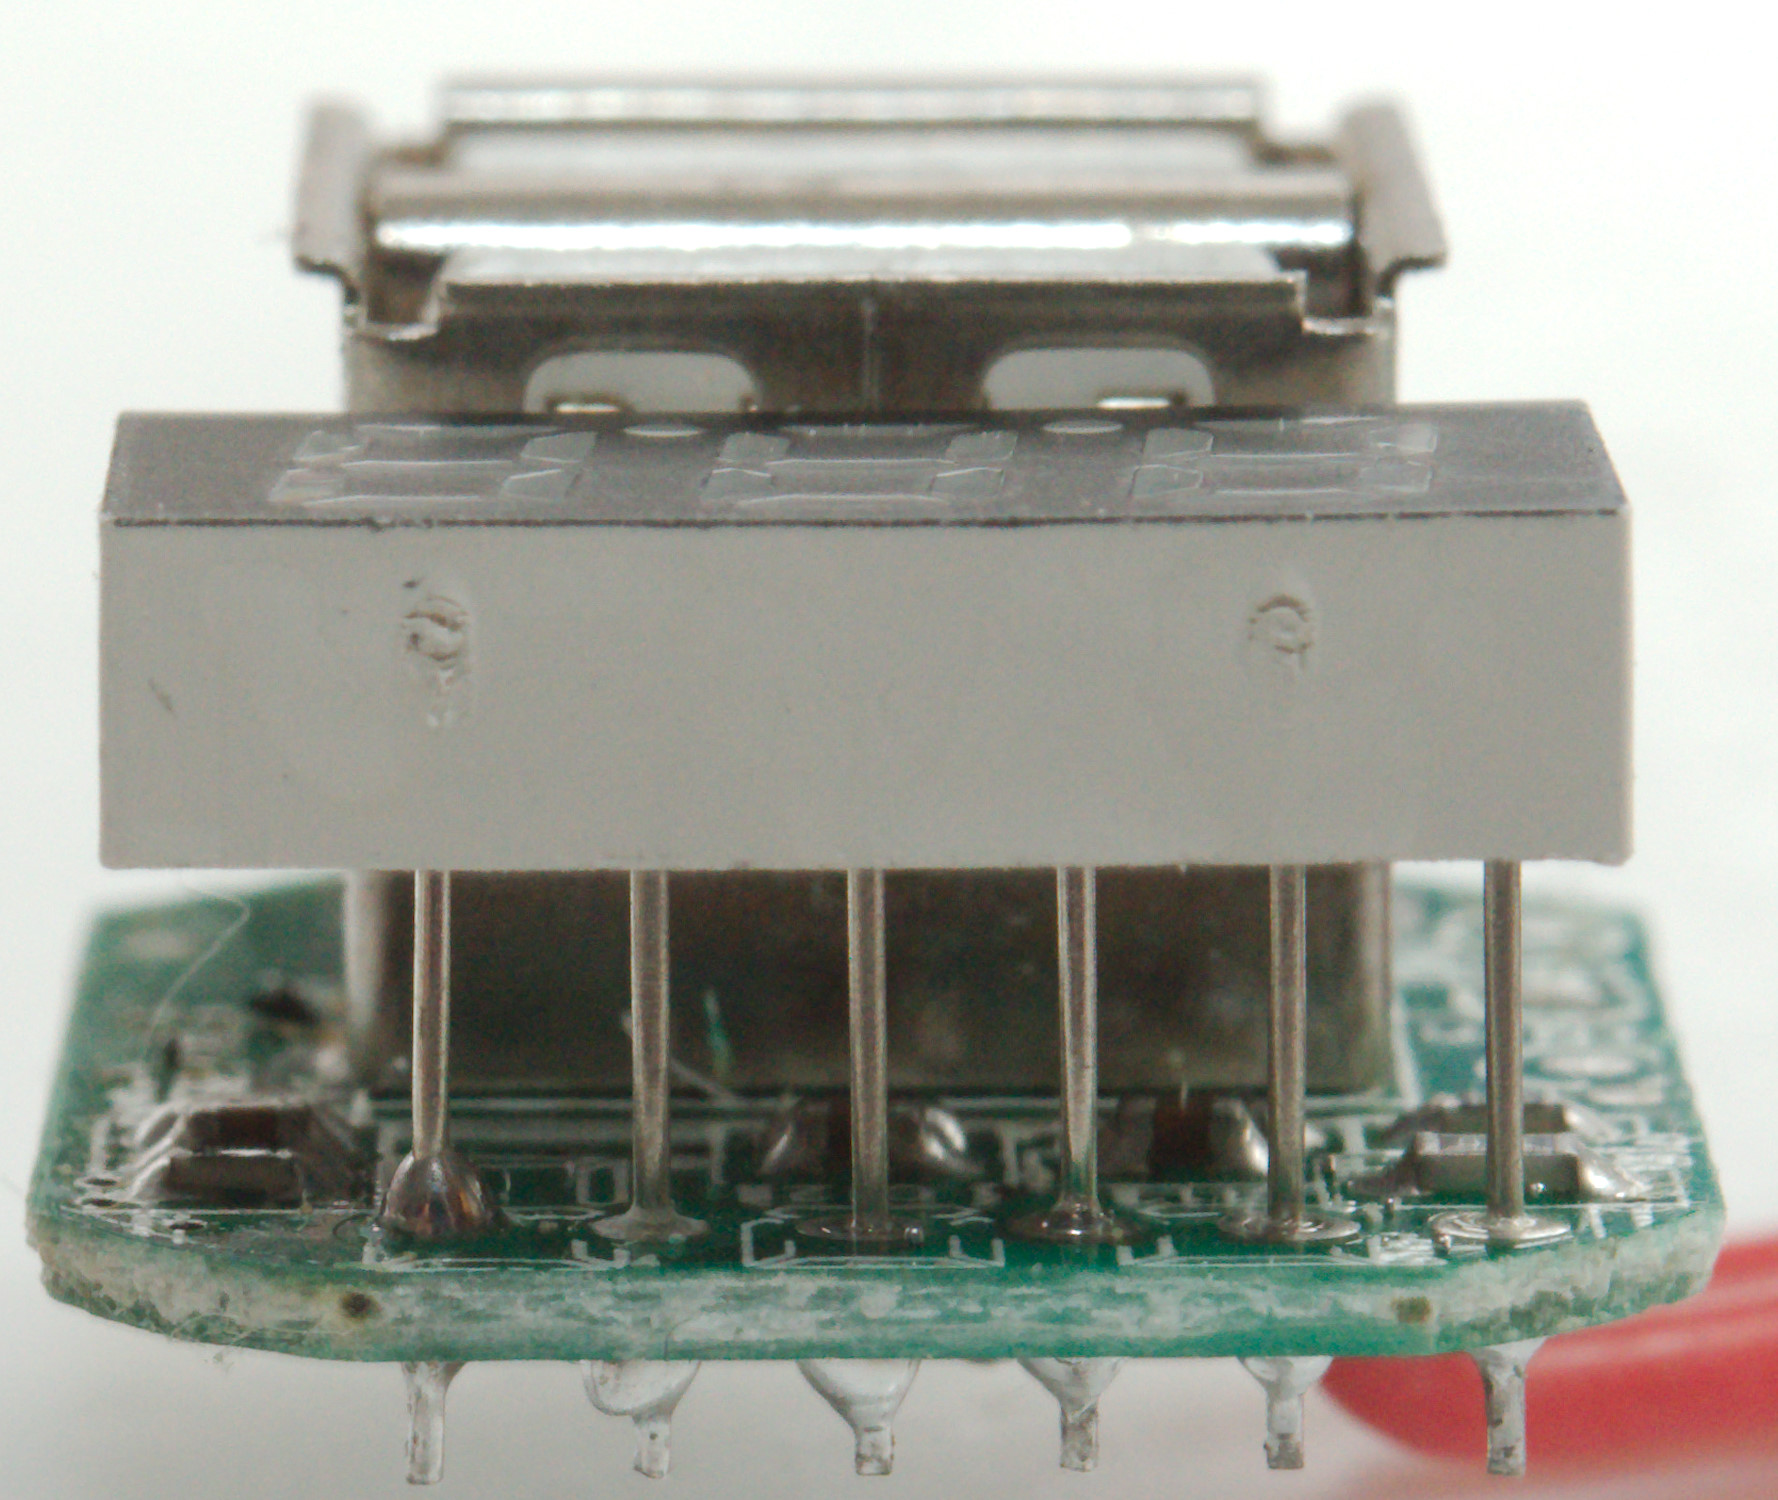
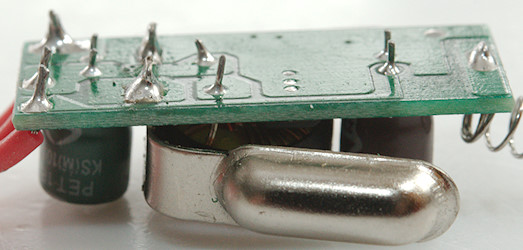
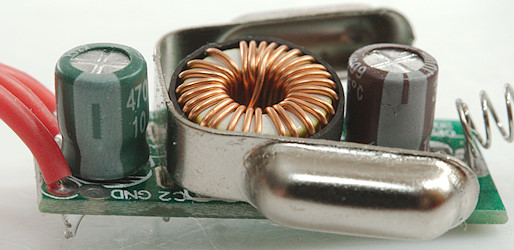
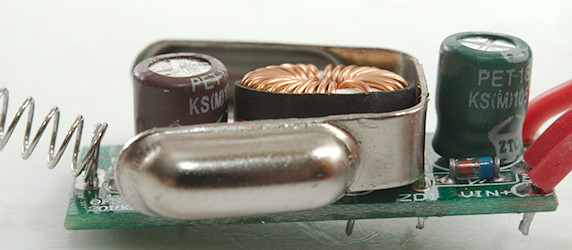
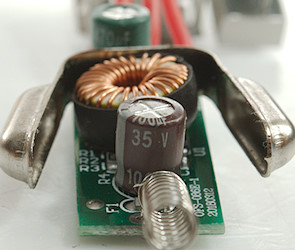
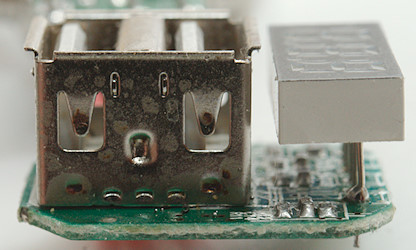
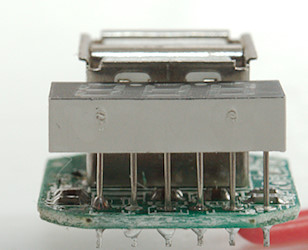
Tear down
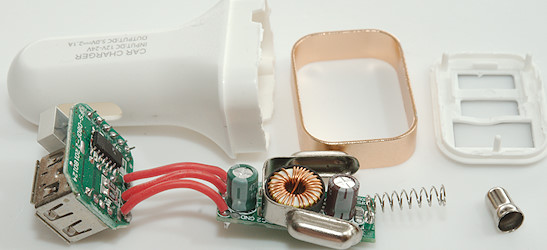
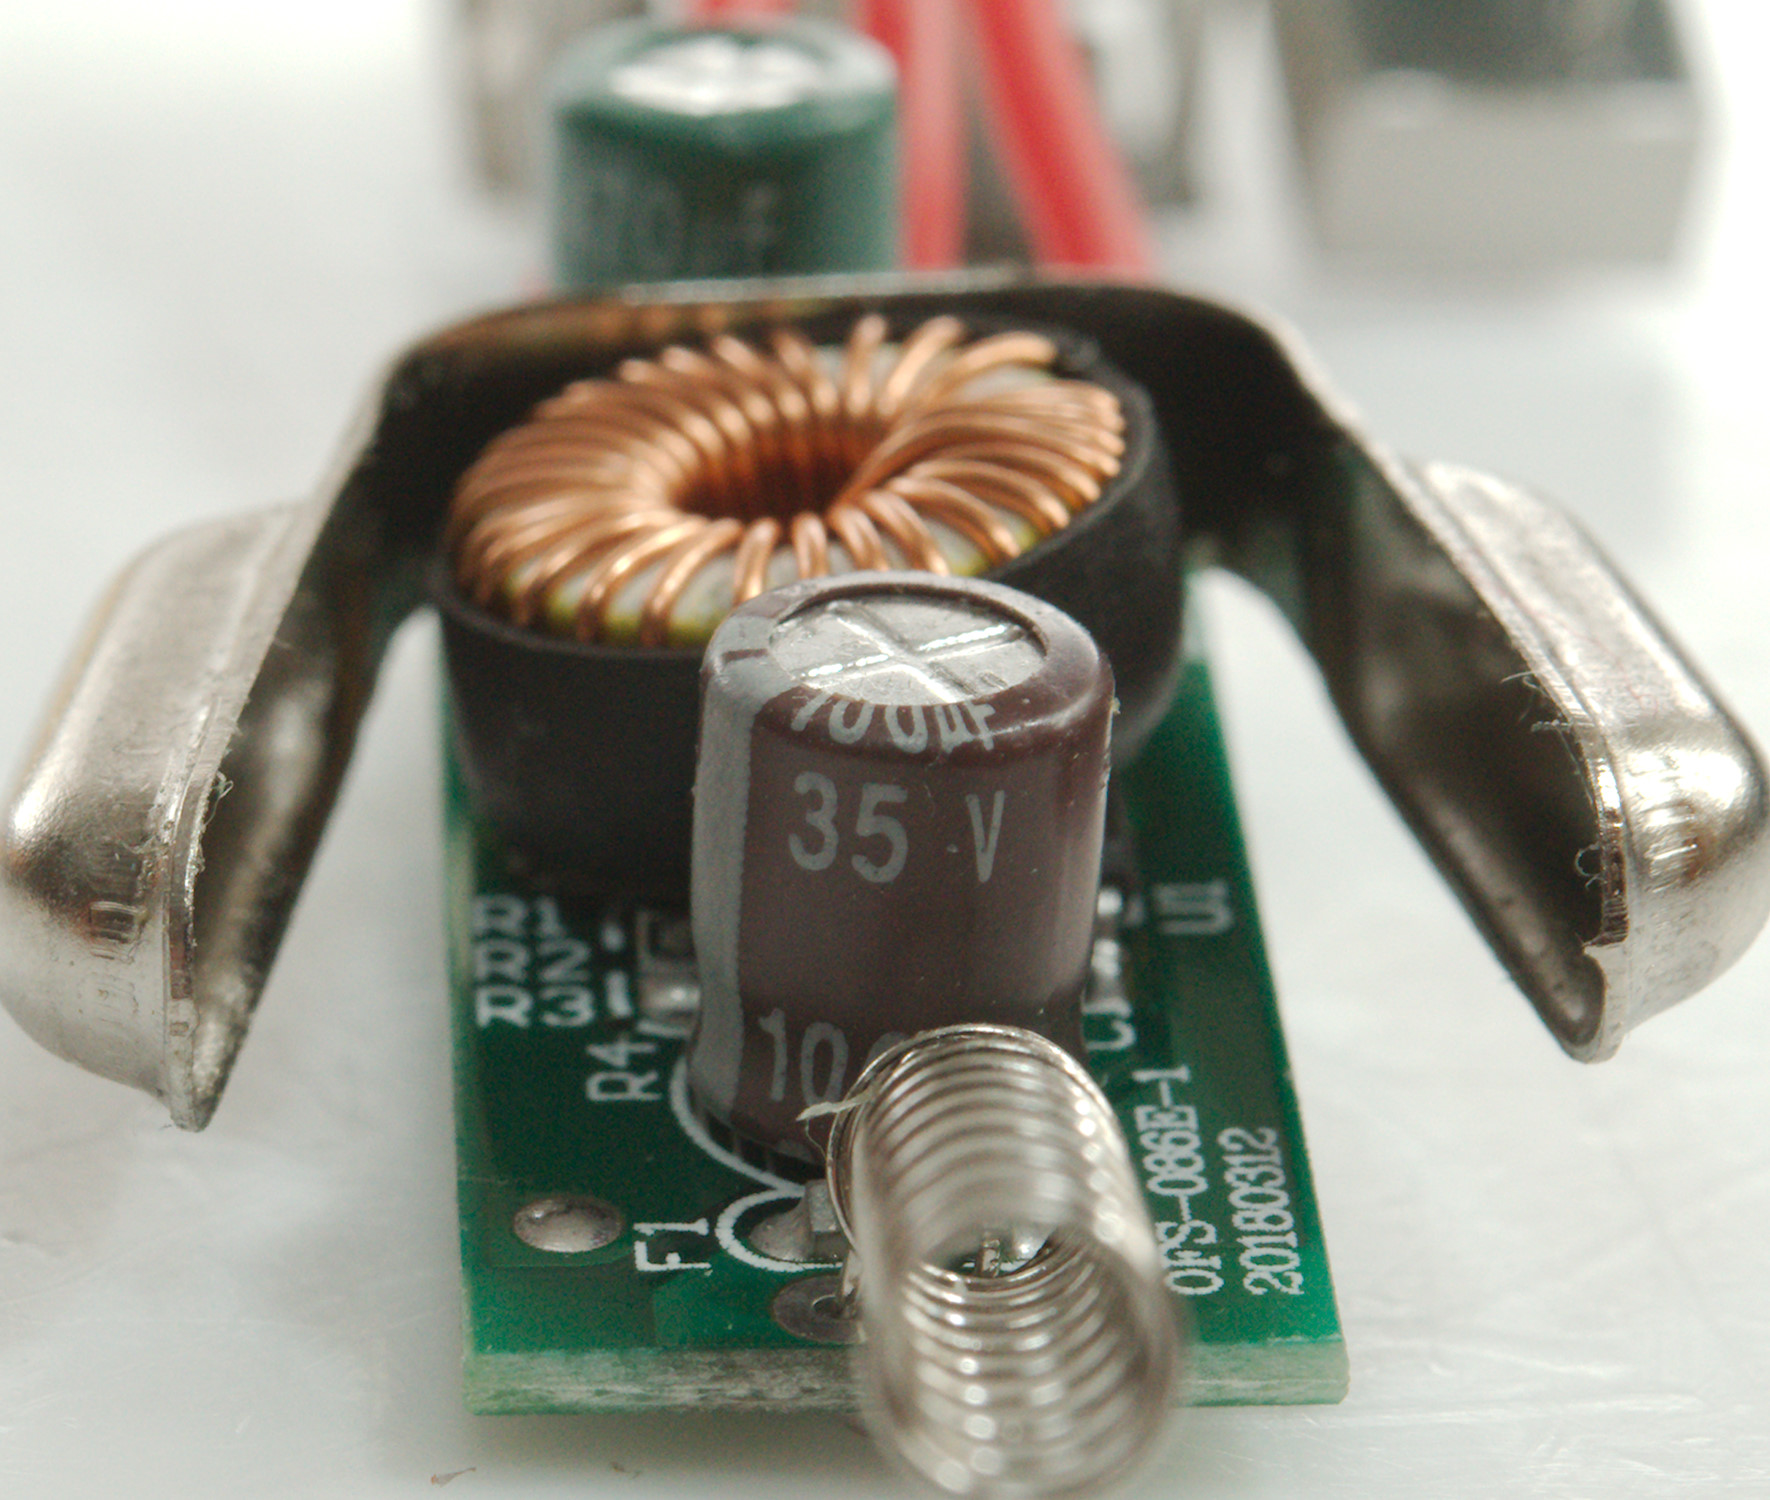
I could break the lid of the charger, the display and usb connectors was then loose and could be pulled out, to get the switcher board I had to press on the sides and use a pin to push from the bottom.
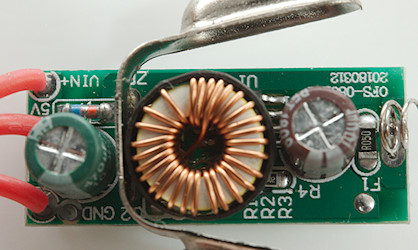
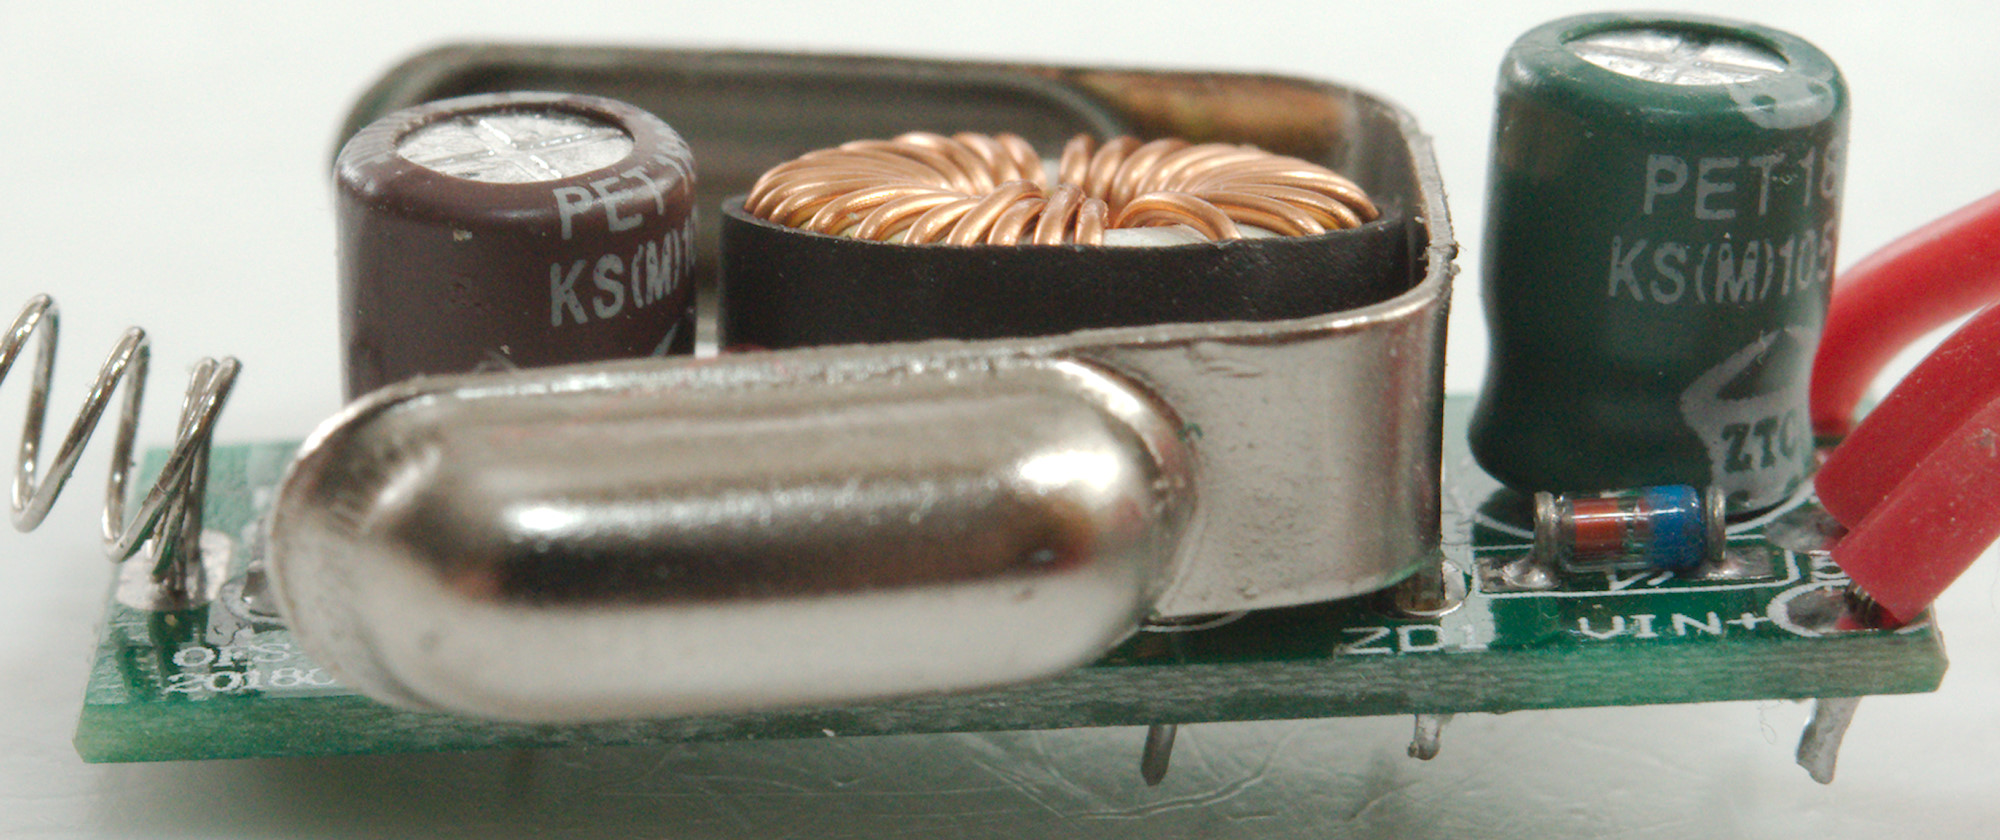
There is space for a fuse at the 12V input, but it is just a 0.05ohm resistor. There is 3 wires to the display board: 0V, 5V and Input (For voltmeter)

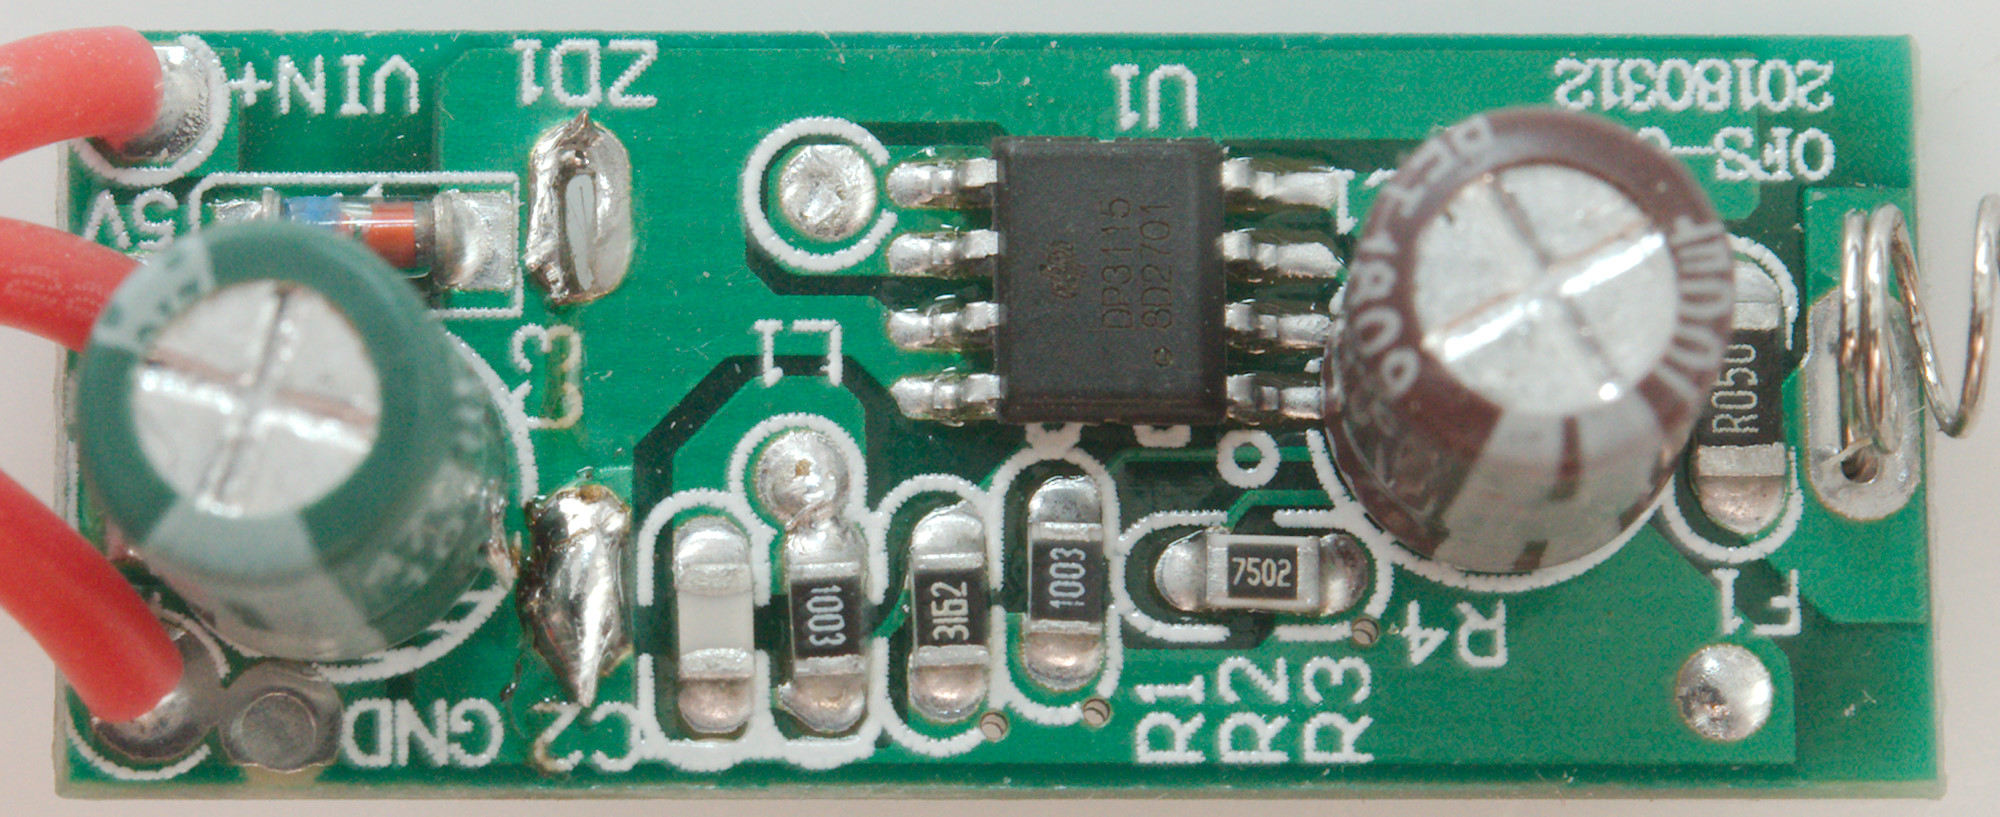
Below the inductor is switcher (U1: DP3115 2.5A synchronous buck switcher).
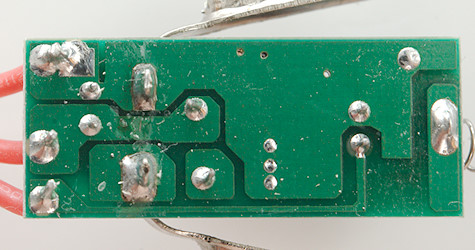
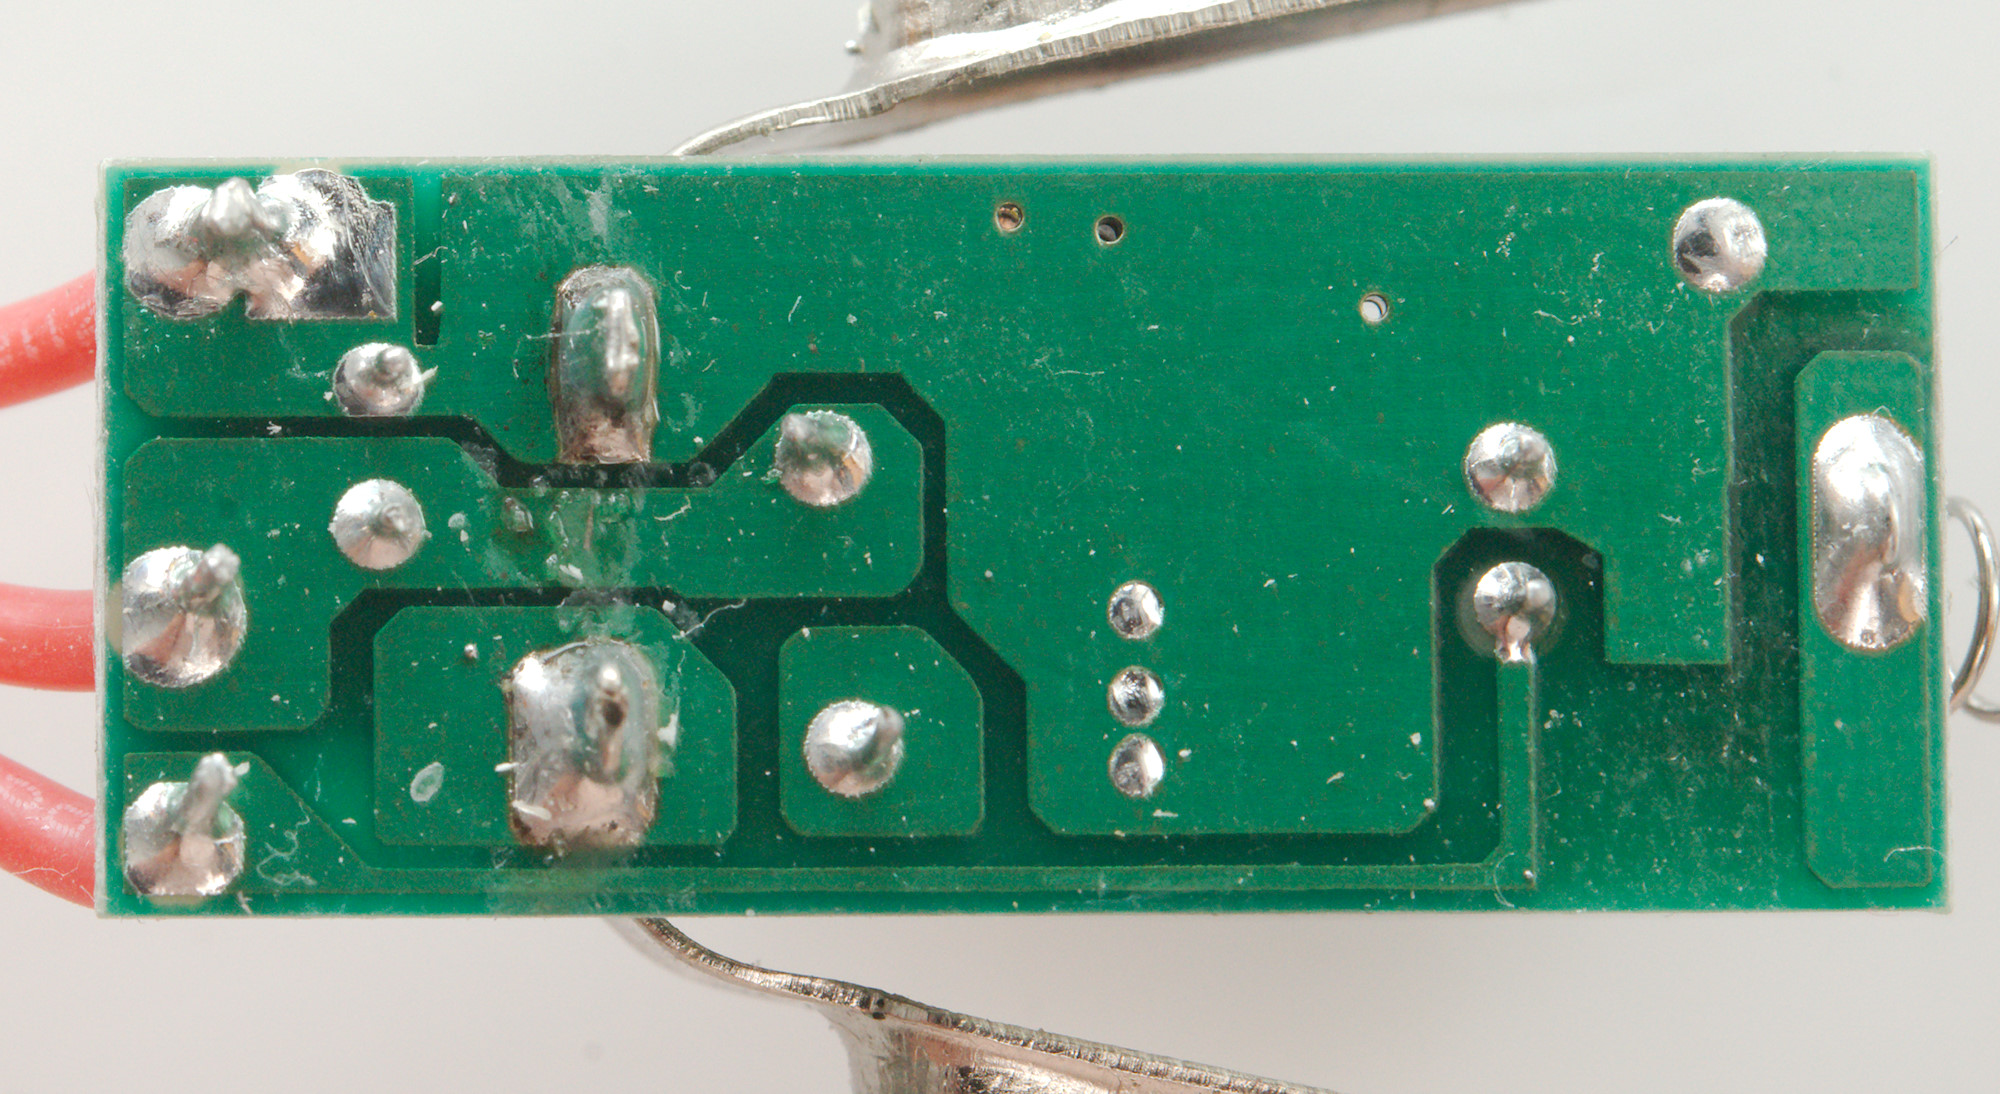
This side do not contain any parts.
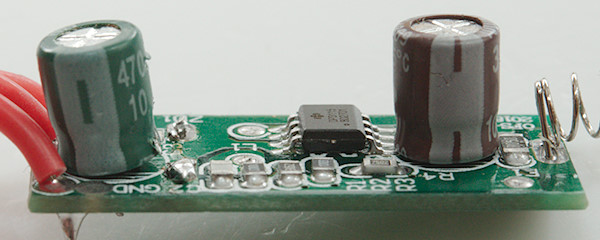

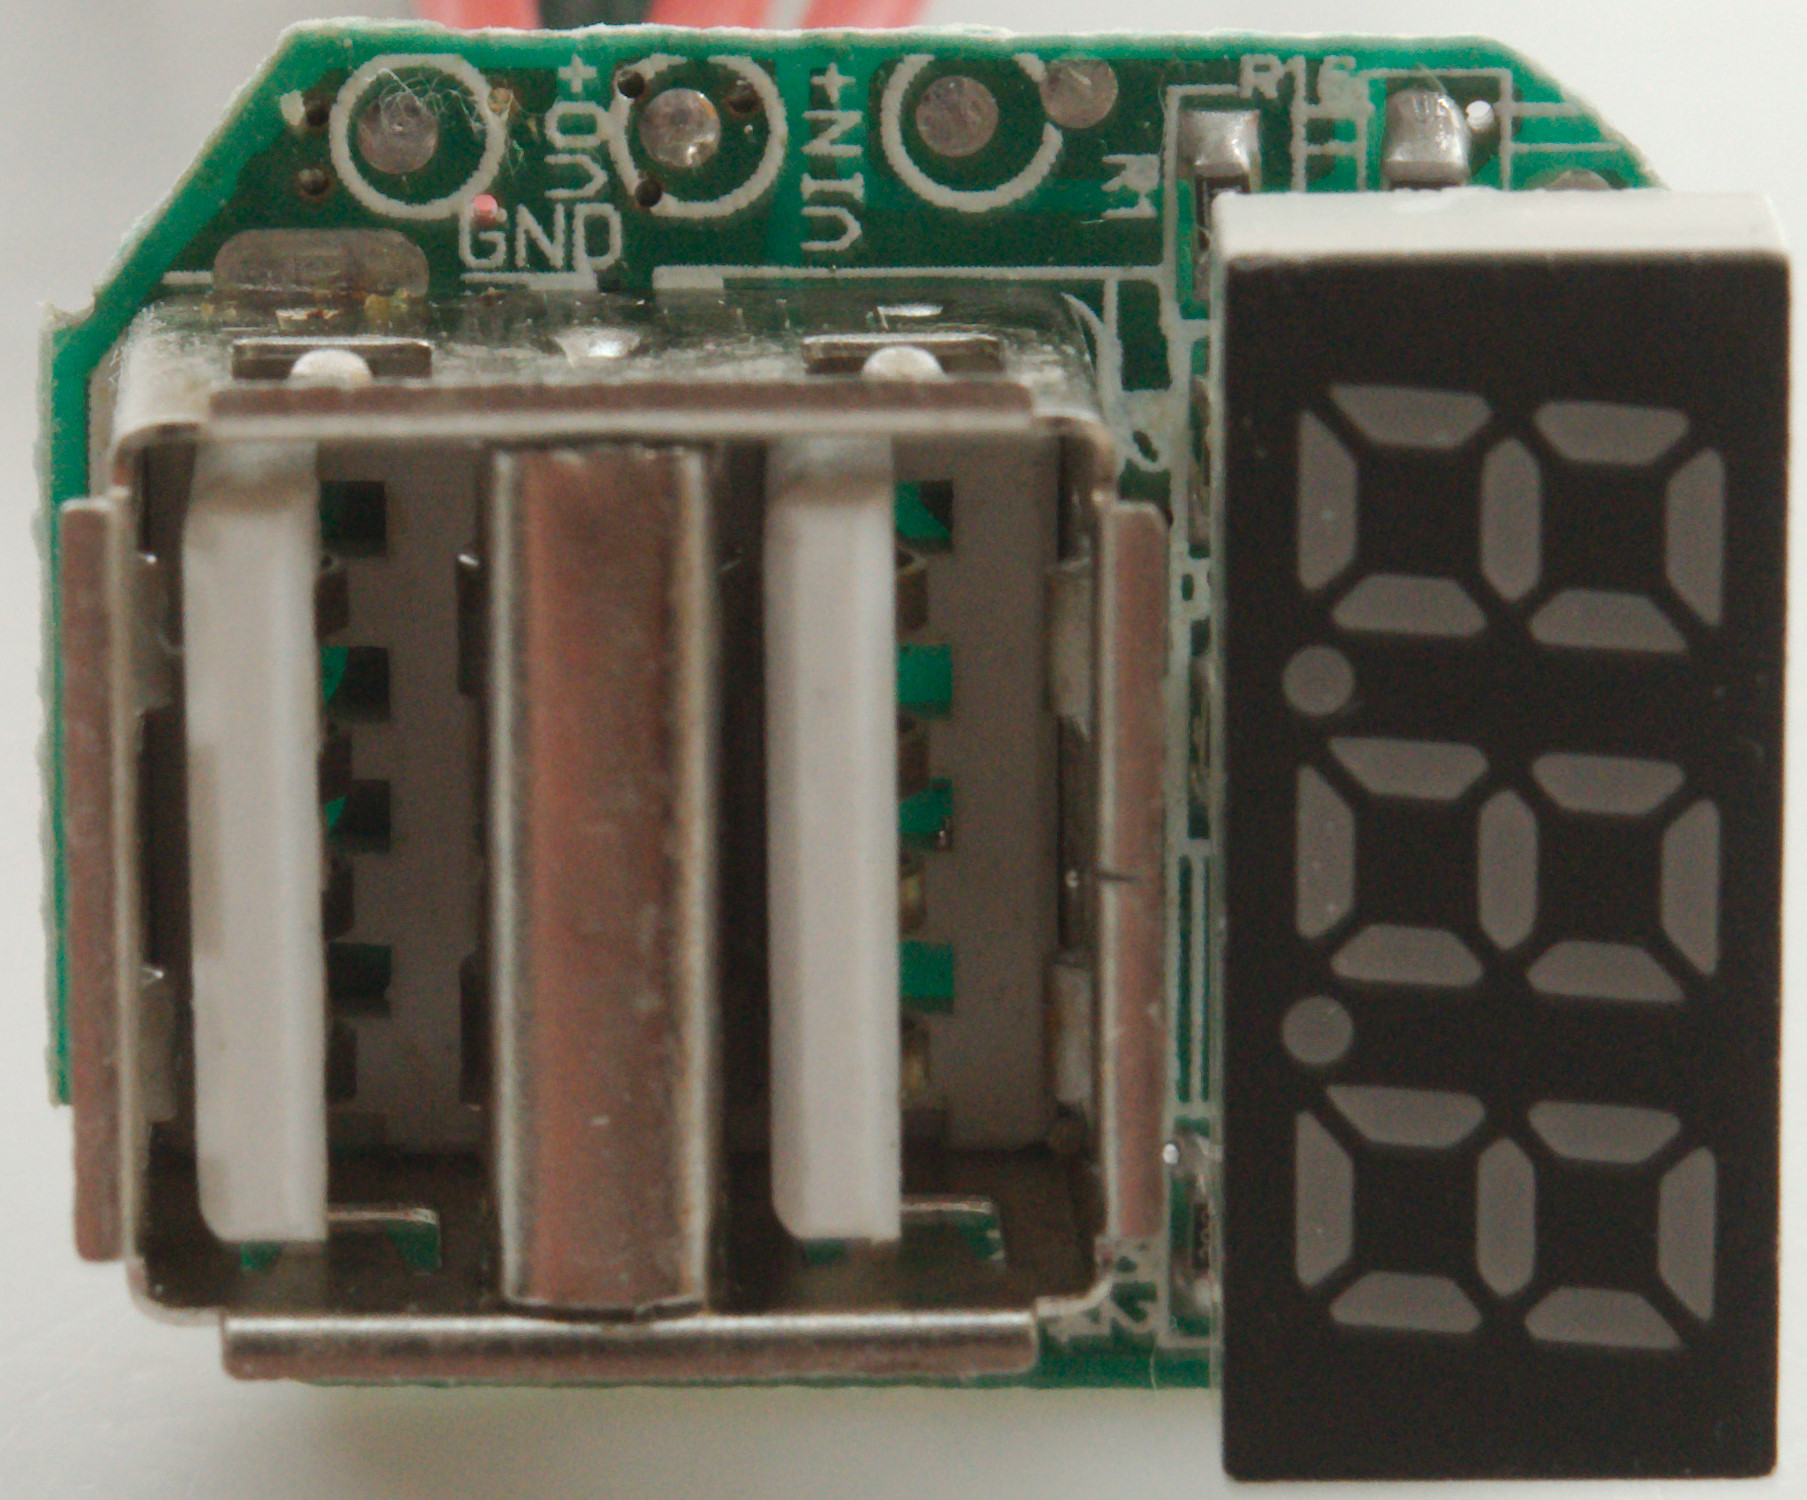
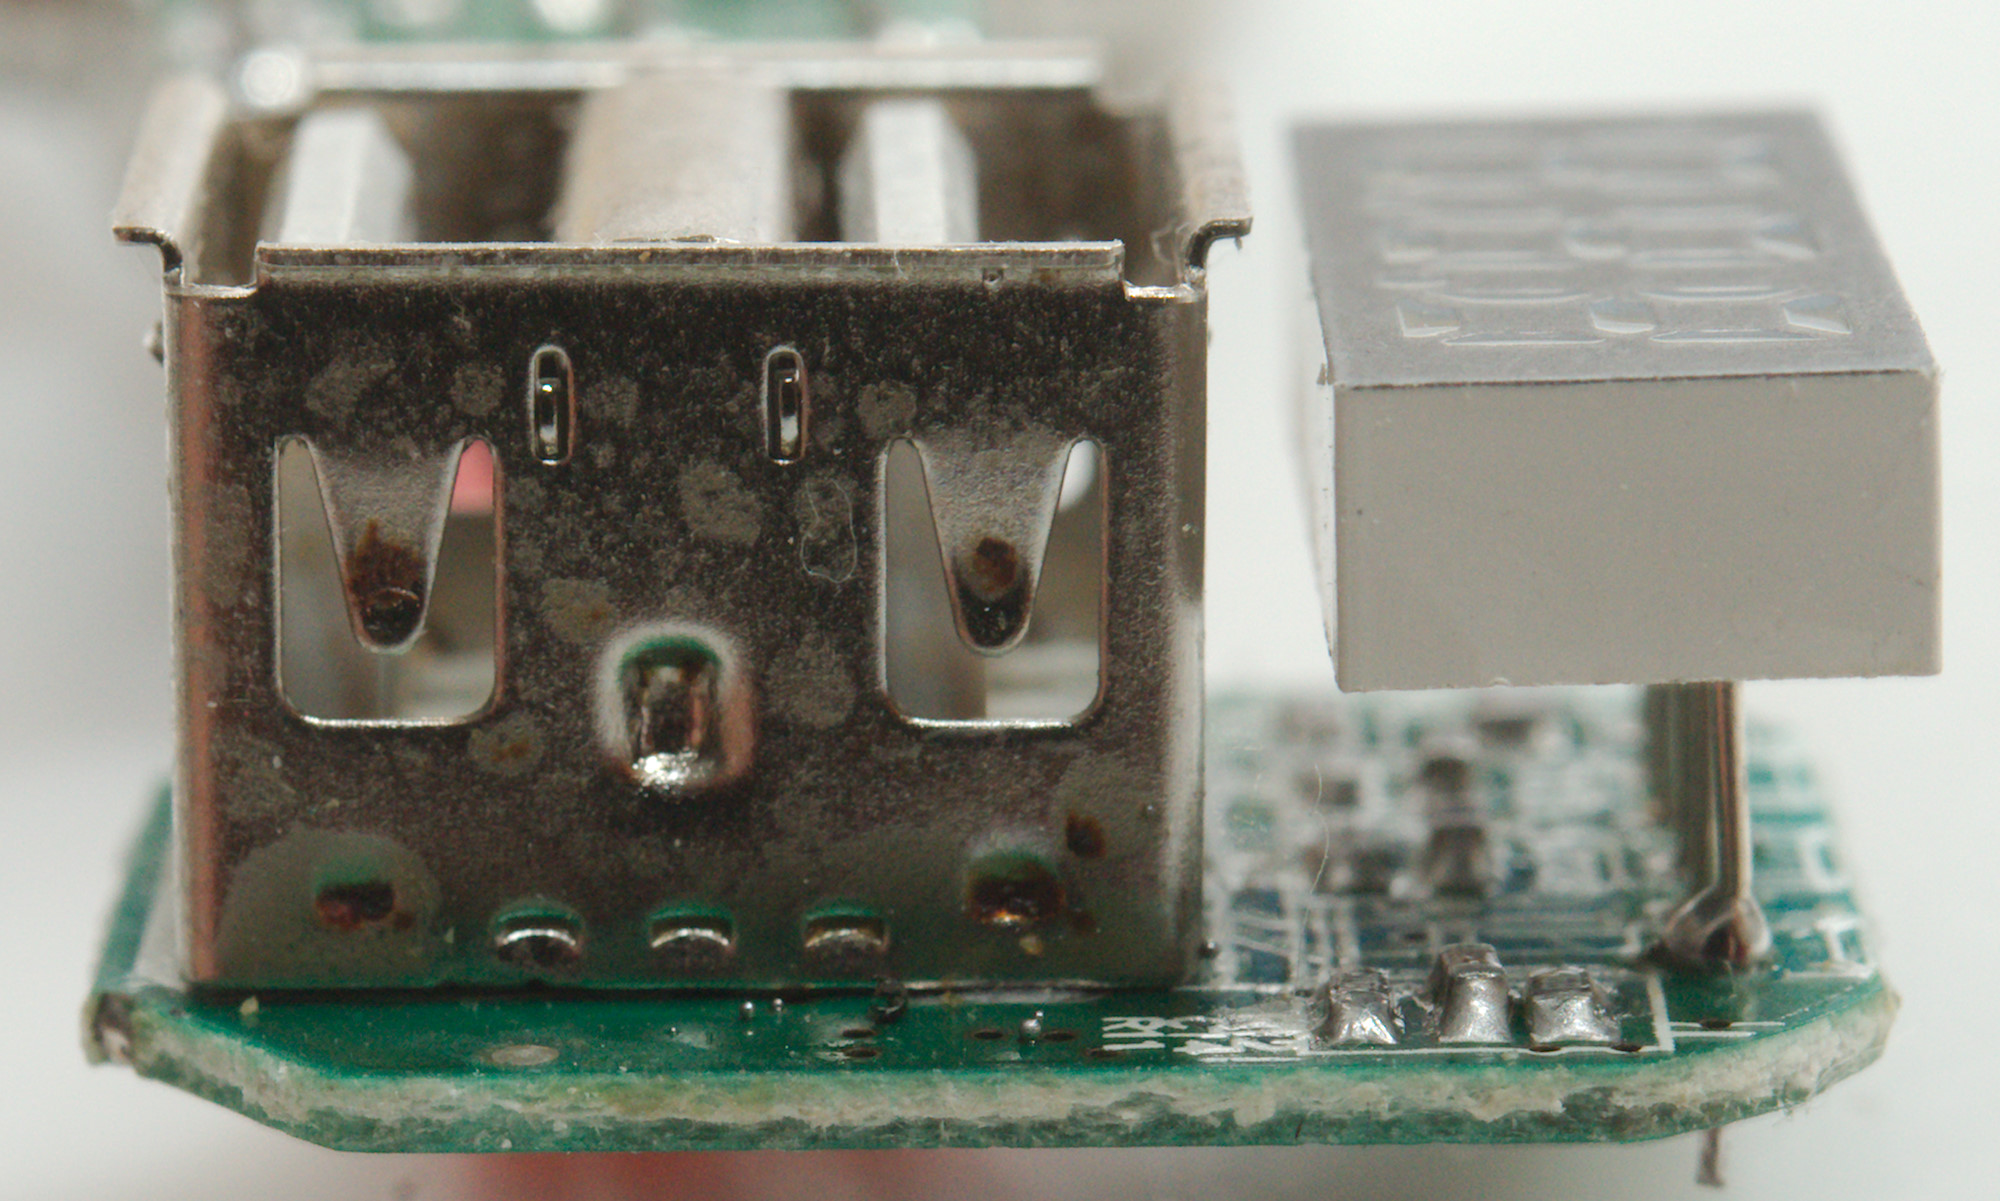
On this side is the display and the two usb connectors, below the display is a few resistors and capacitor. Two of the resistors are probably a voltage divider for input voltage.
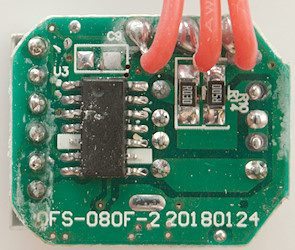
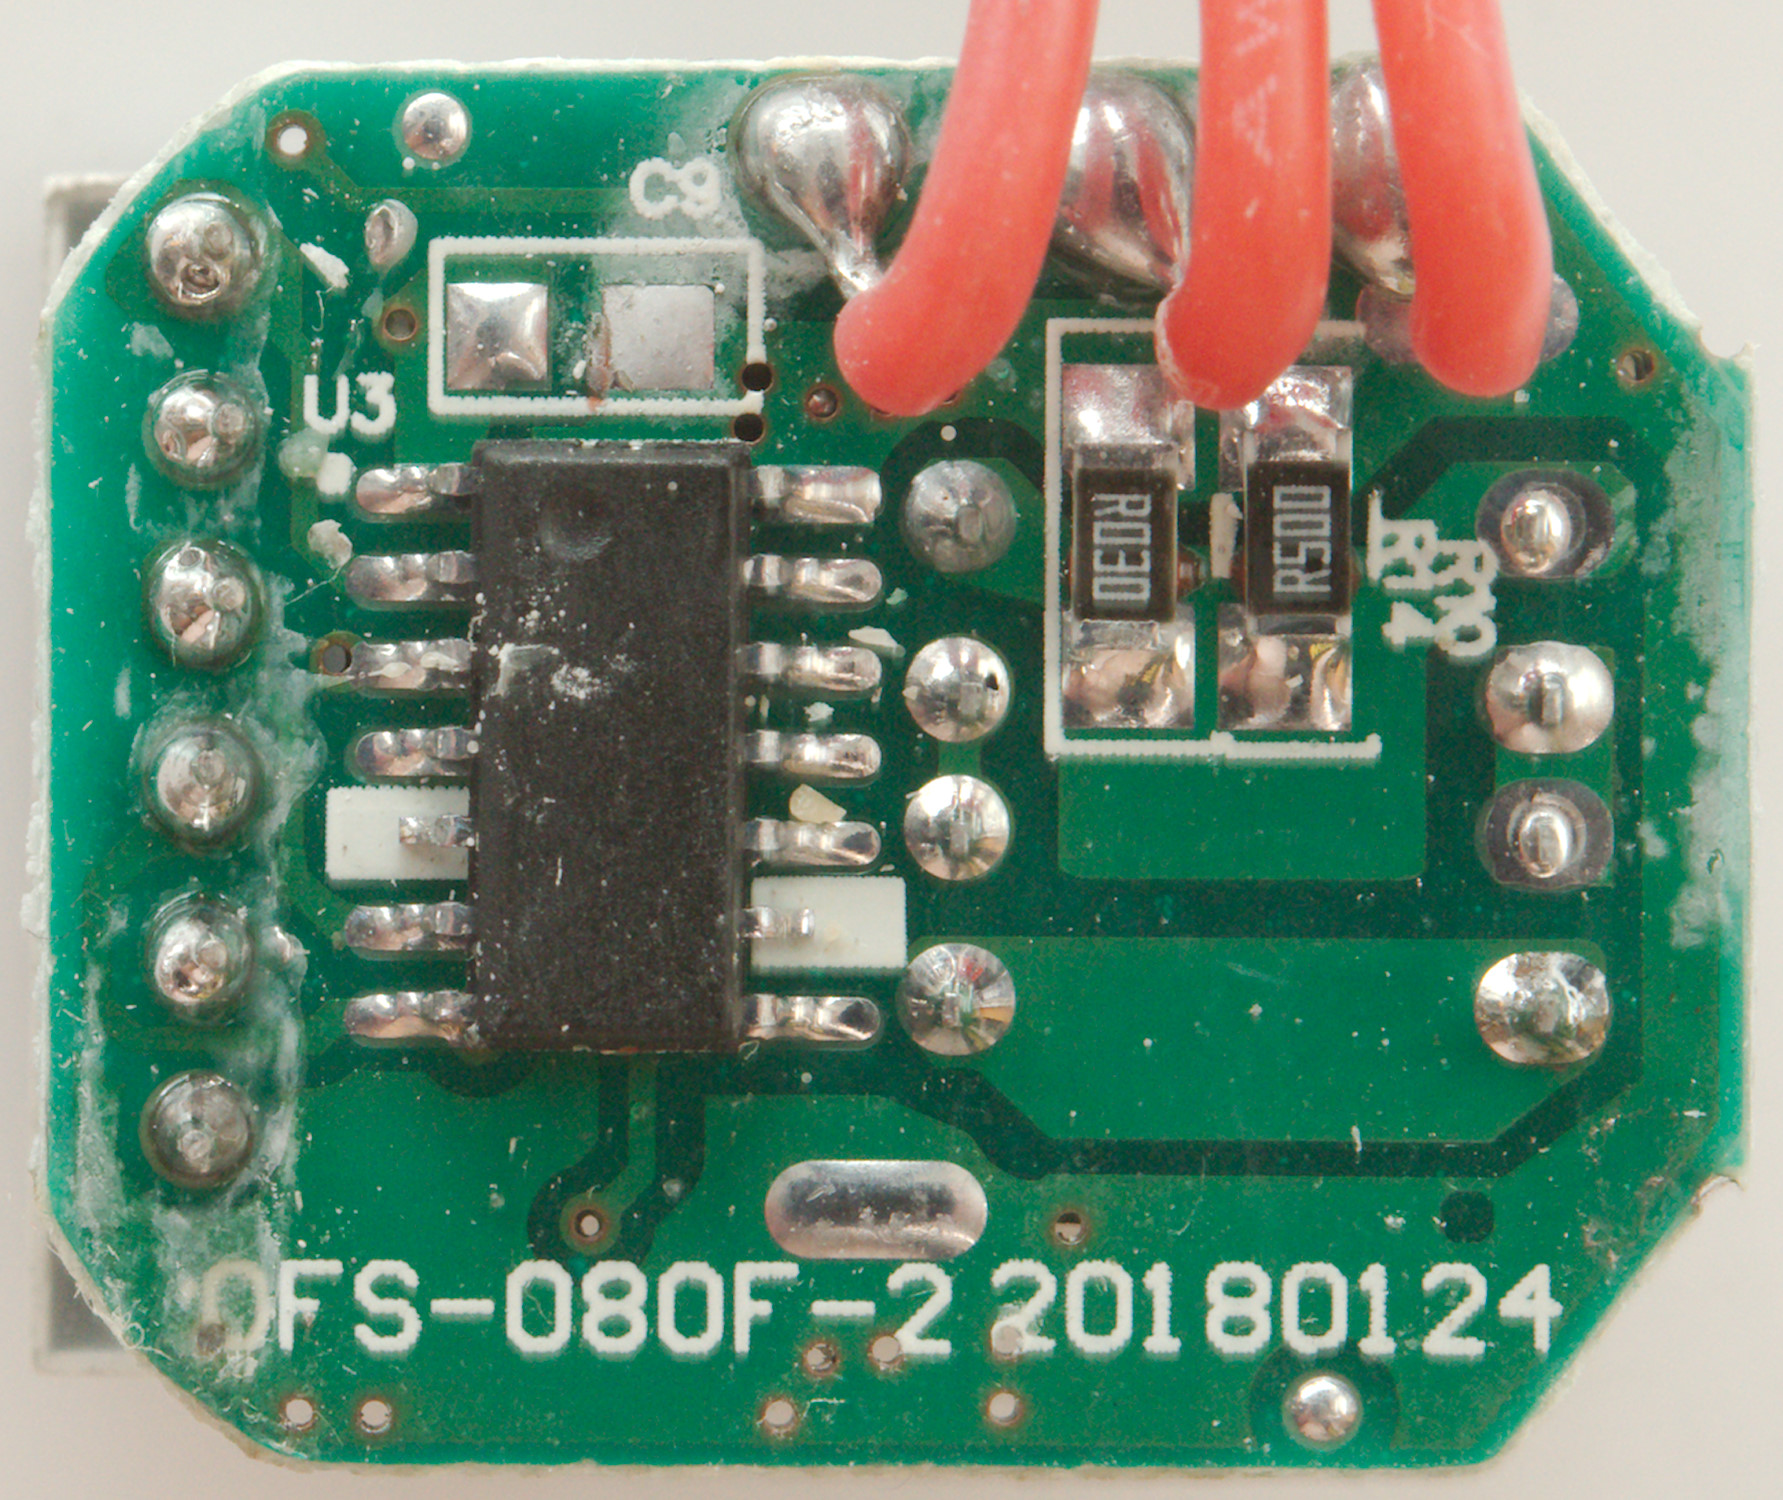
This side has the display controller (U3) and a current shunt (R10 & R14: 30mOhm & 500mOhm) to measure the output current.
The display mist have a build-in chip, with only 6 pins it is not possible to control it directly.
Being a 12V device there is no need to test with high voltages.
Conclusion
I am not impressed with the specification on the dealer site, but the charger works fine, has a good coding, is overload protected at a good level and the display is nice. Only problem is that the current is fine for one usb connector it is way to low for two connectors.
I will rate it as fairly good.
Notes
Index of all tested USB power supplies/chargers
Read more about how I test USB power supplies/charger