What is a Hobby Charger
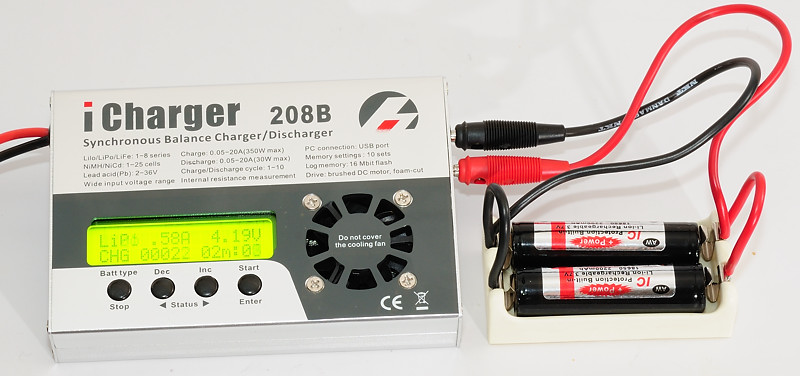
A hobby charger or RC charger is a charger designed to charge many kinds of battery packs. This is because it is designed for charging batteries for RC-cars/RC-planes/RC-boats/etc. and is often designed for field use, i.e. it can be supplied from a car battery. Some hobby chargers have a build in power supply and can be supplied from a mains outlet, but most needs an external stabilized low voltage (12-18 volt or 12-28 volt for higher power chargers) supply.
Some common traits for hobby chargers are (Not all chargers have all the functions, but most has):
- Supports LiIon, NiMH and Pb batteries.
- Can handle one or more cells in series.
- Can balance multiple LiIon cells.
- Can charge, discharge and cycle batteries.
- Measures how many mAh is charged or discharged from the battery.
- Has adjustable charge and discharge rates.
- Can charge at high rates.
- Do follow the correct charging algorithms for the different types of batteries.
- Does not include any tray/cradle to place the batteries in.
- Has a couple of safety settings/functions to break the charge, even if the normal termination fails.
- Remembers the last selected settings.
- Can save a couple of presets.
There are big differences between how powerful these chargers are, from small chargers that can charge with 50 watt up to the high power units with more than 1000 watt (Remember to get a big enough power supply). There are also differences in the output voltage, this limits how many batteries that can be charged in series, this is usual between 6 and 14 LiIon batteries. Even the smallest of these chargers are enough to charge one or two a 18650 batteries at a time with the maximal allowed rate. Discharge is usual much more limited, because the charger needs to get rid of the energy.
Nearly all hobby chargers are single channel, i.e. they only have one connection for a battery, but a few chargers with more channels exist.
The cheapest hobby chargers is about $20 to $30 when bought in China.
Battery support and charging
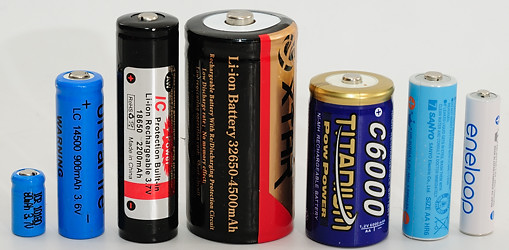
A hobby charger will usual support 6 battery types with just about any capacity and it can nearly always be adjusted to the correct charging algorithm and current.
The supported batteries are:
- Lithium Polymer (LiPo) that will be charged to 4.2 volt per cell with CC/CV
- Lithium Ion (LiIo) that will be charged to 4.1 volt per cell with CC/CV (This is not used for the typical LiIon batteries, they must be charged with the 4.2 volt setting).
- Lithium Iron (LiFe) that will be charged to 3.6 volt per cell with CC/CV.
- Nickel-metal hydride (NiMH) that will be charged with a dv/dt termination.
- Nickel-cadmium (NiCd) that will be charged with a dv/dt termination.
- Lead-acid (Pb) that will be charged to about 2.45 volt per cell with CC/CV.
For all battery types it is possible to select charge rate.
Typical functions
A Hobby charges has many different charge and discharge functions:
- LiIon fast charge, this will usual charge until the current are down to 1/5 of the charge current. This is the fastest charge, but the batteries are not completely filled.
- LiIon charge, this will usual charge until the current are down to 1/10 of the charge current.
- LiIon slow charge, this will charge until the current are somewhere below 1/10. This is the slowest charging and will stuff the most energy into the battery.
- LiIon balance charge, this requires connections from the balance port to each cell and will supervise that each cell in a series connection to prevent it from being overcharged. This is used with battery packs and can also exist in slow/fast versions.
- LiIon storage, this will charge or discharge the cell to optimal voltage for long term storage (i.e. storage for months or years).
- LiIon discharge, this will discharge the battery while measuring how much current was in it. This function is very useful to check a cells capacity.
- LiIon cycle, a combination of charge and discharge, it is often possible to do multiple cycles and see how much current was charged and discharged for each cycle.
- LiIon balance, only do the balancing, i.e. discharge the cells with high voltage until they all have the same voltage.
- NiMH/NiCd charge, regular fast charge that uses dv/dt to stop the charge.
- NiMH/NiCd forming charge, a special charge that is used to balance new battery packs.
- NiMH/NiCd discharge, this will discharge the battery while measuring how much current was on it. This function is very useful to check a cells capacity.
- NiMH/NiCd cycle, a combination of charge and discharge, it is often possible to do multiple cycles and see how much current was charged and discharged for each cycle.
- Pb charge, normal charge.
- Pb discharge, this will discharge the battery while measuring how much current was on it. This function is very useful to check a cells capacity. Some Pb batteries do not like a full discharge!
- Measure internal resistance in batteries.
- Regenerative discharge, when discharging the battery the power is not wasted as heat, but returned to the supply leds, this will only work if the charger is supplied from a rechargeable battery! When the charger has this function it can usual discharge at very high rates.
Note: LiIon is used to describe all 3 types of LiIon batteries: LiPo, LiIo and LiFe
Safety functions
A hobby charger has some safety function build in, these can be useful, but can also prevent some perfectly legal parameter settings from working. These safety settings can usual be adjusted or disabled.
The typical safety includes:
- Temperature, a thermo sensor is placed on the battery and the charger will break the charge if the battery get hot.
- Time, there is usual defined a maximum time that must be used to charge a battery, before the charger will stop. This is fine for normal charging, but if a low charge rate is used, the timer may break the charging premature.
- Maximum capacity, there is also a limit on the maximum charge delivered, when using large batteries or parallel charging this may stop the charging premature.
Other function
A hobby charger often has a lot of configurable settings and sometimes a few other functions:
- Adjustment of the charge voltage, i.e. instead of using the build in LiIon 3.6/4.1/4.2 volt it might be possible to adjust the voltage for each battery type to something else.
- How sensitive the dv/dt is.
- Trickle charge enabled and current, for NiMH/NiCd/Pb batteries there will usual be a small current when the charging is finished, this current secures that the cell stays charged.
- Time interval, how long to wait between a charge and a discharge.
- Sound, there is usual some sounds when charging is finished or failed or when a key is pressed, these can often be disabled.
- Battery monitor, with a computer connection it can be used to graph how the battery is charged/discharged by some other equipment.
- Foam cut, a high power charger can easily deliver current to a foam cutter.
- Motor break-in, in RC people might want to break-in the brushes in a DC motor.
Computer connection
Many hobby charges has a computer connection, making it possible to log how the battery is charged and discharged on the charger. This can be very comprehensive with voltage for individual cells, battery current, battery capacity, battery energy, battery temperature, charger temperature, supply voltage.
Some software is required on the computer to capture the data and show it, this is often a free program called LogView that can display curves and export data to csv files.
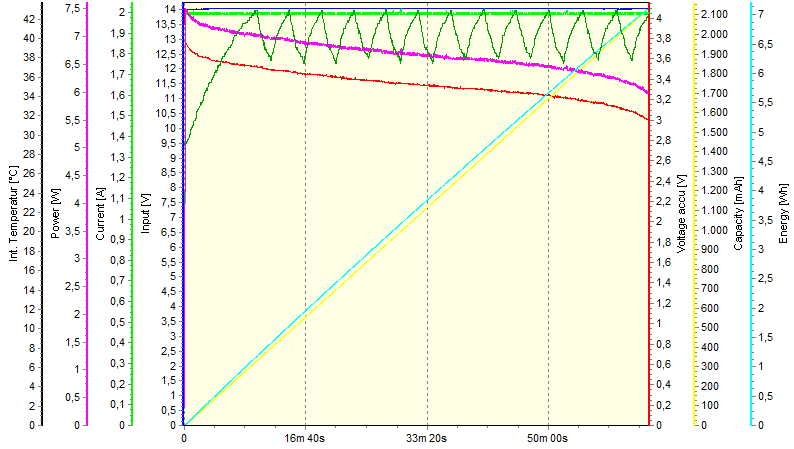
Here is an example of a discharge curve from iCharger shown in logview. It is possible to enable/disable each curve, i.e. usual the internal temperature in the charger is of little interest. How many parameters that can be show in the graph and the resolution of each depends on the charger.
Usage
To charge a battery on a hobby charger, the following steps must be used:
- Connect power / power supply to charger
- Connect battery to charger
- Select battery chemistry. This will mostly be LiPo or NiMH
- Select function (i.e. charge)
- Select current, for small LiIon batteries, the rated mAh can be used as charge current, for larger LiIon batteries (18650), reduce to 70% of the rated mAh.
- Select number of batteries in series, for single cells this will be one.
- Press start
The selections will usual be rememberd to next time the charger is used.
A quick look at two chargers
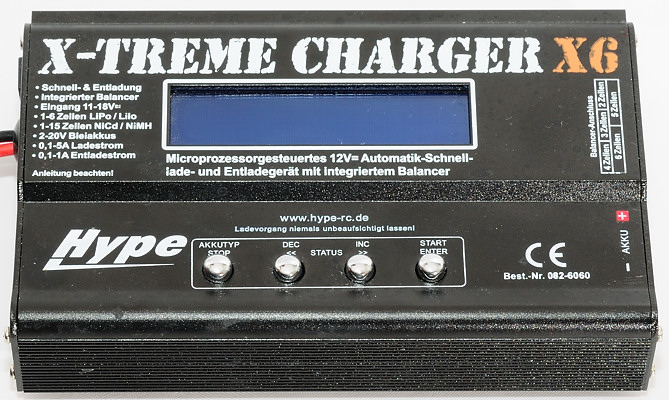
The first one is a simple charger with up to 5 ampere charge current and only the basic functions.
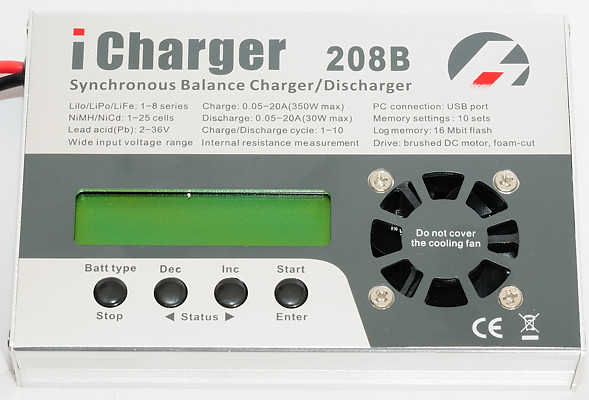
This one is much more advanced with up to 20 ampere charge current, computer interface and build in memory for offline logging. It also has some extra functions.
The Hype charger can be powered from a laptop power supply or connected to a power supply with two alligator clips (I replaced the clips with two 4 mm banana plugs). It has a connection for a temperature sensor, but none was supplied, making this connector useless.
On the other side is the charge current output with two 4 mm connectors. There is also balancing connections for battery packs with multiple cells.


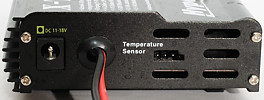
The iCharger has a power cord with 4 mm banana plugs and two large alligator clips that could be used on the plugs that were supplied. There is no connection for a laptop power supply. This charger has a USB connection that can be used for logging and software upgrades.
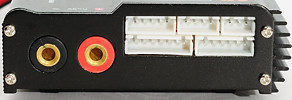
On the other side is the charge current output with two 4 mm connectors, a input for a supplied temperature sensor and a simple connector for balancing.
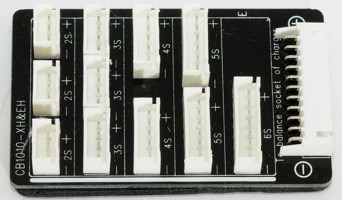
For people needing more advanced balancing connection a break out board is supplied and other types can be bought. The other types might be required because there are different types of connectors in use, depending on battery pack manufacturer.


When charging they have almost the same display, both shows battery type, battery voltage, actual charge current, how long time has been used and how much current has been charged into the cells.
Both charges has some extra displays that can be activated.
How does they charge
Here are two charge curves for each charger, first the Hype:
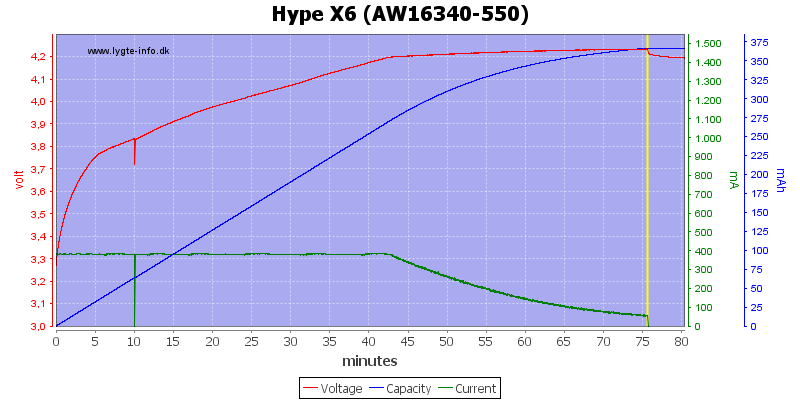
A AW IMR16340 cell that has lost some capacity over time. On the charger I has selected 400mA charge current. The charger keeps a stable current until about 42 minutes, where it changes to constant voltage charging.
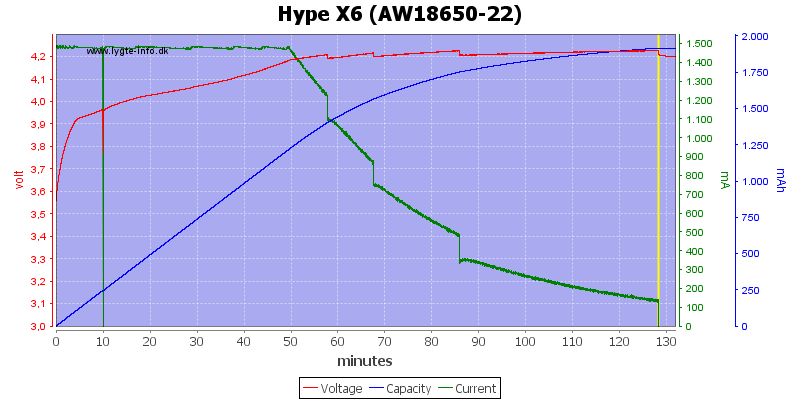
A larger cell, I has selected 1500mA as charge current. Here it changes from constant current to constant voltage at 50 minutes.
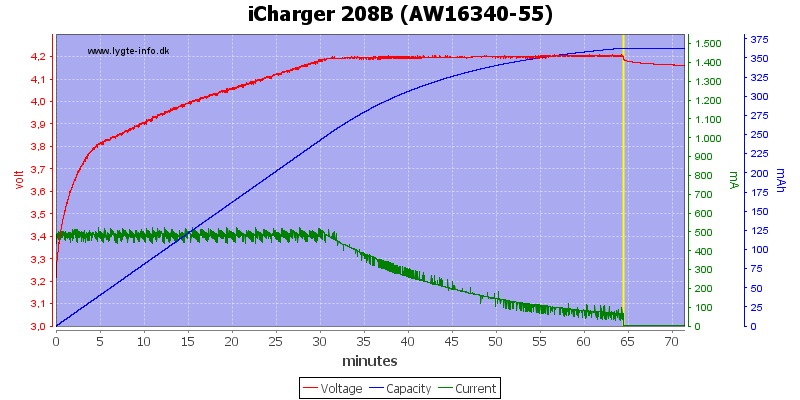
The iCharger has more noise in the regulatation, but keeps the voltage a bit tighter around 4.2 volt. This curve could also be made with the iCharger alone, it records all necessary parameters, but I wanted the better precision of my DMM's.
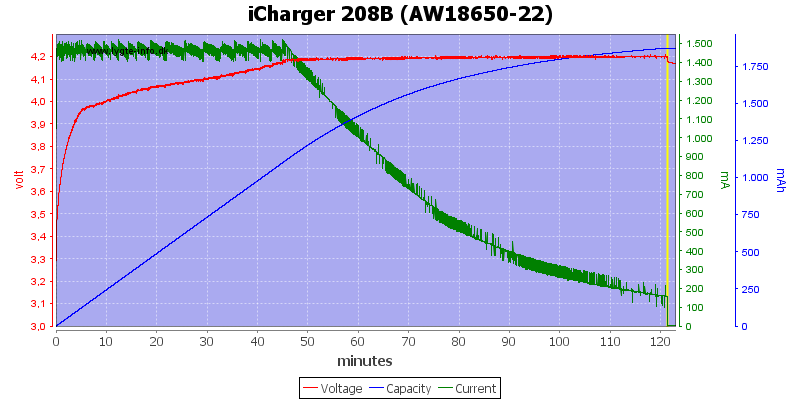
Also here the more noise is obvious, but the charge curve again follows a good CC/CV charge.
There is some explanation on how I did the above curves here: How do I test a charger
How to connect the cells
The hobby charger is very flexible and can be used for almost any rechargeable battery, but how to connect the battery to the charger is left to the user. Here are some examples on how connection to 18650 and other rounds cells used in flashlights can be done.
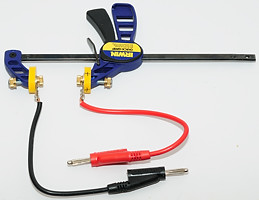

First example is with a clamp. It has a very good grip on the batteries, but be careful with how much force is applied, it is possible to crush the protection circuit. This is the best connection for high current charges and discharges.
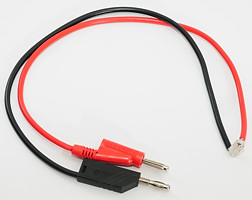

Next example is with magnets. These are a bit tricky to make, because the magnet loses its magnetism if it get to hot and it has to be hot when soldering.
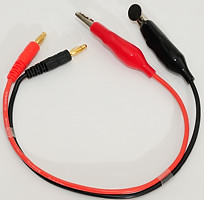
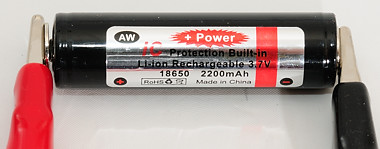
The magnet solution can also be done without soldering. Some hobby chargers are supplied with alligator clips for battery connection and they are usual in a metal that a magnet can hold.
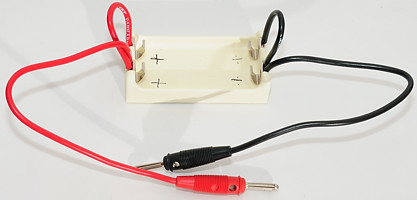
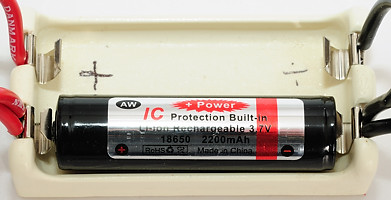
My favorite solution for 18650 batteries is a cradle, this one here is from Luminous DIY. It can handle all sizes of 18650 even the 70 mm long cells can be charged (But it is a very tight fit).
I have wired the cradle to charge two 18650 in parallel, this works well when the batteries has been used in series and is a safe solution. This is because LiIon batteries are charged at a specific voltage.
Note: NiMH/NiCd must be charged in series!
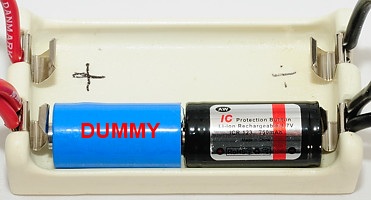


Handling 16340 (Also called RCR123) is more difficult with this cradle, I am using a dummy CR123, but I had to shorten it 2 mm before the protected cells would fit in the cradle.
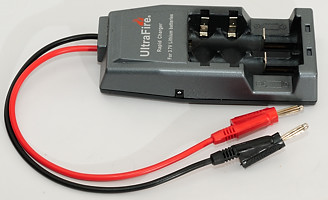
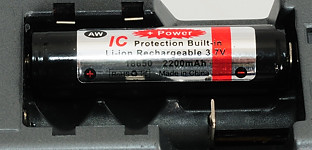
Another way to get a cradle is to take a cradle charger and rip the electronic out. Here I have used a WF-139 as an example, but it is not the best cradle to use because it does not support long 18650 batteries.
More safety
Who has not heard about batteries exploding in laptops and mobile phones. This can happen with a LiIon battery, either because of a production fault or because it has been treated badly. To protect against this most LiIon cells for flashlights is equipped with a protection circuit. In the RC world people usual uses batteries without protection and like to charge and discharge batteries in 10 minutes, this will sometimes lead to exploding batteries. To eliminate any hazards from this there are protection bags.

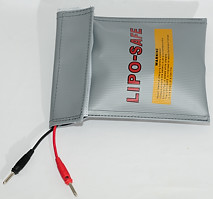
This bag is large enough for the cradle from above to fit inside it and will prevent any flying parts if the battery explodes, it is also supposed to contain any fire. I got it from Hobby King.
I do not use this bag for regular charging, but if I do a cyclic test that will last a couple of days and it has to run unattended, I like the added safety.


