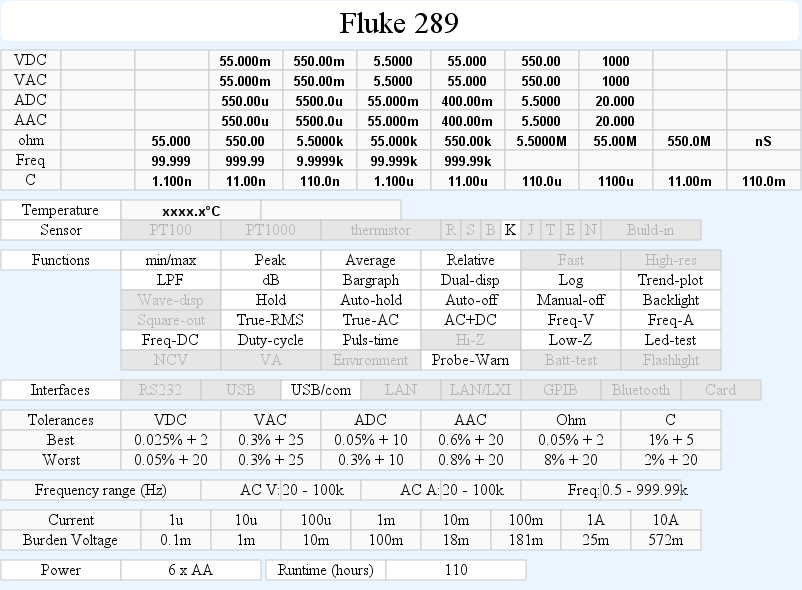
DMM Fluke 289 (Used)
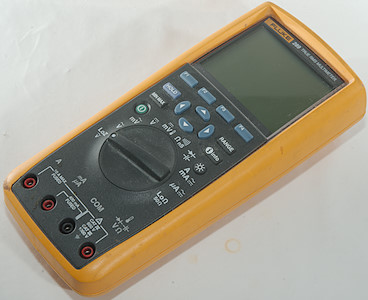
This has been the top multimeter from Fluke for many years. Here I am looking at my old (2009) copy of the meter. This means I cannot say anything about the box or accessories it was delivered with.
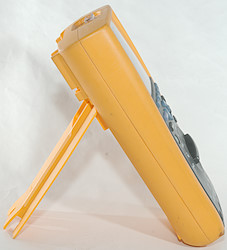
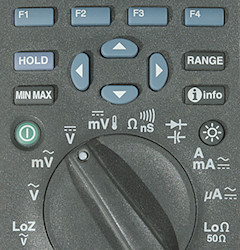
The range switch is fairly easy to turn and with this heavy meter it is stable both lying and standing.
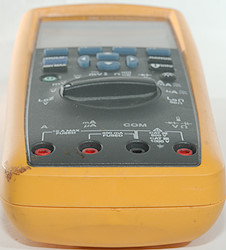
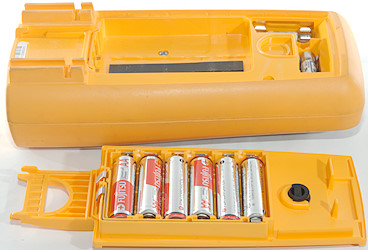
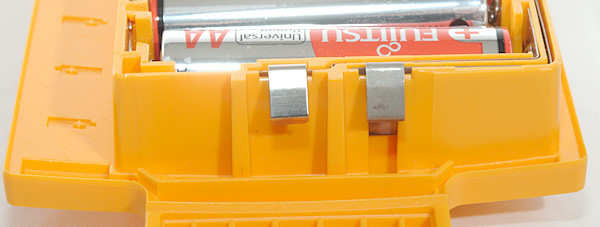
The meter needs 6 AA batteries.
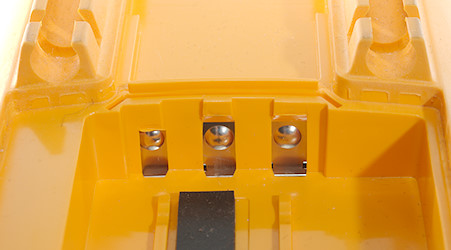
There is 3 connection on the meter, but only two on the battery tray.
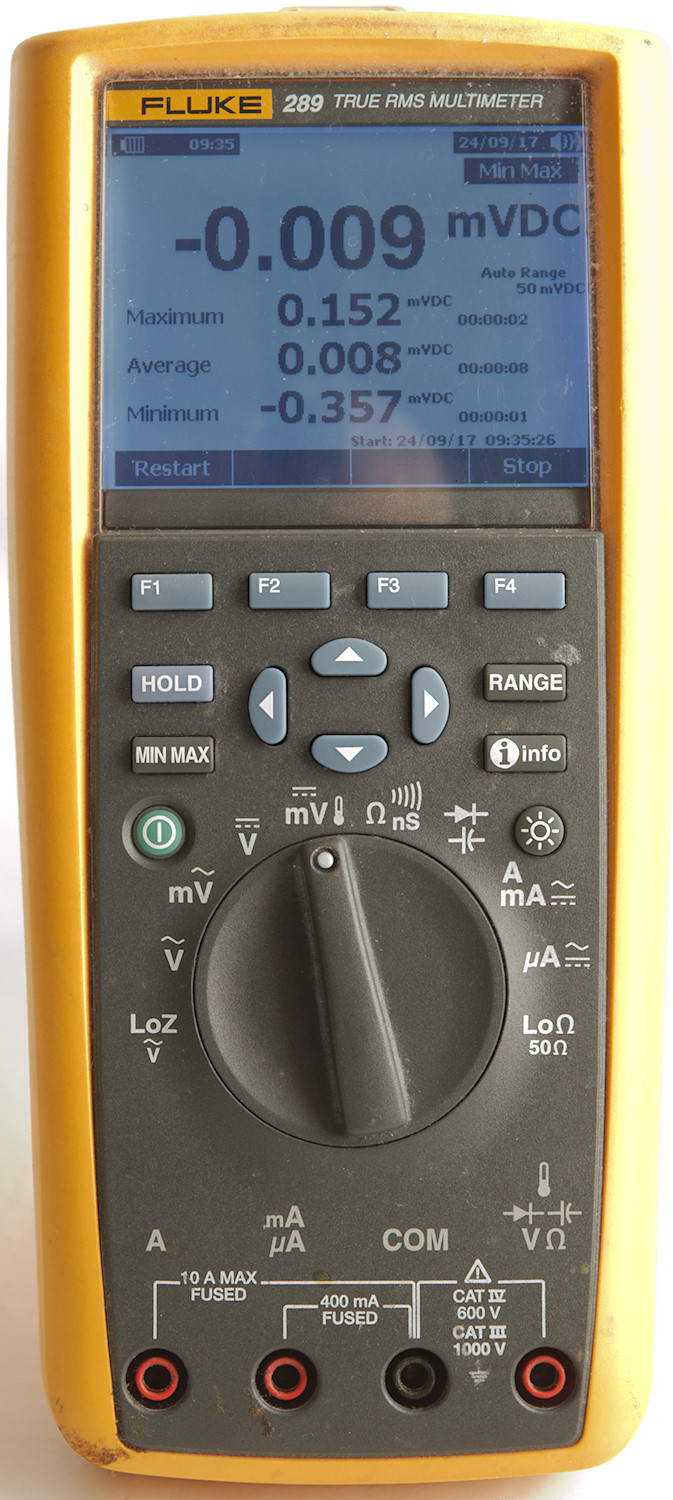
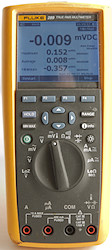
Display
The meter uses a graphical display, this means fairly low contrast, but it can show many different layouts. To get the pictures here I used the background light on the display.
The meter has a build in manual.
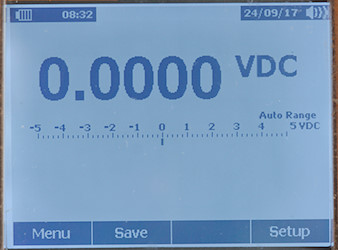
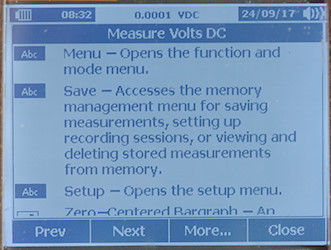
A fairly simple display for showing volt DC. The soft keys shows the usual functions:
Menu: Options for the current selected range.
Save: Save one or more values or look at the saved values.
Empty: Use for some shortcuts and range specific functions.
Setup: General meter setup and calibration.

Here is the "Menu" for DC, the arrow keys are used to move the black square around and each location has one or more functions. For this menu there are a total of 10 functions (VDC, Rel, Rel %, Peak, AC+DC, AC,DC, DC,AC, Hz, %, ms).
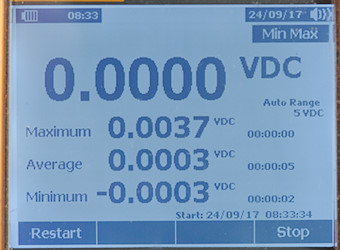
The min/max (and peak) display shows all the values at once, including time stamps for when the event occured.
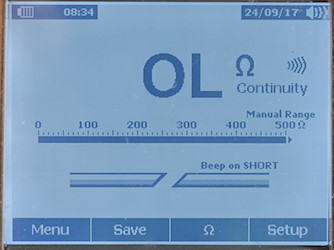
Continuity shows resistance, bargraph and a graphic on open/short. There is a shortcut key to change between ohm and continuity, to avoid using the menu button (For nS the menu must be used.
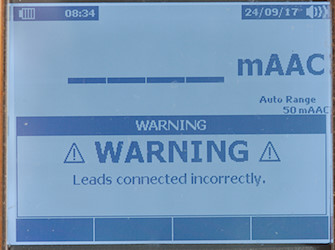
When current ranges is selected a warning will be shown until leads are plugged into the current terminals.
If leads are in the current terminals in other ranges both the warning and the buzzer will be used to warn.
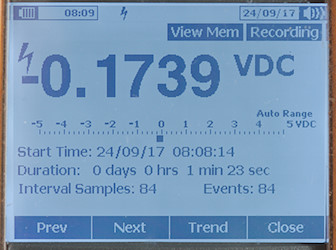
The meter saves data in record sets with data time and samples. Events is used to capture changing values that happens between sample intervals and will add extra sample points. Default setting is that a 4% change will add a event, but it can be adjusted.
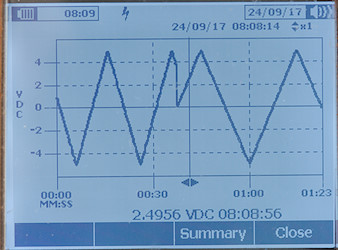
The meter can also show captured data in graphical form and it is possible to zoom on the data.
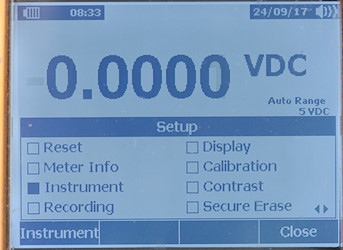
The setup function makes it possible to see some information about the meter (Like calibration data and software versions) and adjust a couple of preferences.
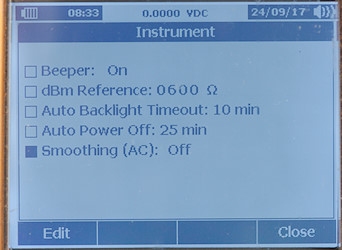
Here is most of the preferences.
Secondary display functions (After / is secondary values):
- REL: relative/reference/absolute
- min/max: value/min/average/max each with time of event.
- Peak: value/min/average/max each with time of event.
- VAC-LPF: VAC, frequency/VAC
- Frequency: frequency/VAC, percent/frequency, puls_time/frequency
- dB: dBm/VAC, dBm/frequency, dBV/VAC, dBV/frequency
- VDC: AC+DC, VAC/VDC, VDC/VAC
- VAC: Crest_factor/VAC
- IDC: AC+DC, IAC/IDC, IDC/IAC
- IAC: Crest_factor/IAC
Functions
Buttons:
- F1: Usual "Menu", but when special functions are active it can be other function (Like "Restart" in min/max/peak)
- F2: Usual "Save"
- F3: Usual empty, but used for shortcuts and other stuff when required.
- F4: Usual "Setup", but also "Stop" and "Close" for min/max/peak/record.
- Hold: Freeze the display, when this is activate F1 can be used for auto hold. Press again to disable.
 : The arrows are used for menu and parameter selection (Up/Down is also contrast adjustment).
- Range: Change to manual range and change range, hold down to disable.
- Min Max: Activate min/max function, press again to stop and press once more to return to normal mode (The last two can also be done with the F-keys).
- Info: Build in manual.
 : Power button, a press will turn on the meter. This button will be illuminated when meter turns on, it turns off when the meter is on and flash when logging in low power mode.
 : Background light, the meter has two brightness settings.
Rotary switch:
- LoZ VAC: LowZ mode, it will show both DC and AC voltage
- VAC: Show AC voltage, frequency, dBm, dBV, Crest factor
- mVAC: Show AC voltage, frequency, dBm, dBV, Crest factor
- VDC: Show DC voltage, frequency, AC+DC, AC and DC.
- mVDC: Show DC voltage, frequency, AC+DC, AC and DC. Temperature input is also selected here.
 : Resistance, continuity and conductance (nS).
 : capacitance and diode.
- A mA: Current DC, AC, frequency, crest factor
- uA: Current DC, AC, frequency, crest factor
- LoOhm: The lowest ohm range, uses a higher current than other ranges and has a 1mOhm resolution.
Input
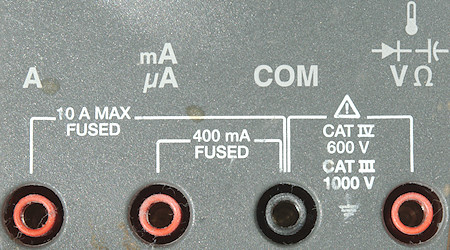
- A: High current, it is possible to use 20A for 30 seconds
- mAuA: The lower current ranges, the selector switch will change between two different shunts.
- CON: The common terminal for all ranges.
- xxx: All other ranges.
Measurements
- Volt and frequency
- At 10mVrms in mVAC frequency input range is from 0.4Hz to 500kHz
- At 100mVrms in mVDC and mVAC frequency input range is from 0.4Hz to 1MHz (The meter shows OL above 1MHz)
- At 2Vrms in DC frequency input range is from 0.4Hz to 15kHz
- At 2Vrms in AC frequency input range is from 0.4Hz to 500kHz
- Duty cycle works from 2% to 95% at 100kHz with 1Vpp in mVDC, precision is within 2.0
- Duty cycle works from 1% to 99% at 10kHz with 1Vpp in mVDC, precision is within 0.14
- Max/min on VDC needs about 200ms to capture a voltage on DC, it will need multiple pulses to get the full value.
- Peak on VDC needs less than 0.1ms to capture a voltage with repeating pulses on DC (It either need a slightly longer pulse or a few pulses to capture the full voltage).
- Peak on AC is just as fast, but due to the capacitor in series with the input it will not show DC values.
- Min/max on AC is slightly slower, but due to the capacitor in series with the input it will not show DC values.
- Min/max/peak do not disable auto range.
- 1 VAC on AC input is 5% down at 125kHz, with LPF (Low pass filter) it is 5% down at 410Hz (RMS will not work at the frequency).
- 1 VAC on DC input (i.e. AC or AC+DC) is 5% down at 45kHz (RMS will not work at the frequency).
- Frequency counter on DC requires a zero crossing.
- Frequency counter on AC is capacitor coupled and do not require a zero crossing.
- LowZ is a fixed 1000V range that shows both VAC and VDC (Not AC+DC)
- In dBm the impedance can be adjusted in 1ohm step from 0001 to 1999ohm (It is done in the configuration menu)
- Input impedance is 10..11Mohm on DC. AC and mVAC is a capacitor (Impedance is around 10Mohm).
- mV DC range is 10Mohm impedance up to around 2.6 volt where it slowly drops to 2kOhm
- Over voltage protection is 1000V
- Current
- On over current in mA (440mA) or A (10A) the display will flash
- When selecting current ranges with probes in wrong terminal display will show a warning
- When selecting non-current ranges with probes in current terminal there will be an audible alarm and the display will show a warning.
- 400mA current is protected by a 0.44A/1000V 10.3x38mm fuse.
- 10A current is protected by a 11A/1000V 10.3x38mm fuse.
- Ohm, Continuity, diode and capacitance
- Ohm needs about 2.5s to measure 100ohm
- LowOhm needs about 2s to measure 10ohm
- LowOhm is 2.6V open and 8.8mA shorted
- Ohm is 3.9V open and 1.0mA shorted
- nS is 3.9V open and 0.35uA shorted
- Continuity is very very fast (Below 1ms).
- Continuity start beeping when resistance is below 50ohm and stops beeping when resistance is above 94ohm
- Continuity is 5.4V open and 1.0mA shorted
- Diode range uses 5.0V, max. display is 3.1000V at 0.8mA, max. current is 1.0mA shorted.
- 10uF takes less than 0.5 second to measure.
- 70000uF takes between 4 and 10 seconds to measure.
- Over voltage protection is 1000V
- Miscellaneous
- Current consumption of meter is about 22mA, 36mA with low backlight and 58mA with high backlight
- Meter works down to 5.3V where it shows "Batteries critical low, replace now" and turns off, battery gauge shows empty at 6.2V.
- Reading do not change with battery voltage.
- Power on time is about 8 second from on button lights up until first reading is on the display.
- Backlight is stable until the battery gauge shows empty, then it turns off and cannot be turned on again.
- The meter needs a few display update before it shows correct value.
- Viewing angle is good, but contrast is fairly low.
- Display updates around 4 times/sec
- Bargraph updates 30 times/second
- Bargraph will be 0..max or min..0..max depending on range.
- Backlight automatic turnoff is adjustable from: off/5/10/15/20/25/30 minutes.
- Auto turn off is adjustable from off/15/25/35/45/60 minutes
- Standard probes fits perfectly.
- Weight is 805g without accessories, but with batteries.
- Size is 223 x 103 x 60mm.
- Probes
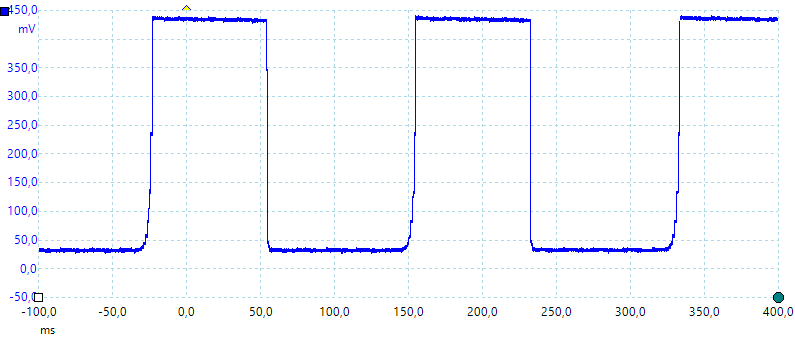
A look at the capacitance measurement waveform with a 1uF capacitor
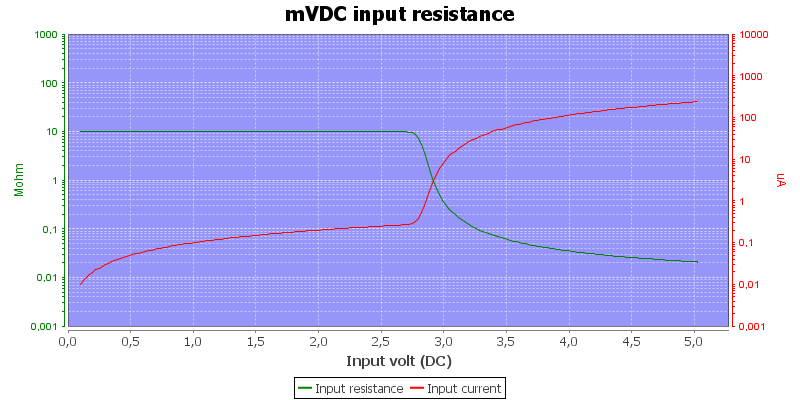
The input resistance in mVDC
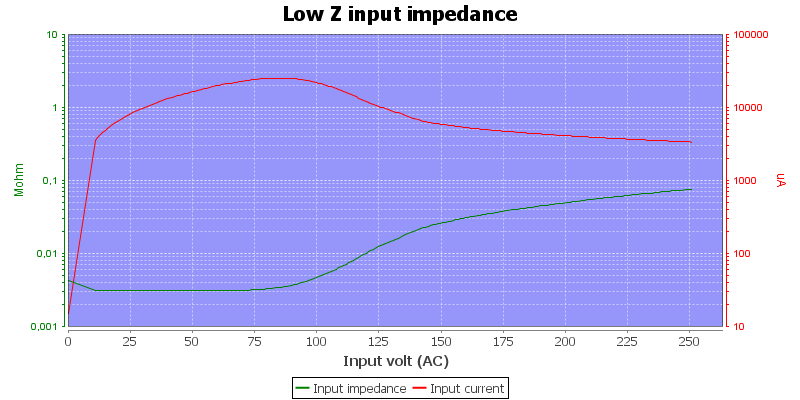
LowZ input is a PTC, this means it starts at a fairly low value and will increase resistance with voltage.
The high mA range is only rated for 400mA (Due to the fuse), it will start flash at 440mA and can show up to 550mA
The 500Mohm range will only show 66Mohm on my decade resistor, but correctly 100Mohm on a test resistor (Reference meter show 100Mohm in both cases).
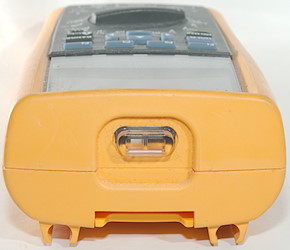
Computer connection
The software from Fluke is called "FlukeView Forms" and I believe that is the only way to get the communication cable. I bought the software with my meter, but have never really used it. It is designed to collect data from the meter and make a final report, it has some standard templates and it is possible to define you own templates for this in the extended version of the software. The software can both log data directly from the meter and download saved data from the meter.
I have used the interface a lot with my own software to log data from the meter.
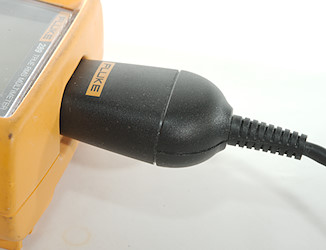
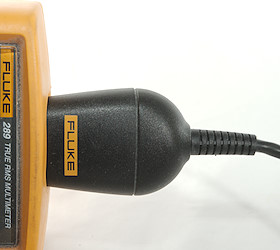
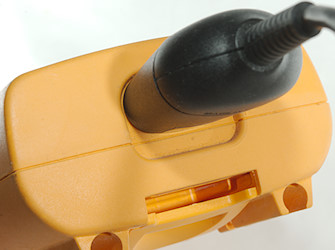
The interface plugs into the meter, but is not locked tight. Moving the meter around or pulling in the cable will likely disconnect it, but it do not fall out by itself.
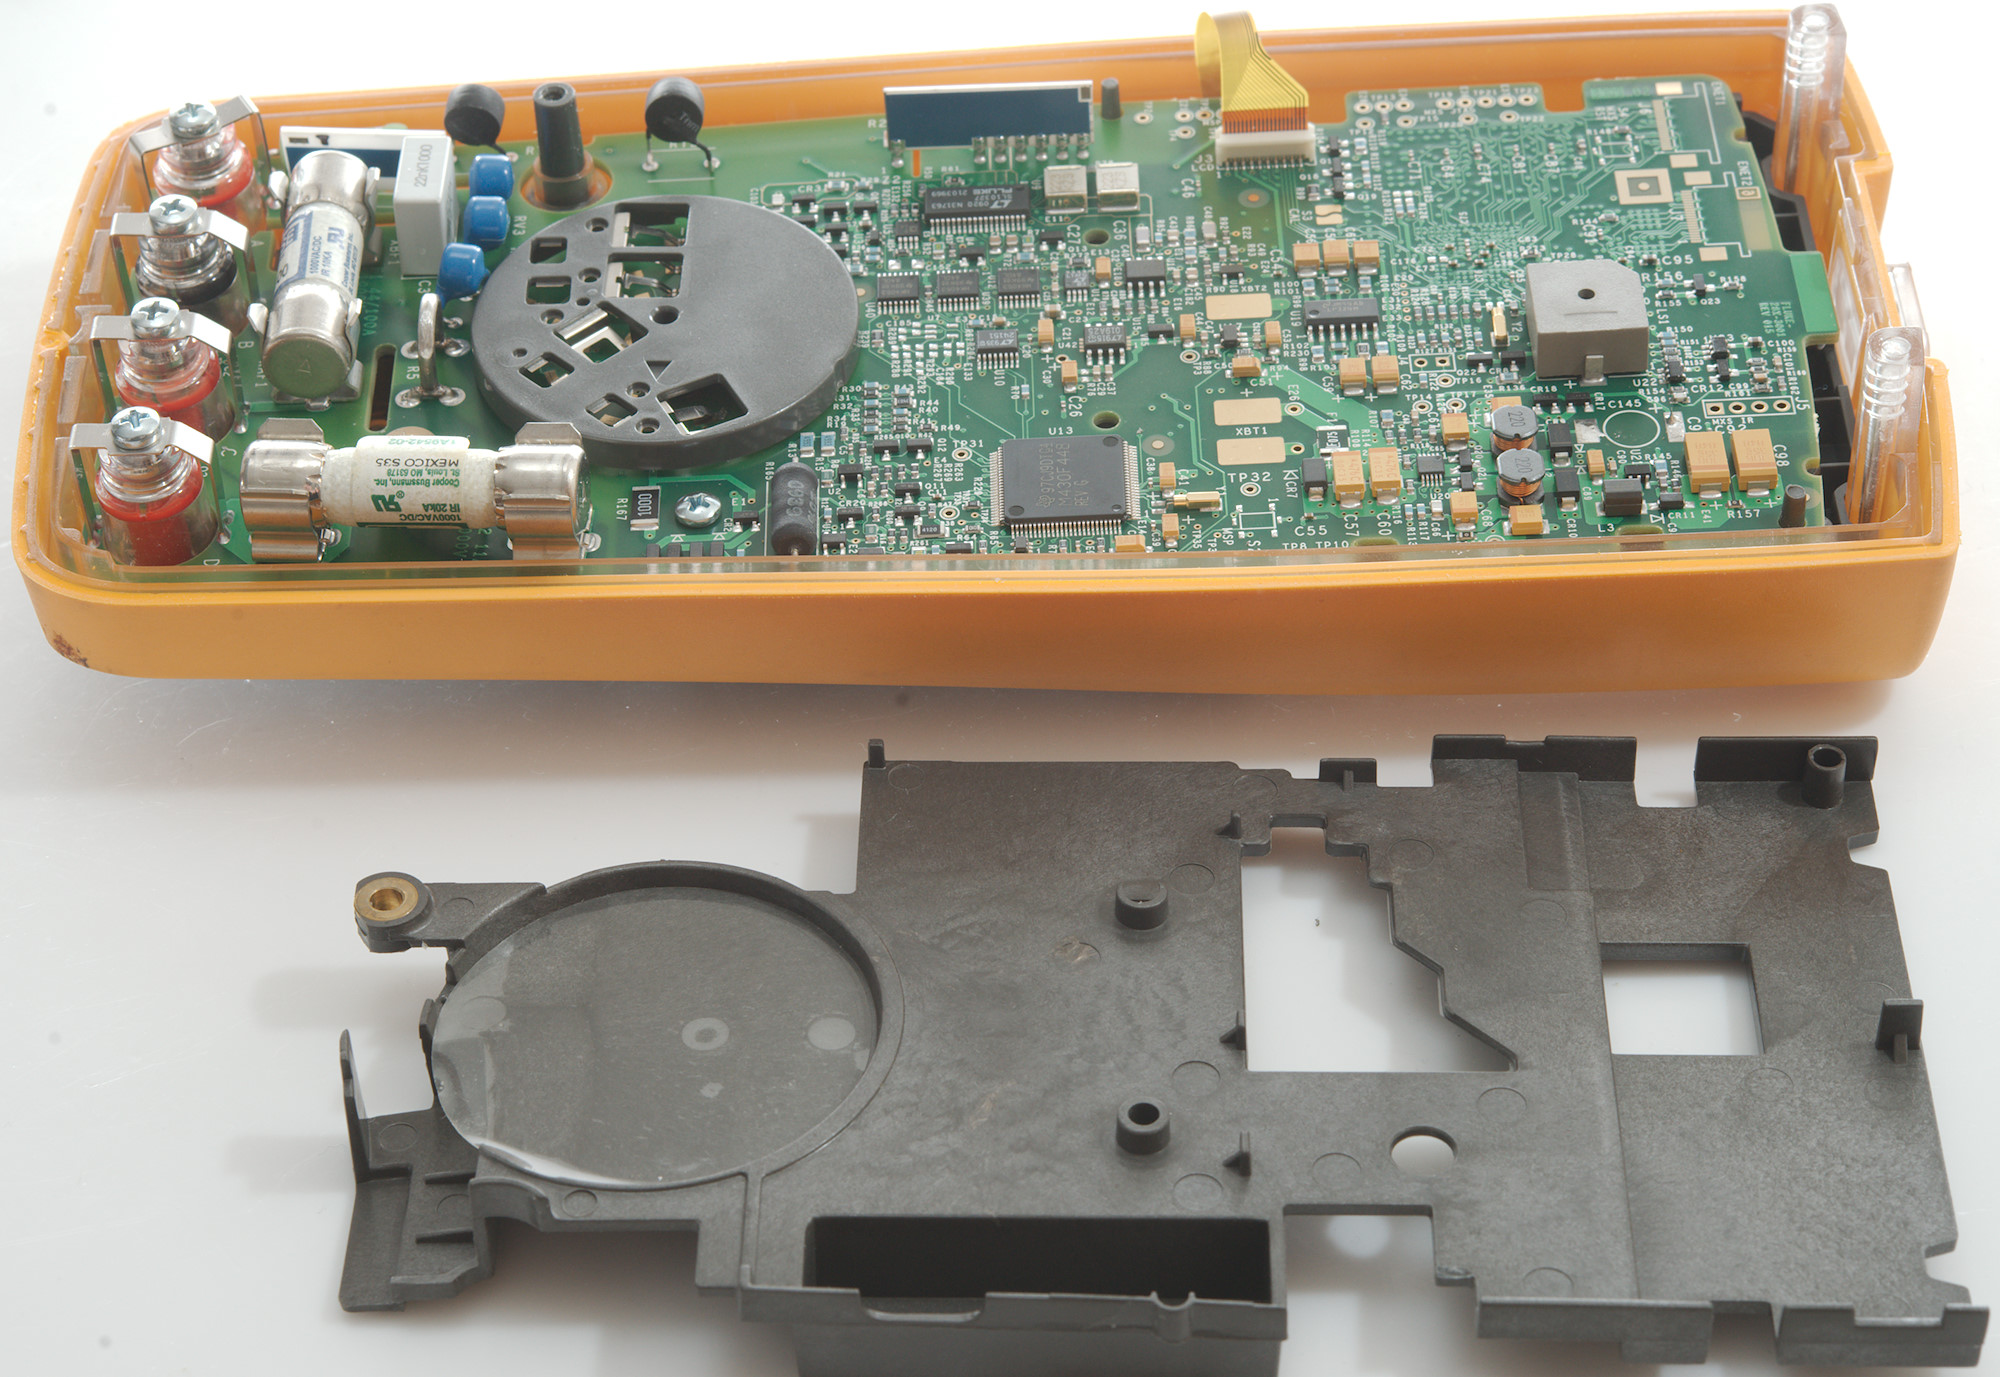
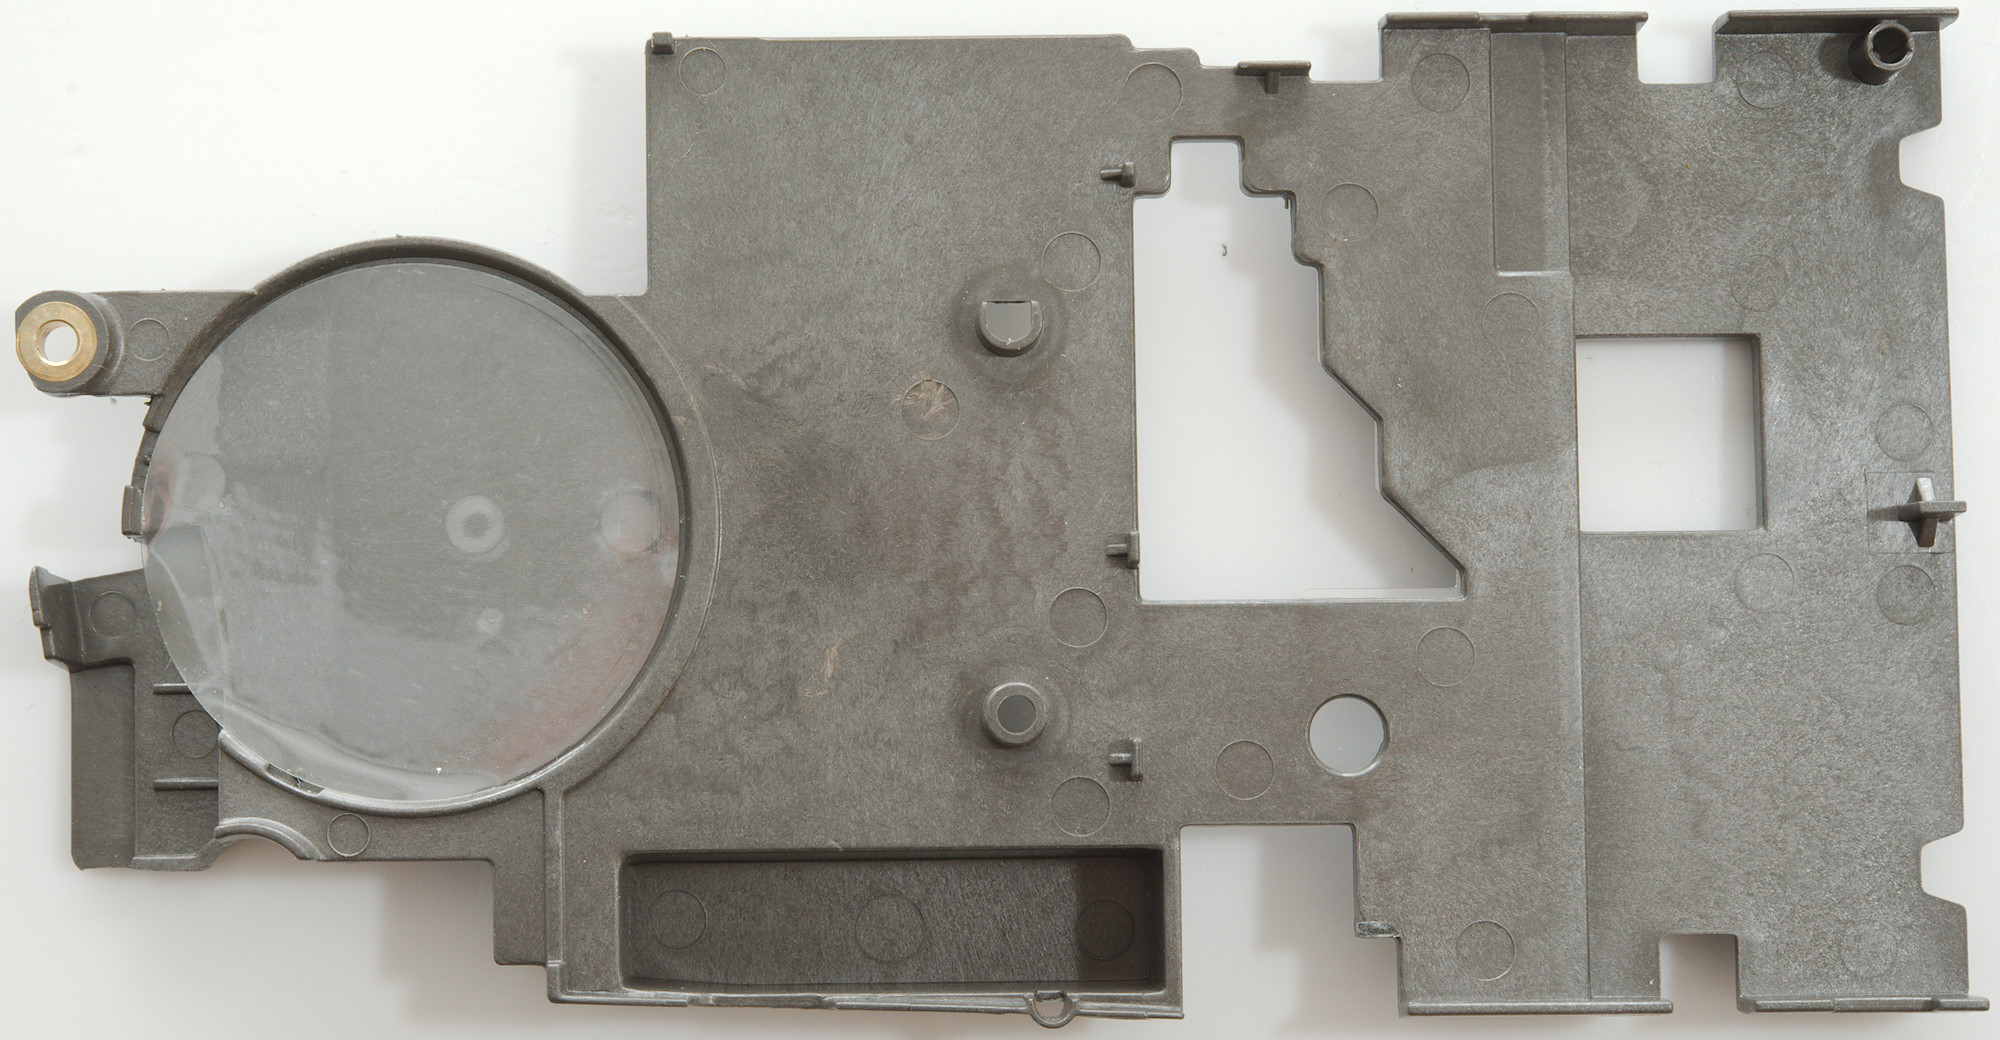
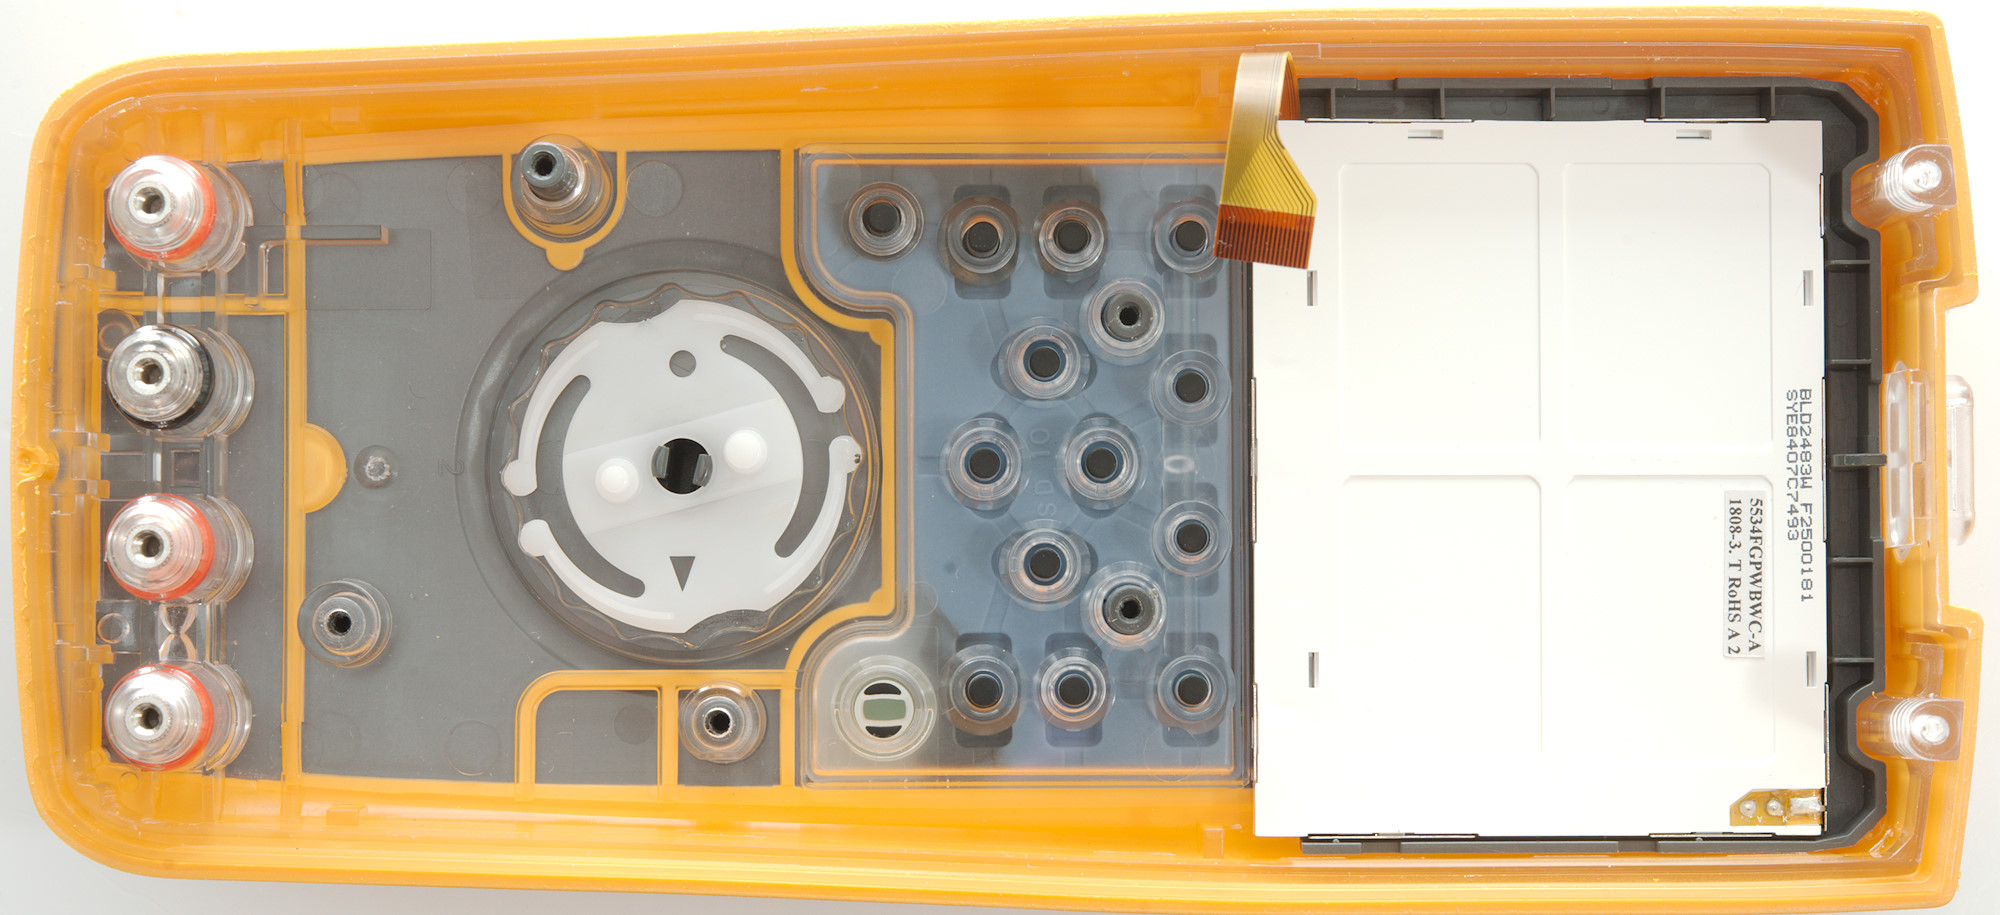
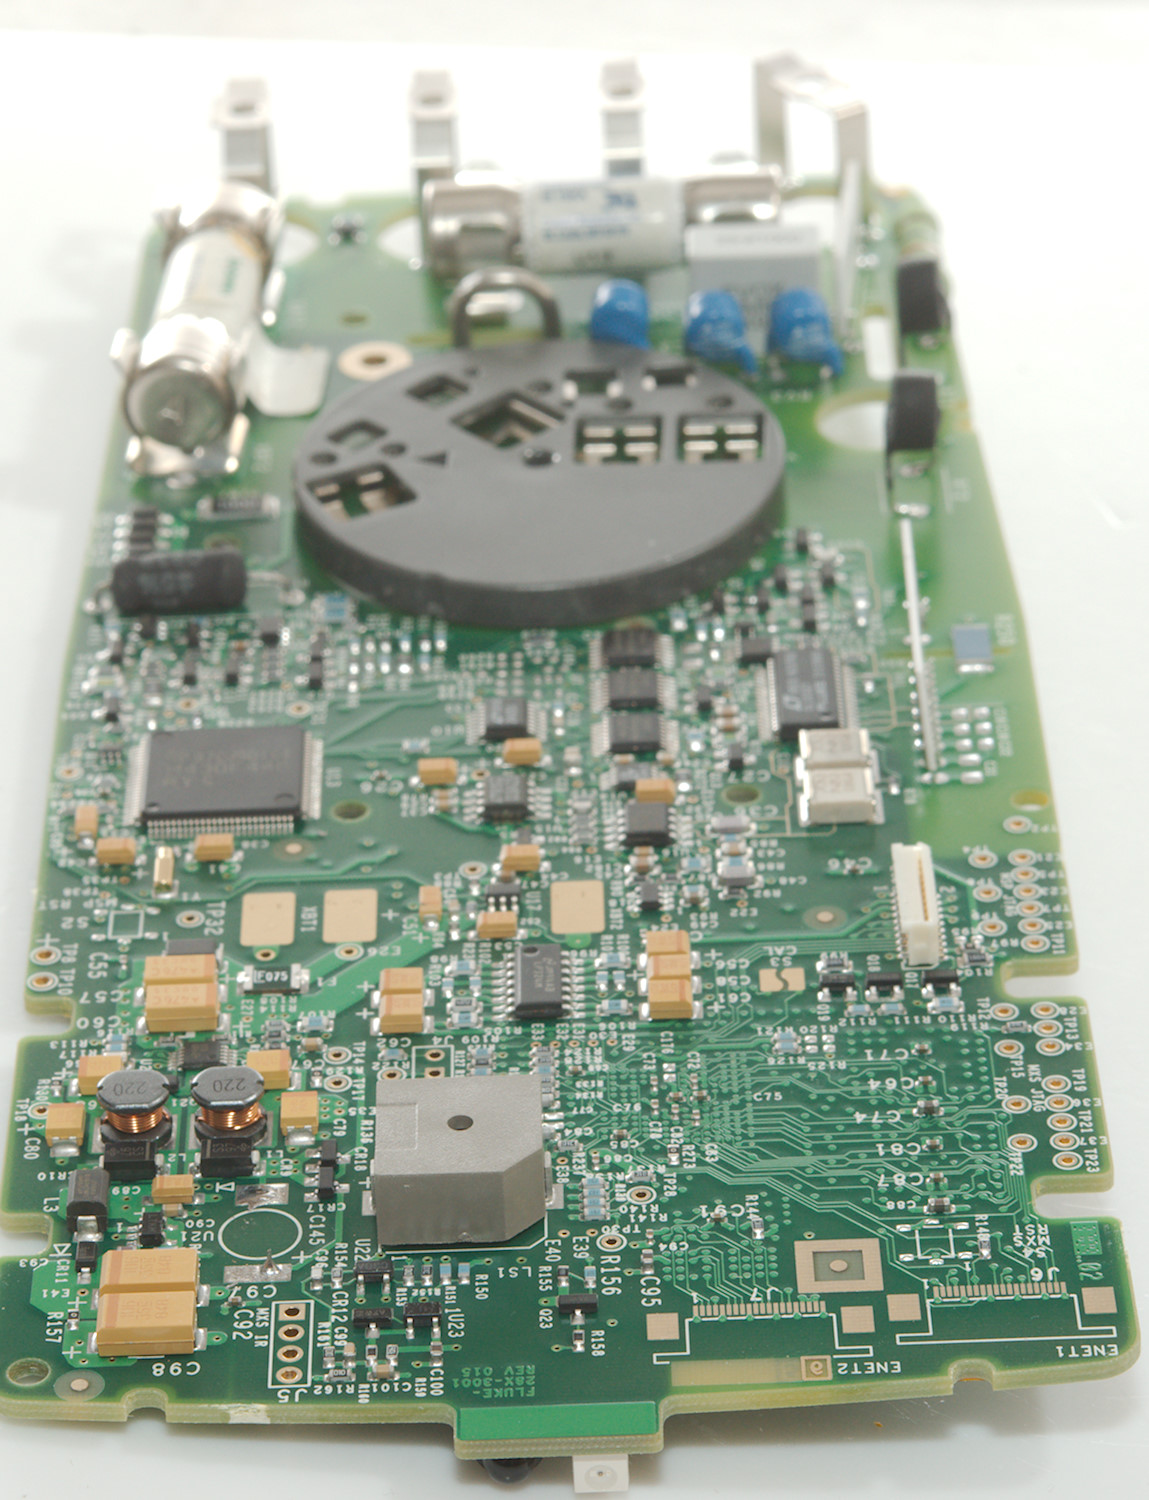
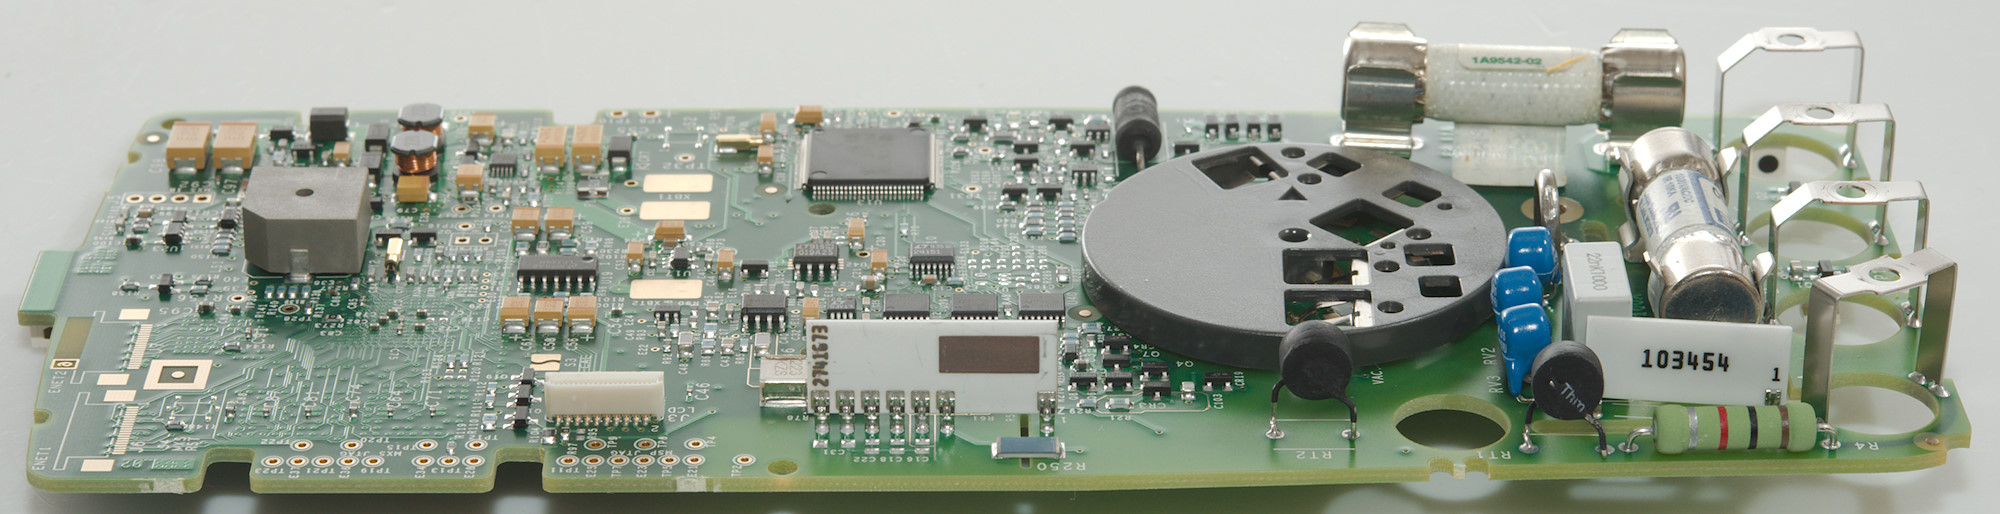
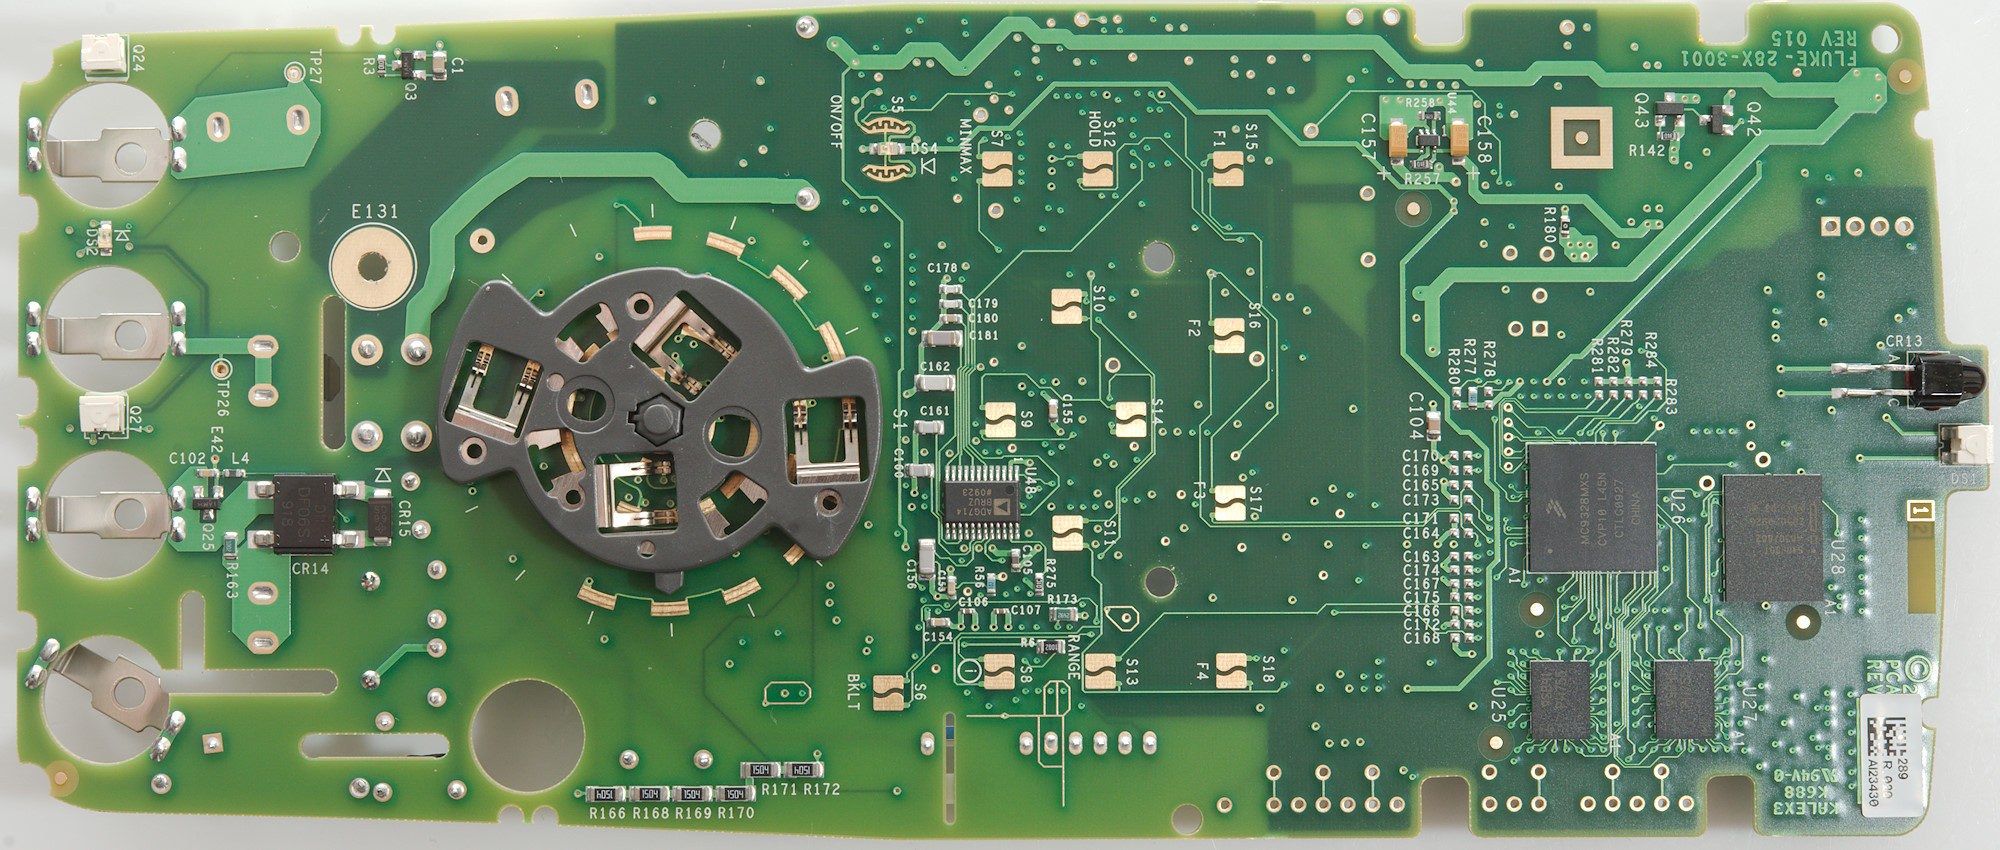
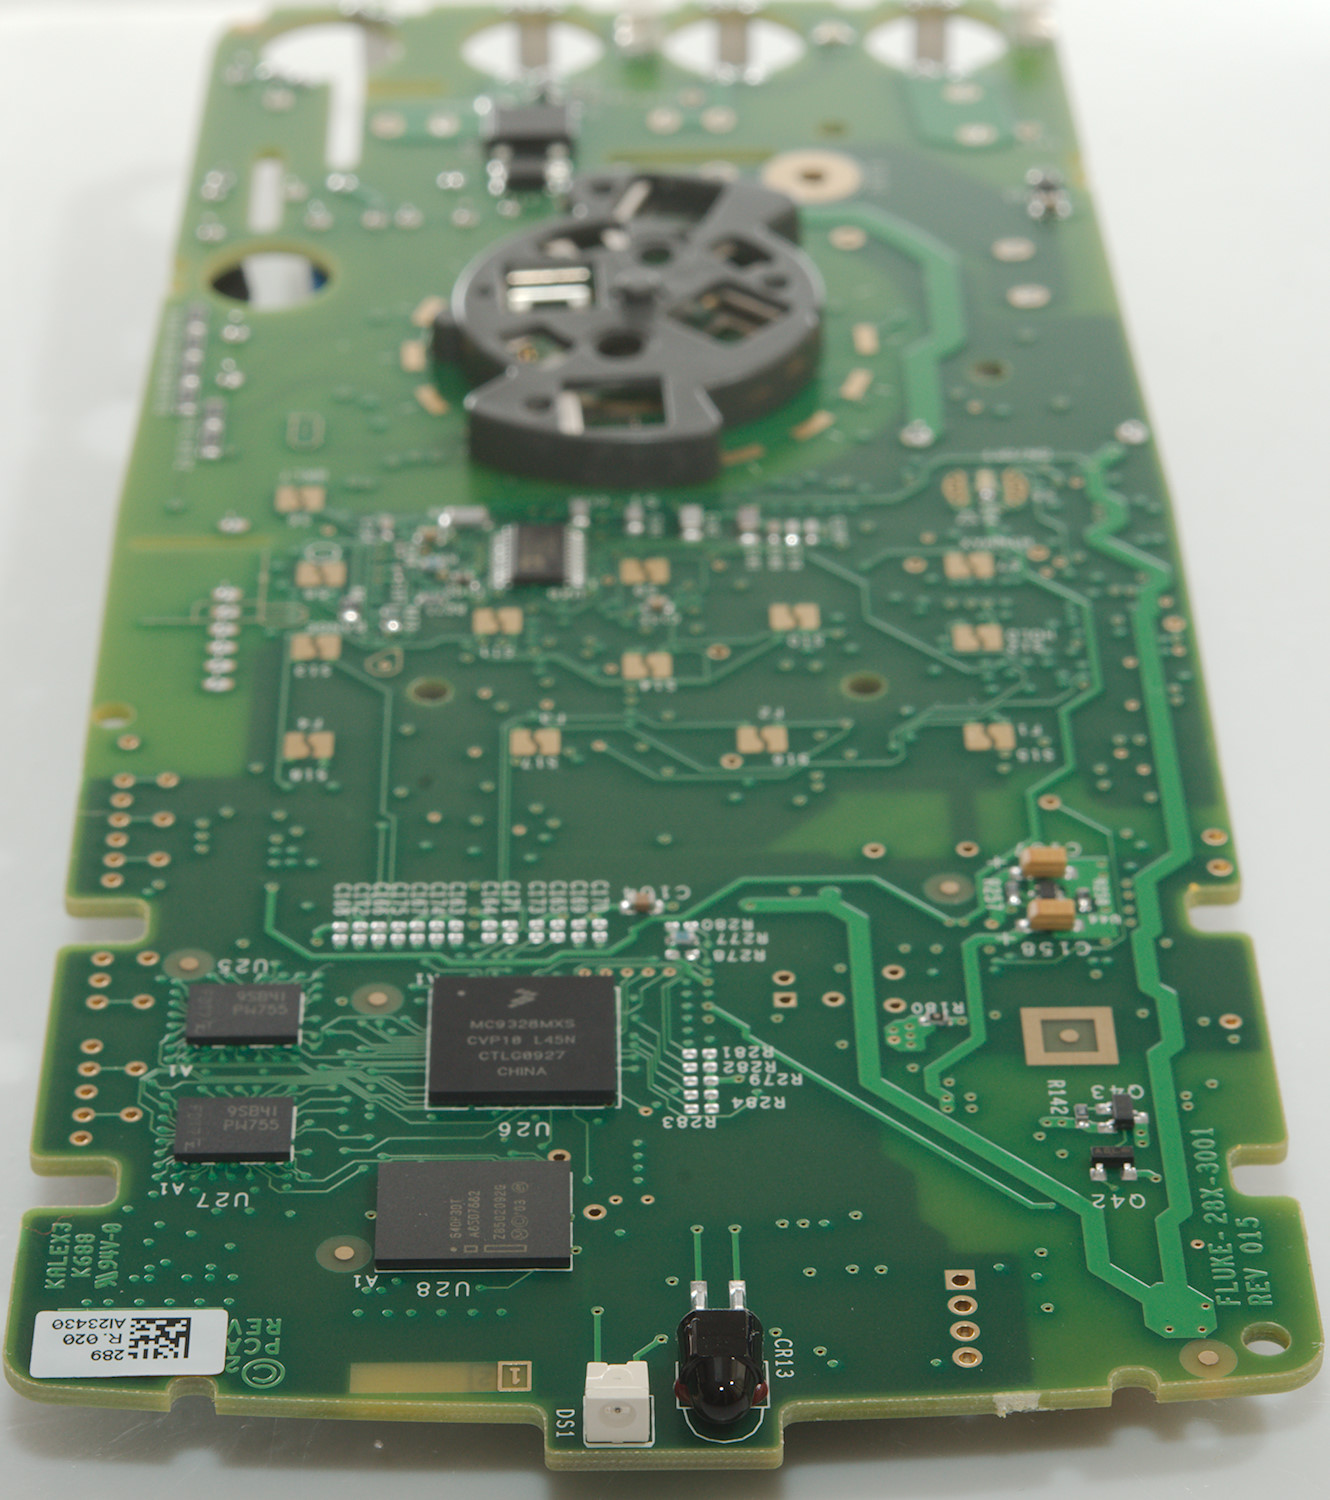
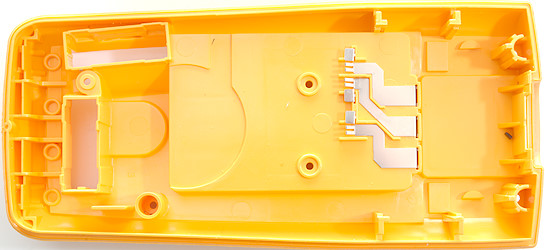
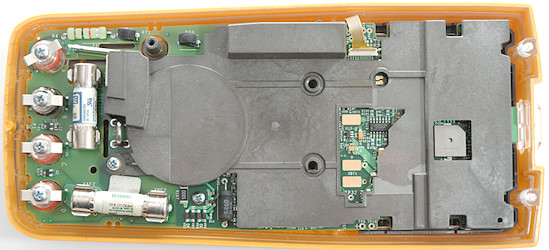
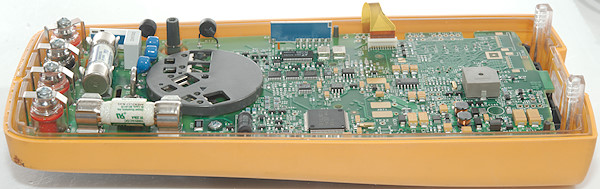
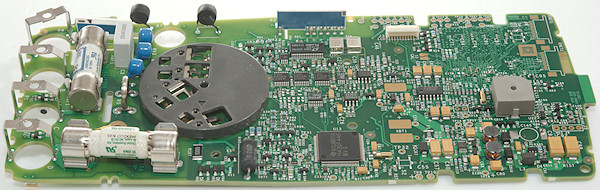
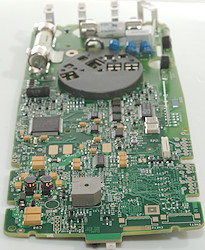
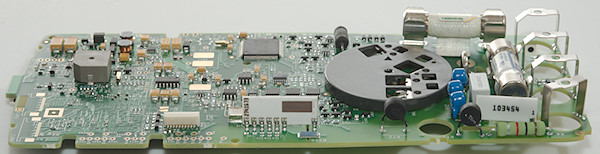
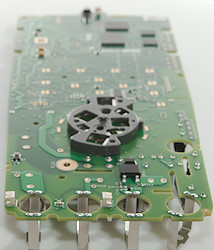
Tear down
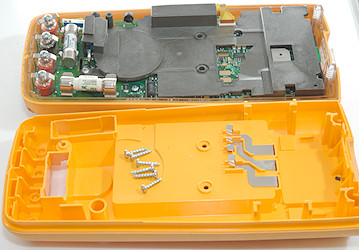
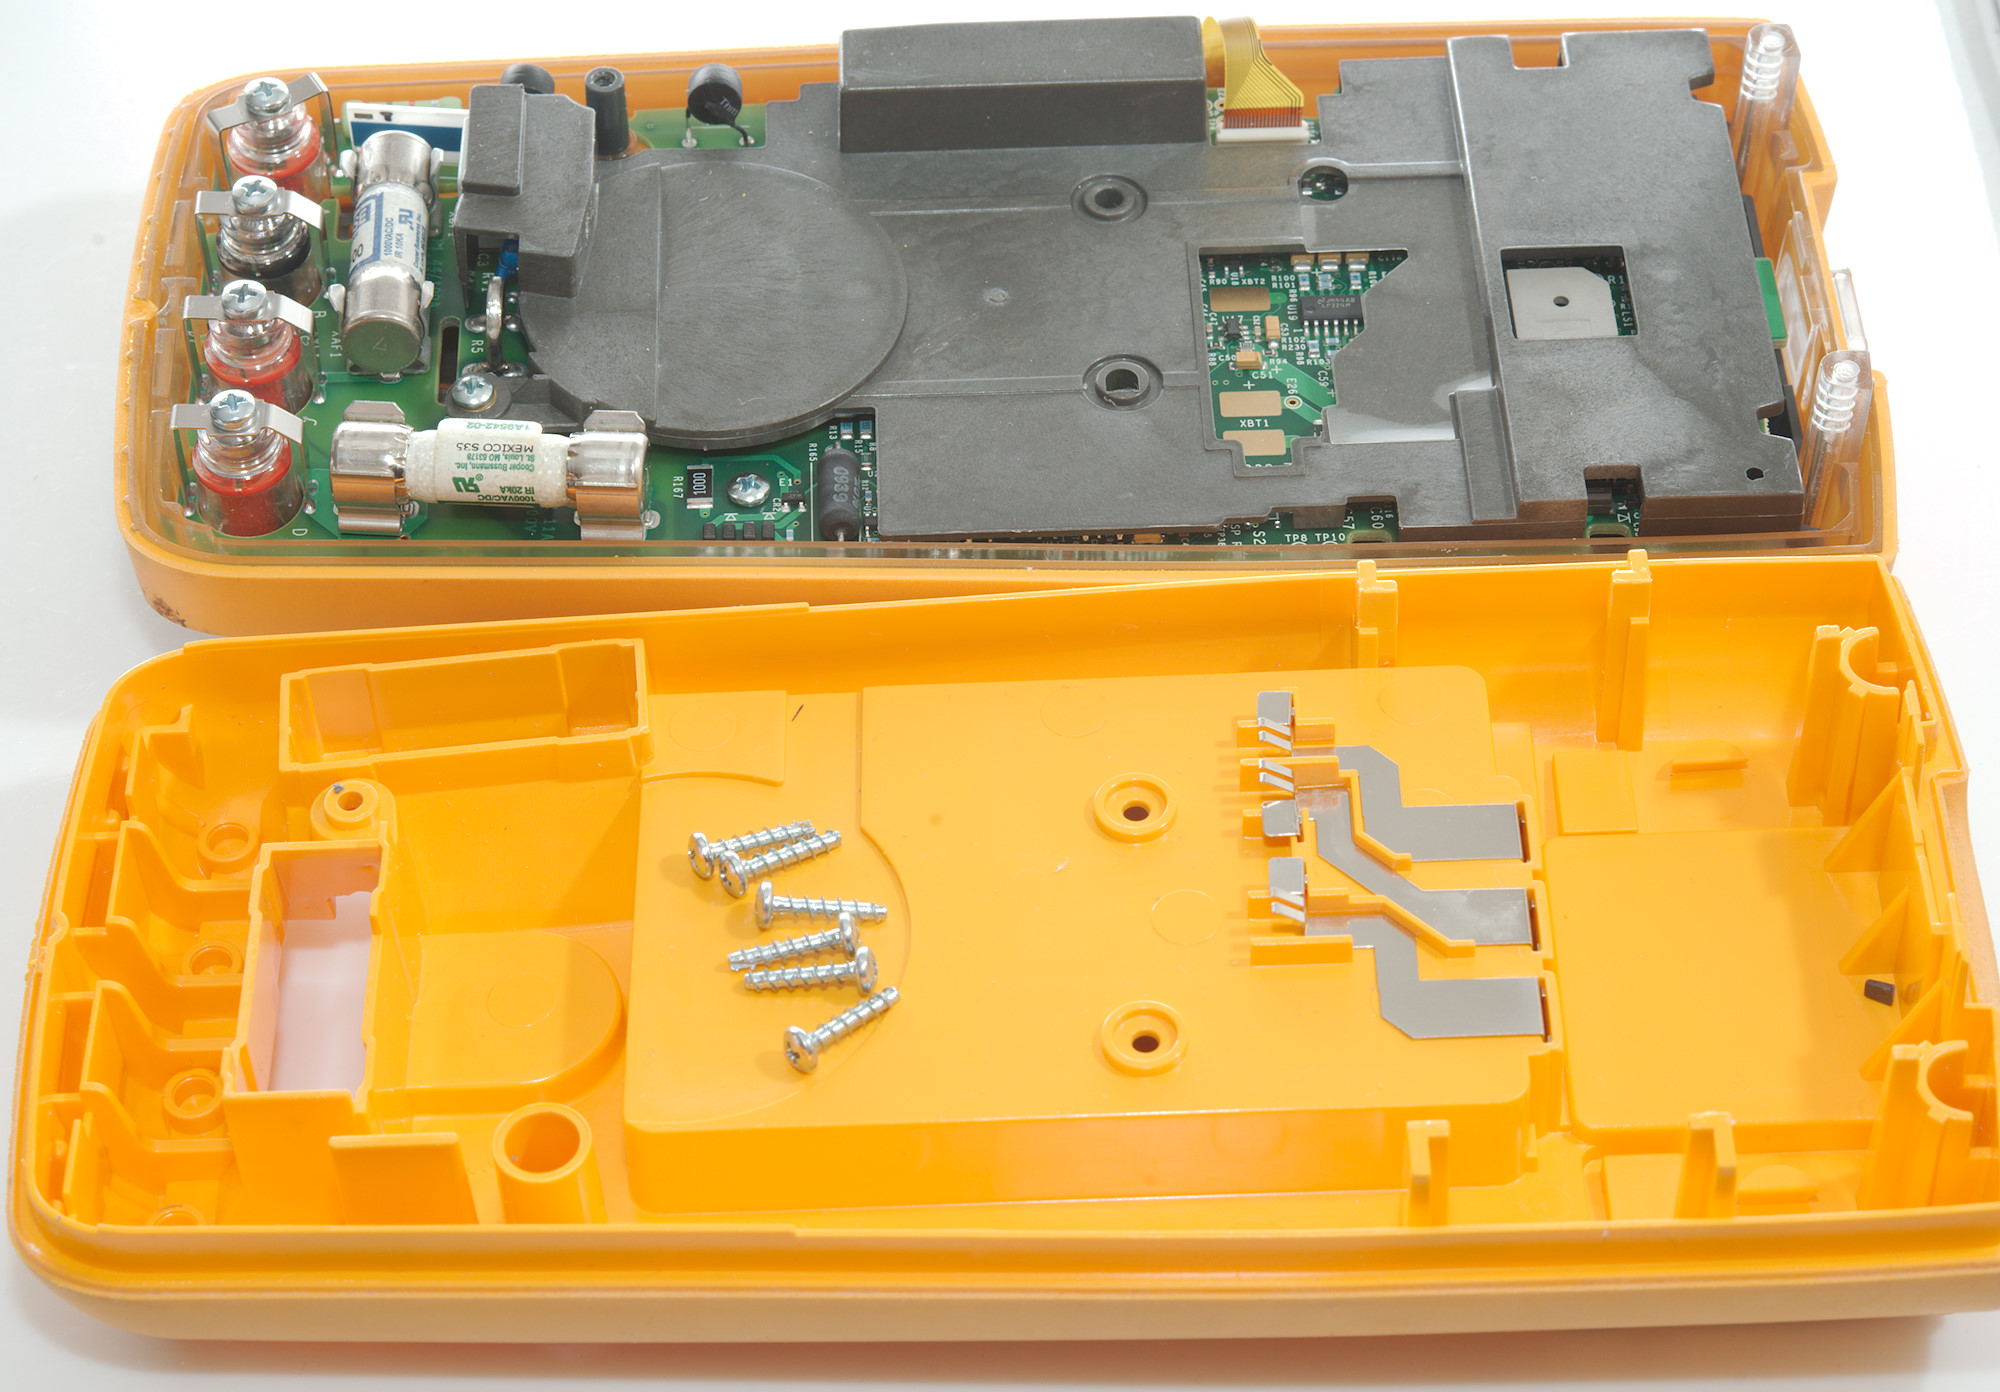
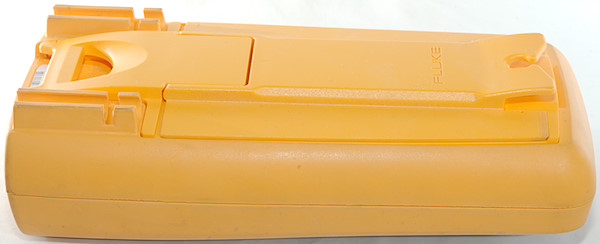
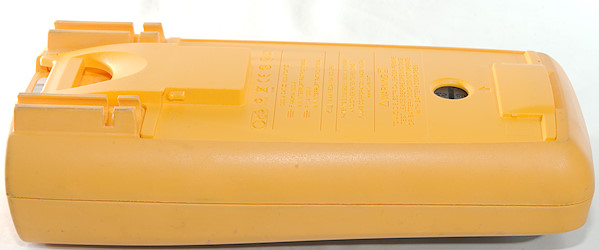
Six screws and the back could be removed, four of them are under the battery cover.
All 3 connections from the batteries are connected to the circuit board.
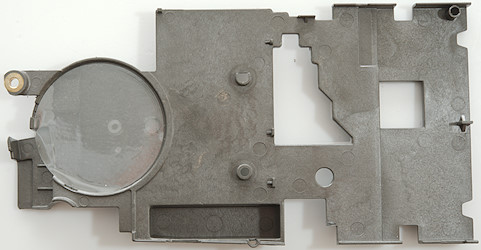
There is a inner cover in conductive plast. it is difficult to get a connection, but when you get there is less than 25ohms from one end to the other.

The range switch uses a different type of wipers compared to most other multimeters.
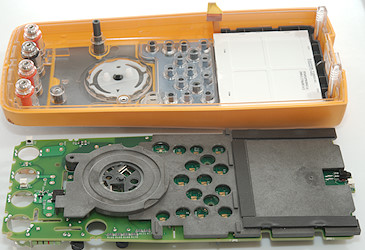
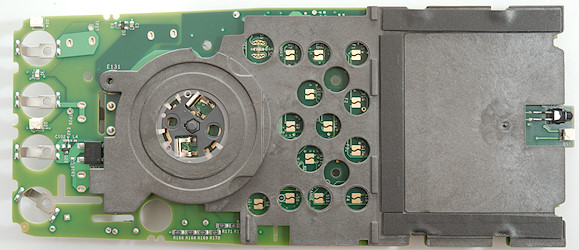
Again the internal cover.
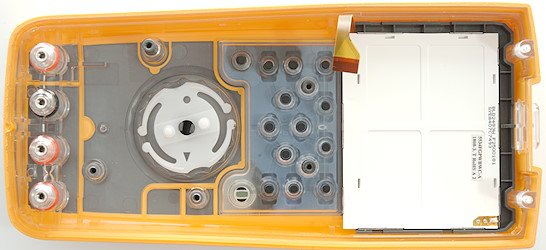
The top of the meter is made of clear plastic with the yellow layer over it.
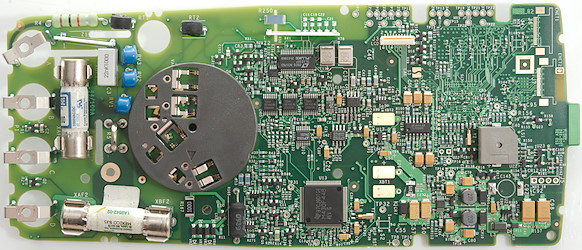
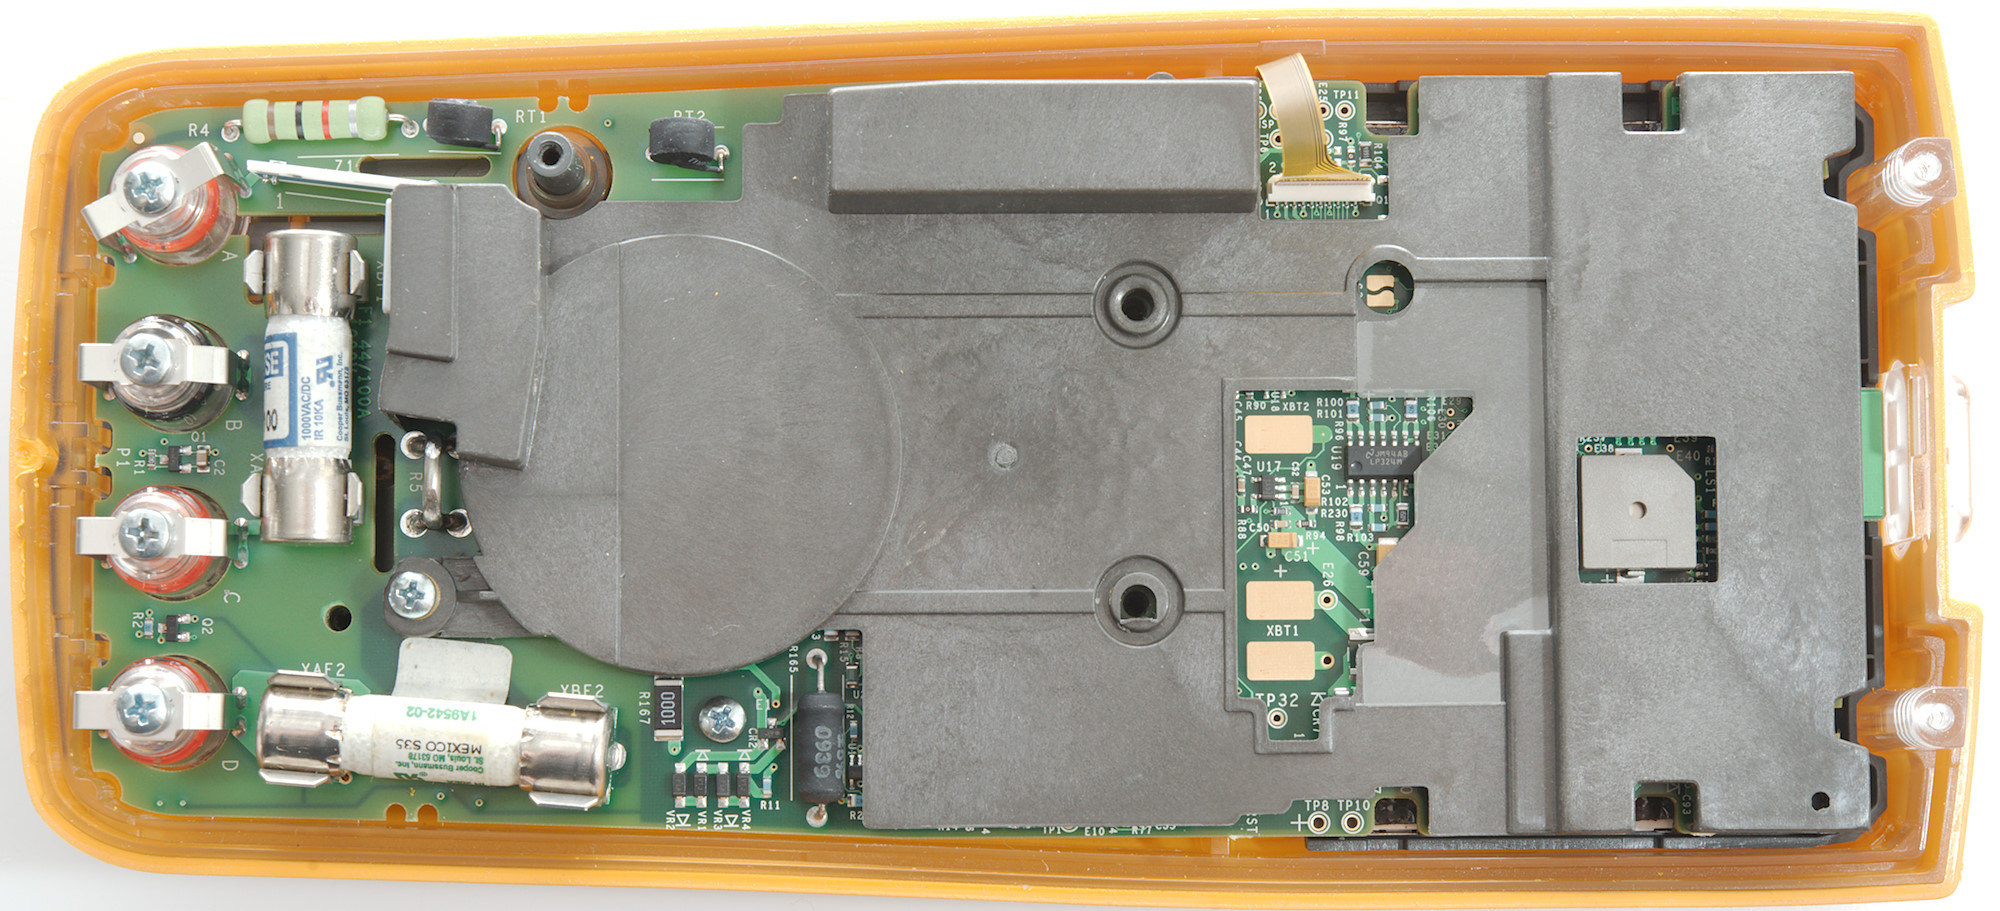
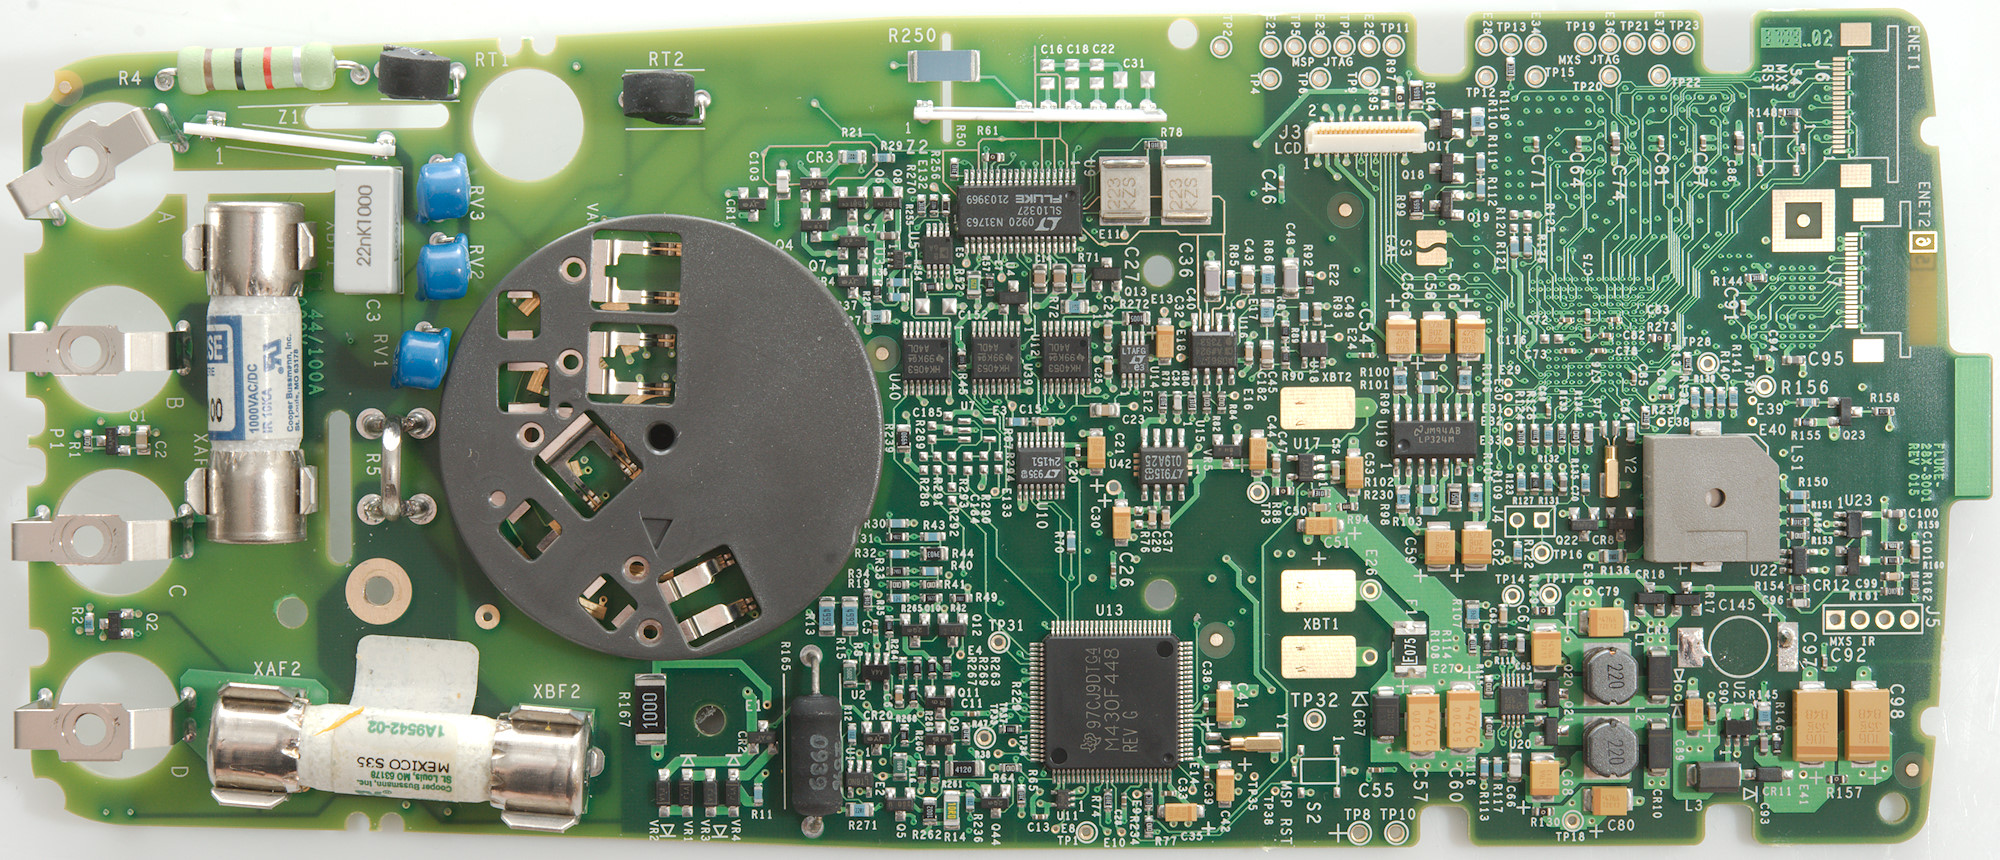
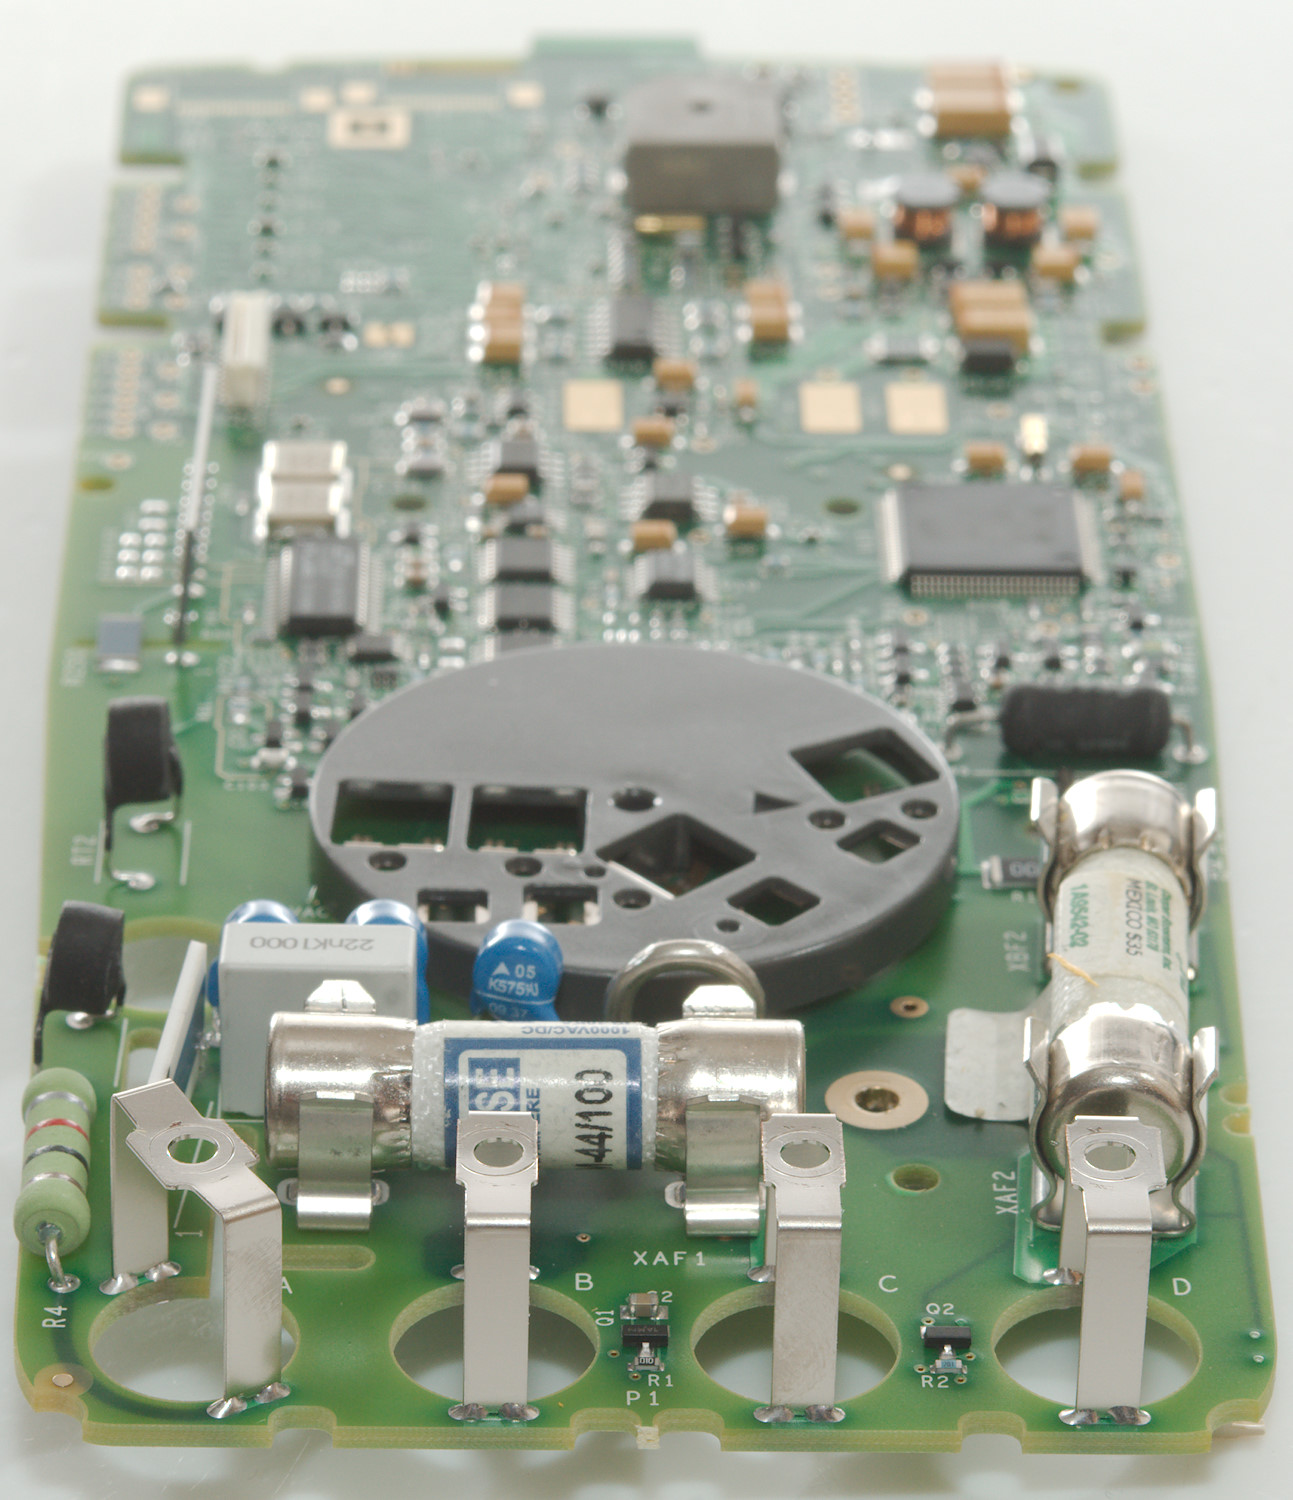
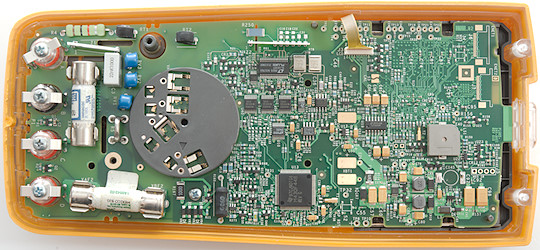
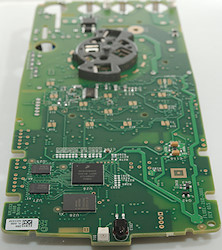
The voltage input has two paths, one is a 1kOhm (R4) resistor followed by a PTC (RT1) and then clamped by two MOVs (RV3 & RV1) in series. The other path is a ceramic resistor (Z1: 1Mohm) clamped by two MOVs (RV2 & RV1) in series. The LowZ is handled by a PTC (RT2). The range resistors for the voltage input is the other ceramic resistor (R61:10MOhm+more). The AC capacitor beside the MOVs (C3: 22nF 1000V).
The 10A current shunt is a 4 terminal wire shunt (R5), the mA shunt is a power resistor (R165: 1ohm) and the uA shunt is a smd resistor (R167: 100ohm).
At the input is a couple of muxes (U9: Unknown, but probably a mux), (U12, U39, U40: 4053), then there are the ADC circuit with a ADC (U10: LT2415-1, 24 bits), reference (U42: LT1019ACS8-2.5 0.05% 5ppm) and rms converter (U14: LTAFG/LTC1968). This is controlled from a mixed signal processor (U13: M430F448 16bit risk, 48KB+256B flash, 2KB ram). The display must have a controller build in, there is only a few wires to it (J3).


There was missing some stuff on the top side of the circuit board. Here is the detection of terminals, it is done with a light emitter (DS2) and two receivers (Q24 & Q27). There is also the uAmA protection diodes (CR14: Bridge & CR15:Diode).
A high quality mux (U48: ADG714) is placed on this side.
There is also a processor more (U26: MC9328MXS, ARM9) with flash memory (U28: 640P30 64Mbit) and probably some ram (U25, U27). This must be the processor that handles the user interface.
At the top of the board is the IR link (CR1 & DS1)

Conclusion
This meter is a very precise high-end meter with just about any function that is possible. Because the screen is alphanumeric it is fairly easy to navigate around on the meter and it can also pack a lot of information on the screen. But the screen is also one of the problems with the meter, it has fairly low contrast and is best read with the background light on or under a bright lamp. Another problem is the user interface, using arrow keys to select functions are not as fast as a dedicated button, the processors in the meter means it is on the slow side to power on.
Generally I like the meter and have used it on the bench and for logging with a computer (More than 1000 hours). I dislike the low contrast on the display and the slow power on, but for min/max/average this is my favorite meter. If I needed to do off-line logging this meter would also be in top.
Notes
I have removed the super capacitor (C145) from my meter (It was starting to leak), this means it cannot remember date/time when replacing batteries. Because I usual do not use date/time (Time stamp is added by my logging software) they are not set correctly.
How do I review a DMM
More DMM reviews