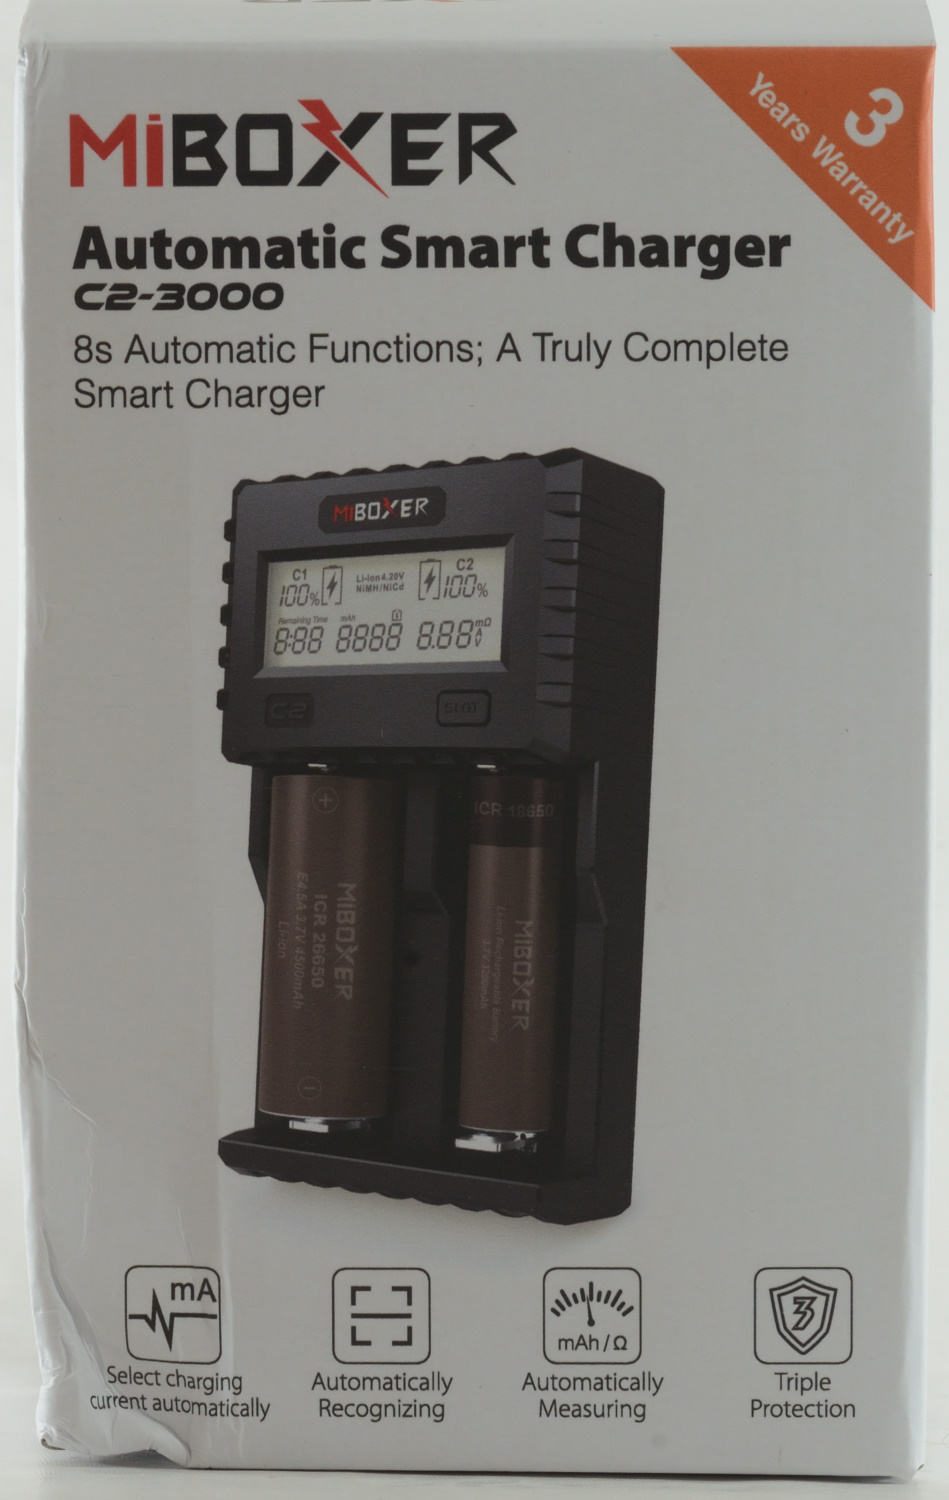
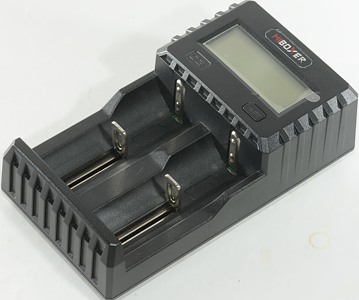
Charger Miboxer C2 3000 updated
This review will not be a full review only a supplement to the original review.

After my first review Miboxer changed the software in this charger. The change added a manual current adjustment.

The charger can now be bought in two versions, one with car adapter and one with mains adapter.
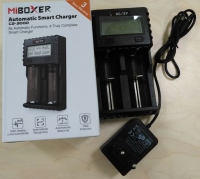
I did not get the full package, but Miboxer supplied a picture of the contents: The charger, a power supply and a manual.
There are 6 manual settings and automatic.
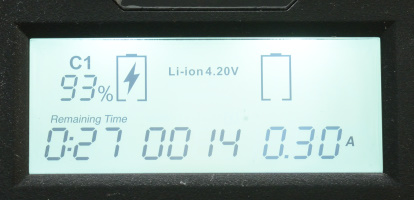
Holding down the button will show the current, a press on the button will step the current one value. A few seconds after the last press the charger will start charging with the selected current.

With the selectable current there is no problem with small batteries.
Measurements
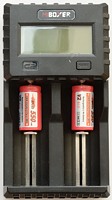
Charging LiIon
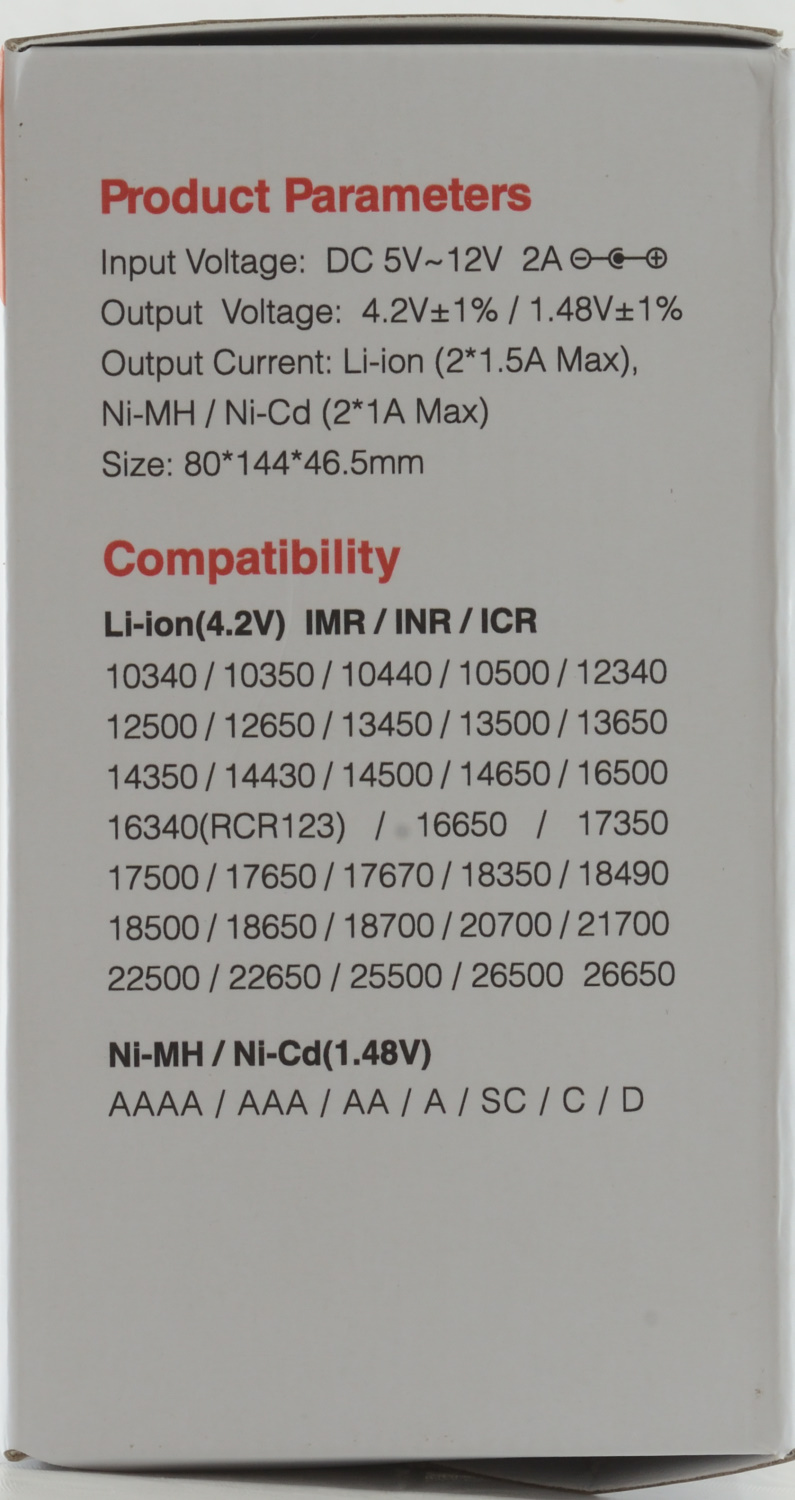
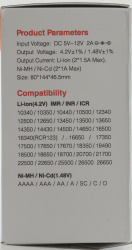
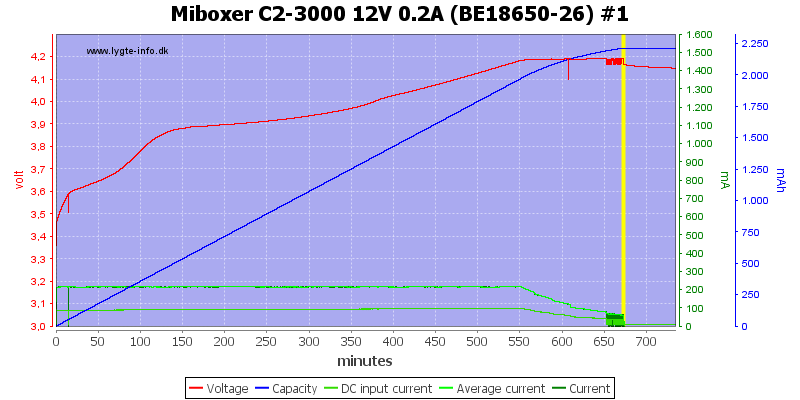
Current settings: 0.20A, 0.30A, 0.50A, 0.80A, 1.00A and 1.50A (Automatic has more levels).
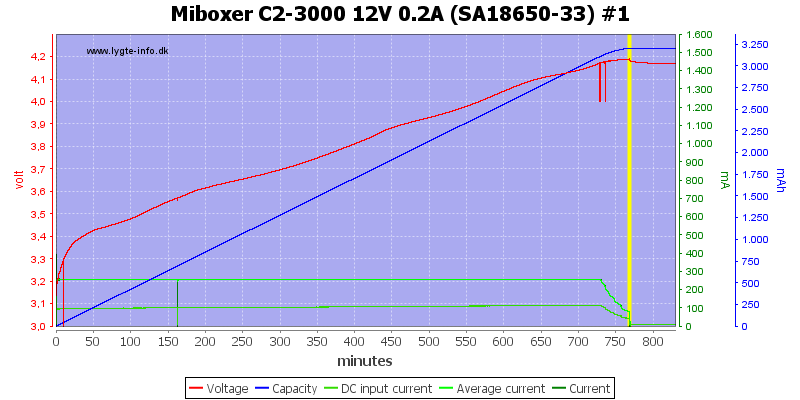
Lowest setting, it is a nice CC/CV charge with about 100mA termination current. The termination current if fine for larger cells, but on the high side for small cells.
With an older cell it did have a few problems around the termination, but it do terminate.
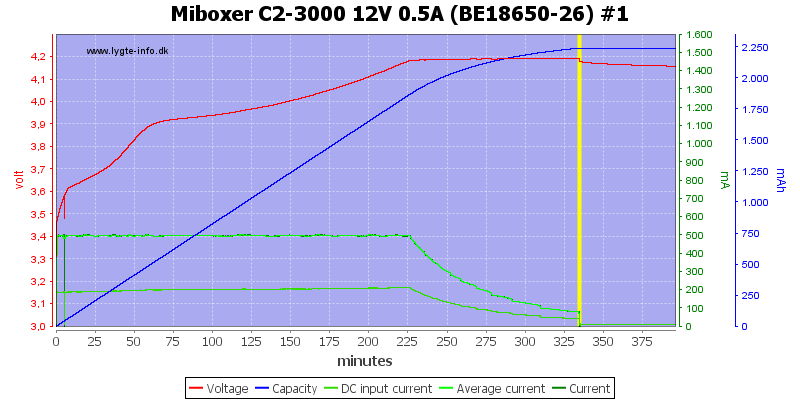
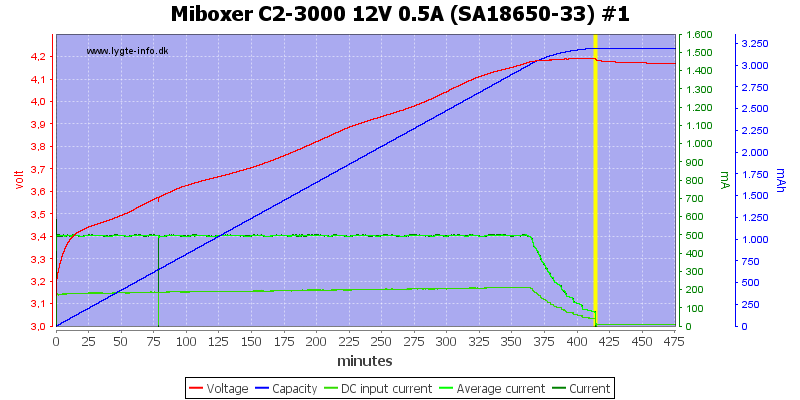

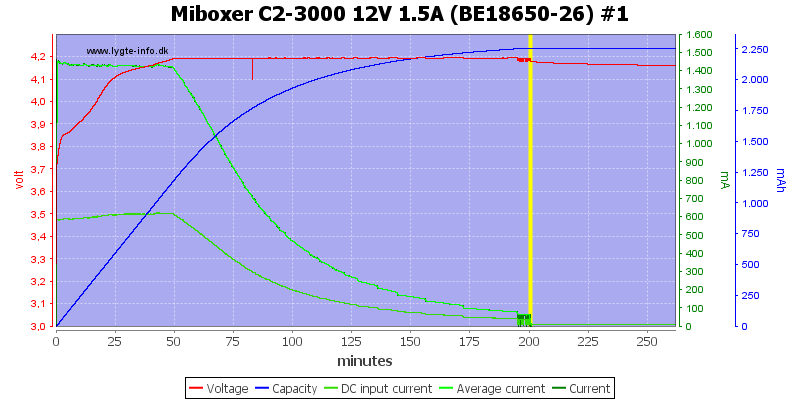
With manual selection I can charge this old cell with 1.5A, but most of the time will be used in the CV phase with lower current.
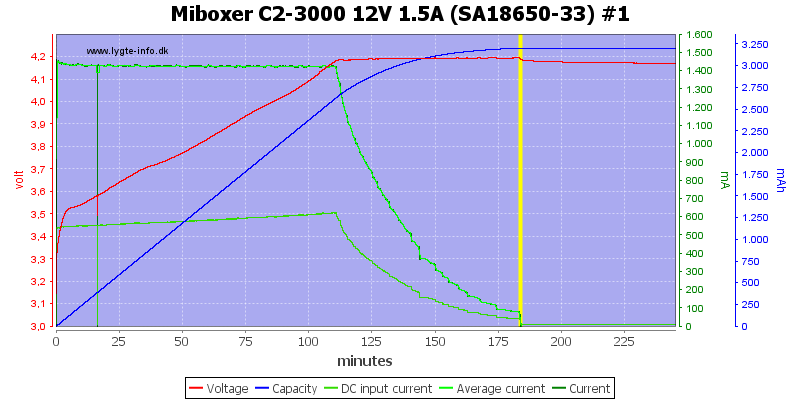
A newer cell will charged fairly fast (3 hours).
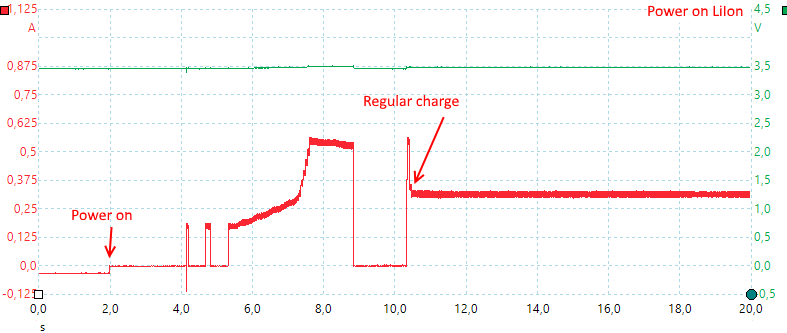
My oscilloscope pickup adds 100mOhm to the circuit, this means the current will be fairly low on automatic.
Notice that before I power on the charger the red current line is below zero, the charger discharges the batteries when it is not powered!
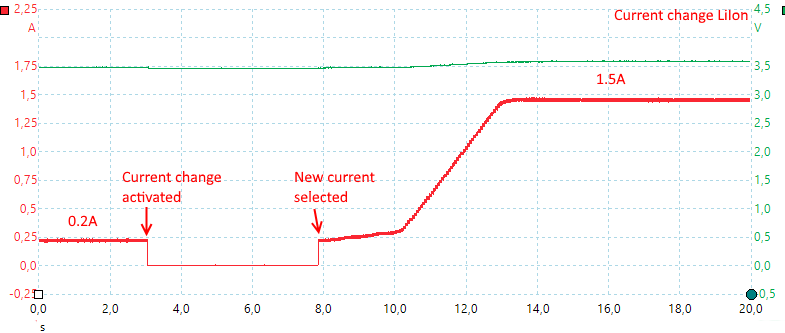
When the SLOT button is held down the current will start to flash and it is possible to move between the current selection, during this time the charge current is off.
Even with my 100mohm resistance I could select 1.5A and charge with it in manual mode.
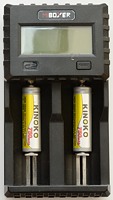
Charging NiMH
Current settings: 0.10A, 0,20A, 0.30A, 0.50A, 0.80A and 1.00A (Automatic has more levels).

At low current the charge has a problem terminating the charger, it do terminate, but first after a few hours.
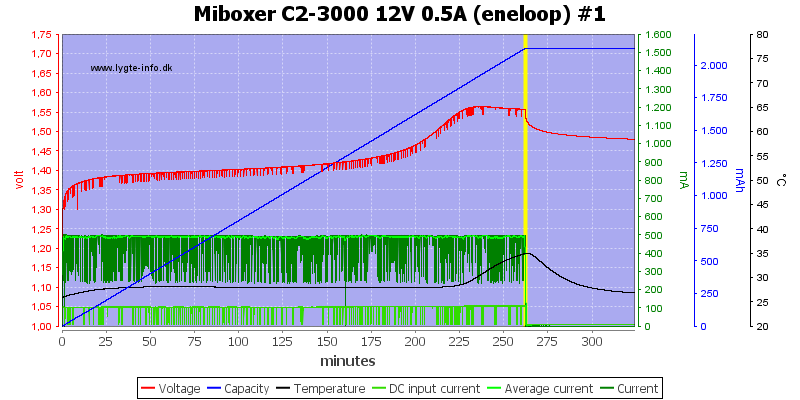
At 0.5A the termination works fine.
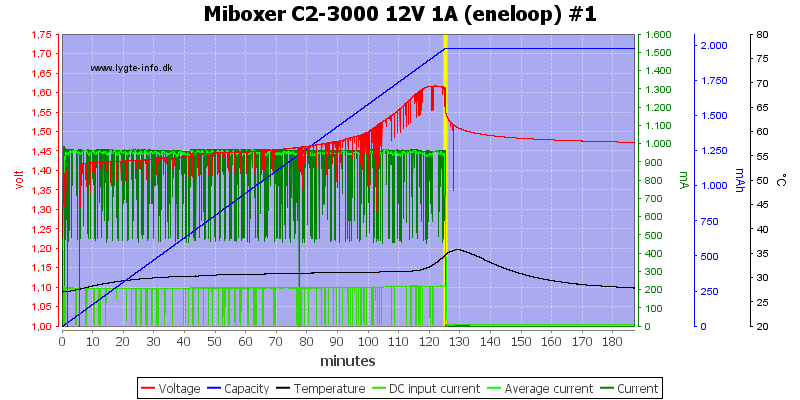
And the same at 1A.
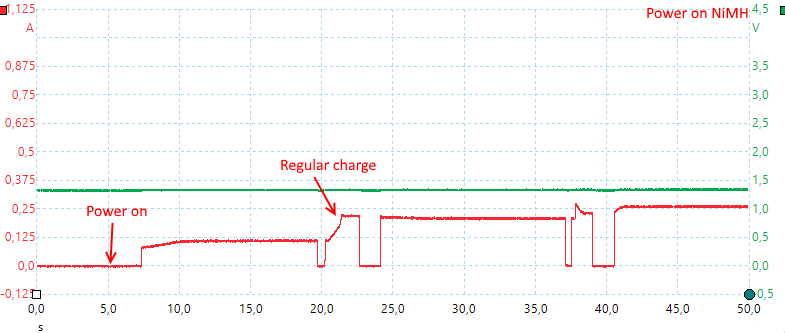
The charger analyses the internal resistance in the battery, before selecting a charge current.
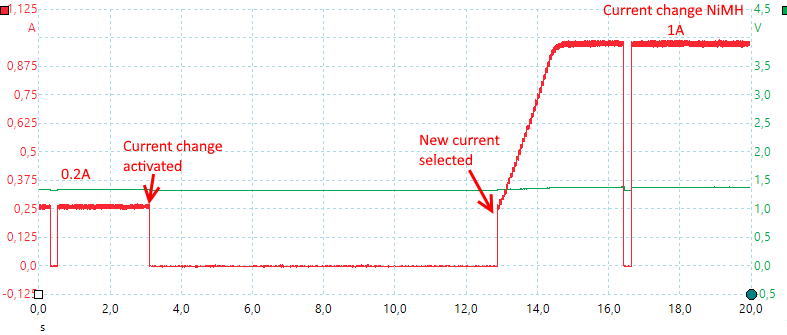
Again I can change the current with the SLOT button.
Conclusion
With this upgrade Miboxer has remove most reservation with the charger. I like the 1.5A charge current for LiIon, it is useful for most 18650 cell and will charge them fast (3 hours is fast for that type of cell). I will mean that the combination of automatic and manual current selection makes the charger easy to use for most people: Automatic can always be used, but for special needs (Fast charging or lower wear on small cells) you can always go to manual.
The charger will discharge LiIon batteries when not connected to power, i.e. the charger must not be stored with batteries in it.
The possibility to buy it with a main power apdater is an improvement, but I would have liked the usb cable included (or even better a usb connector on the charger).
Now I will call it a good charger for all size LiIon and NiMH batteries.
Notes
The charger was supplied by a Miboxer for review.
Here is an explanation on how I did the above charge curves: How do I test a charger